DIY: PALLET PLANT HANGER
There are many ways you can repurpose a timber pallet into something functional and stylish for your home or garden and you don't need any carpentry skills to do so because it's SO easy.
This DIY pallet plant hanger can be put together in a matter of minutes and will completely transform a blank wall, fence or courtyard corner into a vertical garden.
Grow herbs and edible flowers for the ultimate kitchen garden or keep it low-maintenance with succulents and fast growing trailing plants - the options are endless.

A DIY PROJECT FOR ANY INDOOR OR OUTDOOR SPACE
Repurpose an old pallet to create a vertical garden and fill it with any plants you please.
There are many ways you can repurpose a timber pallet into something functional and stylish for your home or garden and you don't need any carpentry skills to do so because it's SO easy.
This DIY pallet plant hanger can be put together in a matter of minutes and will completely transform a blank wall, fence or courtyard corner into a vertical garden.
Grow herbs and edible flowers for the ultimate kitchen garden or keep it low-maintenance with succulents and fast growing trailing plants - the options are endless.
YOU WILL NEED
Pallet; ruler; pencil; saddle clips; drill with phillips head drill bit & screws that are less than the depth of the pallet planks; plant pots.

STEP 1
Lay pallet on floor right side up. Work out where you want your saddle clips to sit and mark straight lines between the planks, as shown.
STEP 2
Position the saddle clips along the lines and screw in place with drill.
STEP 3
Prop pallet up and slide pot plants into saddle clips. Hang the pallet hanger on the wall using wall hooks or simply lean it against the wall.
TIP
Stretch or compress the saddle clips to suit the plant pot size before attaching to the pallet.


DIY: PUMPKIN SPICE SUGAR BODY SCRUB
Fall is in the air and that means our skin is getting drier by the minute. It's time to add a little something extra to your beauty regime without the hassle of spending money on overly expensive products. At home, do-it-yourself au natural remedies are a perfect solutions and turns out that herbs, spices and food can do more than create a tasty dish!
A BEAUTY “DIY” SCRUB TO GET INTO THE FALL VIBES
Contributed by estCA staff contributor, Eleni Hopkins
Fall is in the air and that means our skin is getting drier by the minute. It's time to add a little something extra to your beauty regime without the hassle of spending money on overly expensive products. At home, do-it-yourself au natural remedies are a perfect solution. It turns out that herbs, spices and food can do more than create a tasty dish!
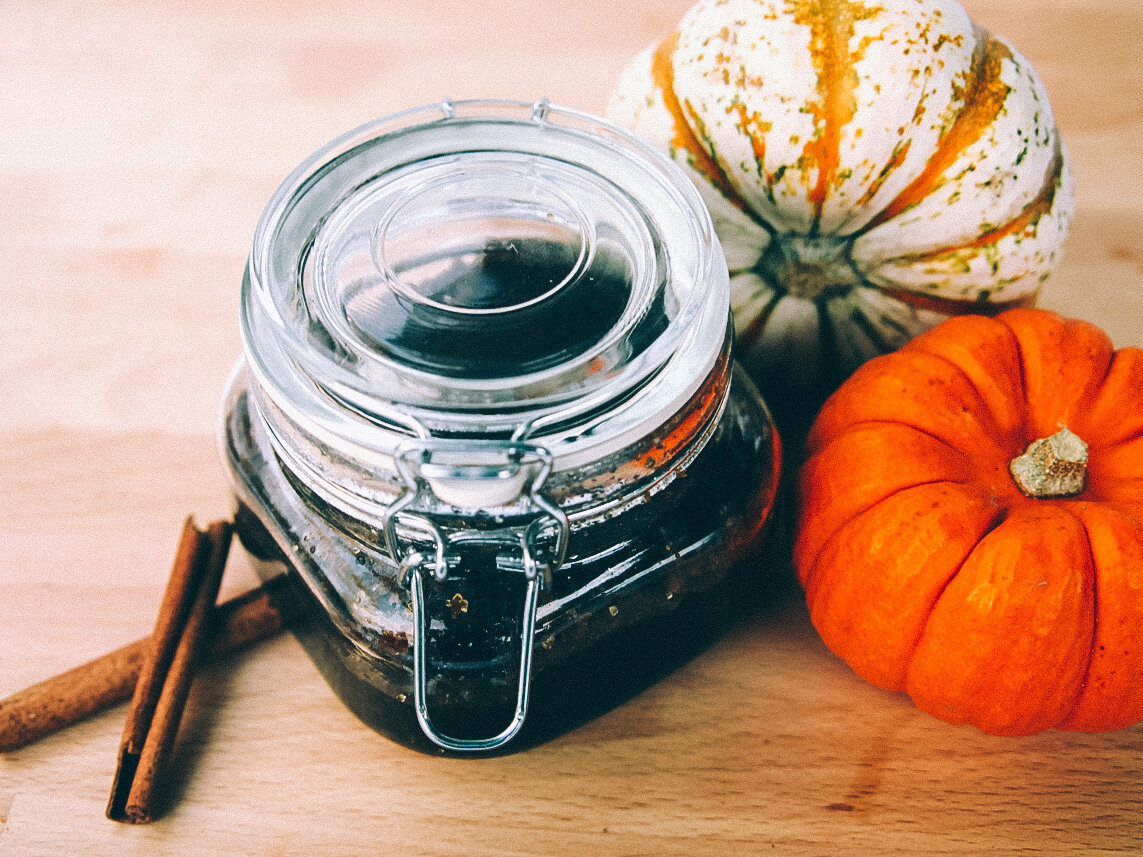
So, this week we are bringing in the scents (and feeling) of fall with this seasonal Pumpkin Spice Sugar Body Scrub.

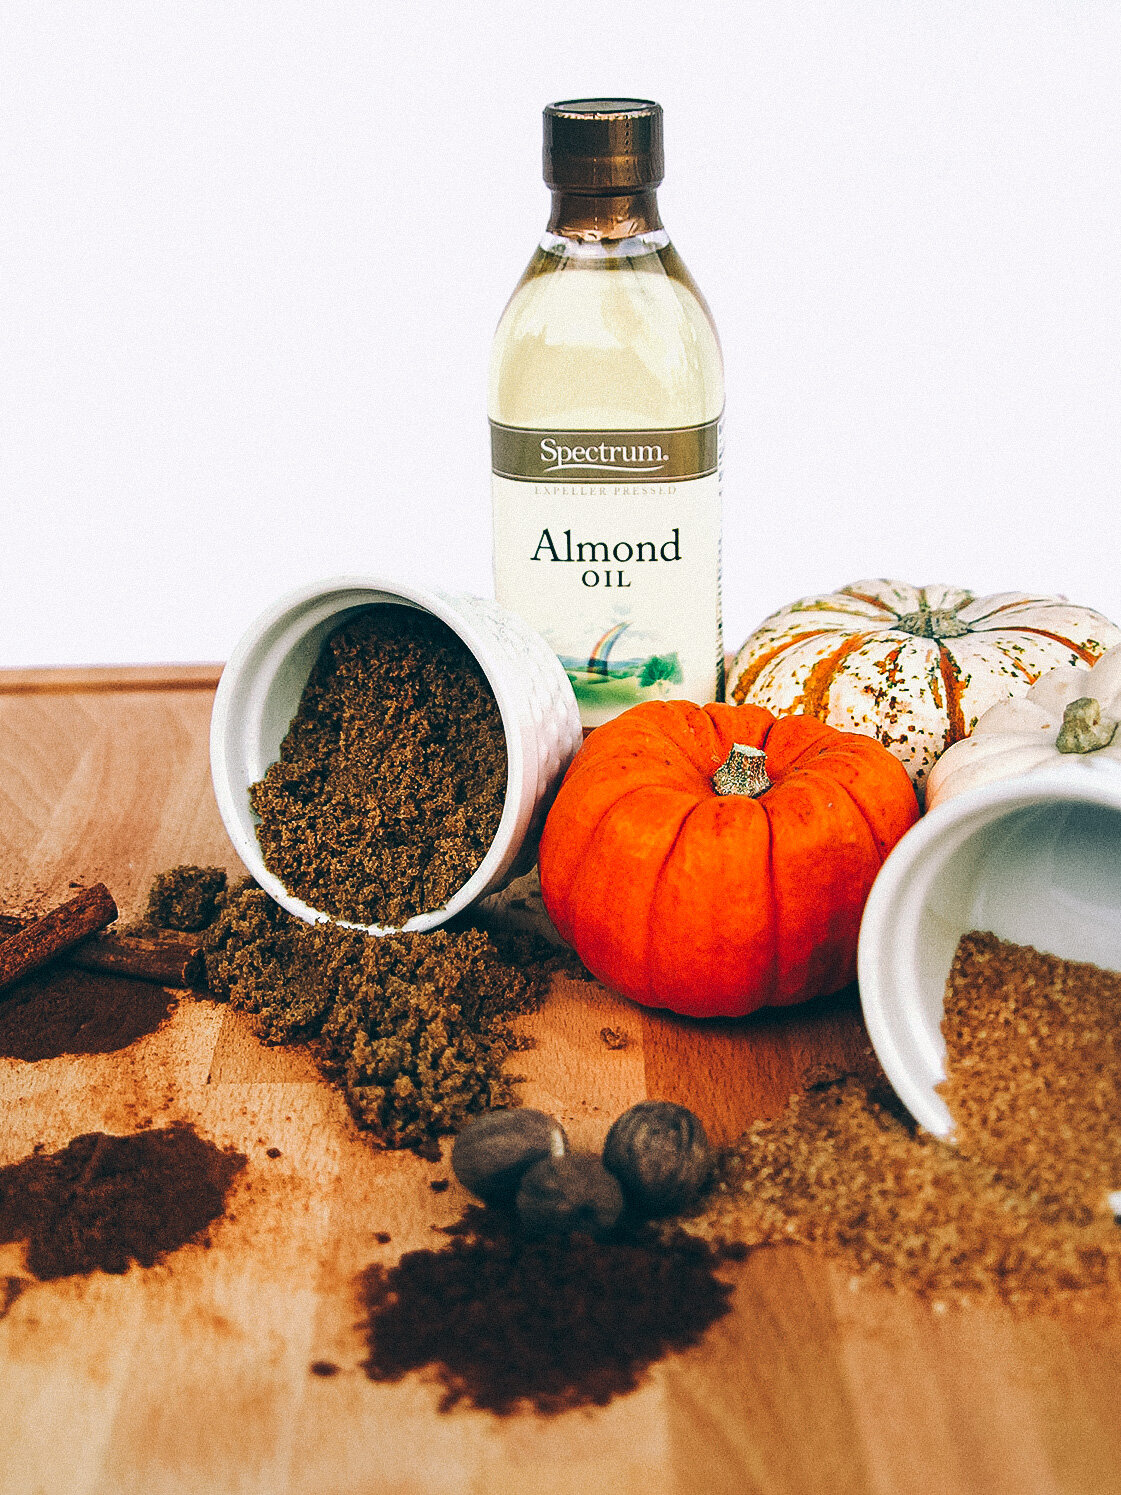
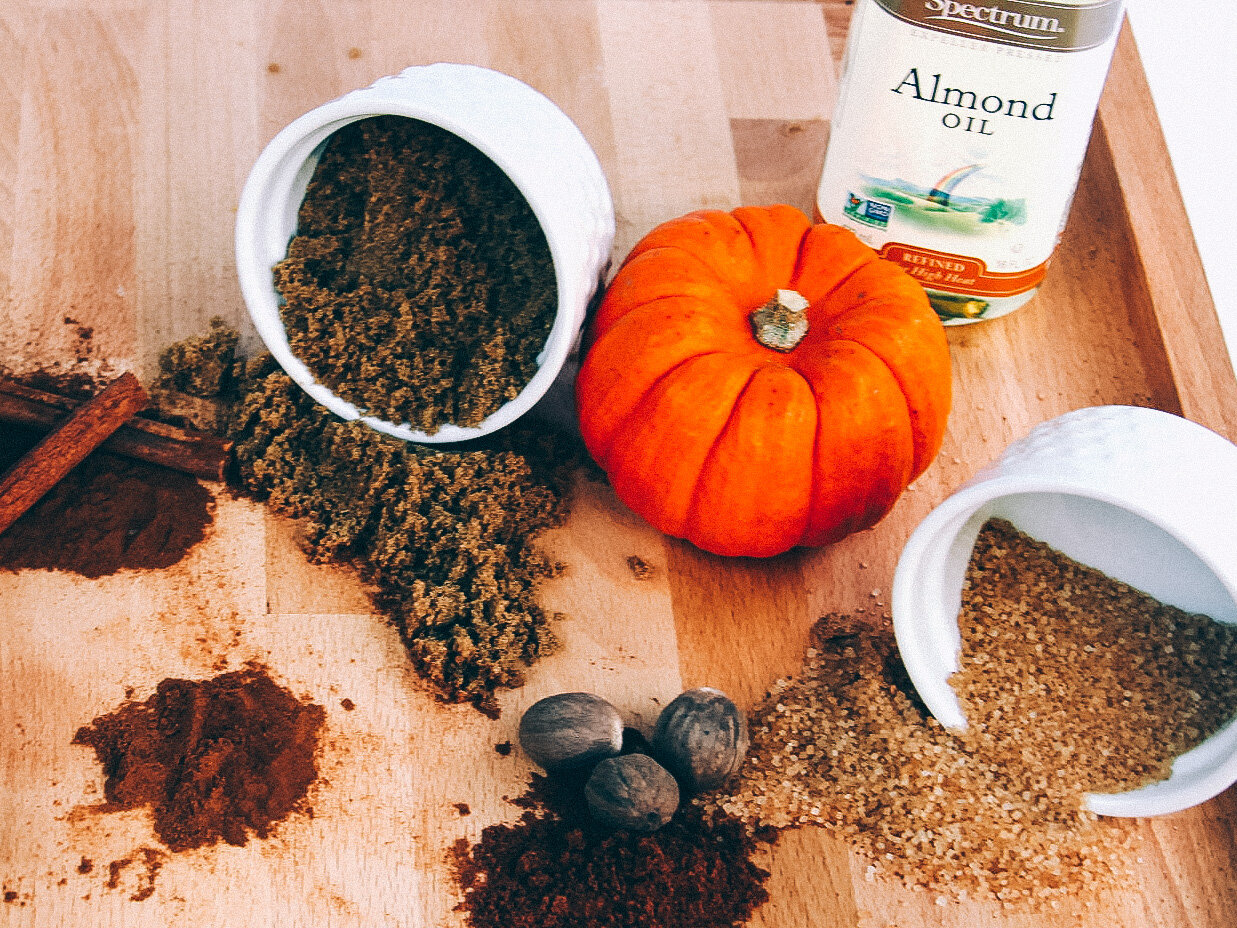
Here’s what you’ll need:
1/2 Cup Almond Oil
2 Cups Brown Sugar
1 Cup Sugar in the Raw
1 Teaspoon Pumpkin Pie Spice
1 Teaspoon Ground Cinnamon
1/2 Teaspoon Nutmeg
Jar

Benefits
Almond Oil: Almond oil is rich in Vitamin A, B and E which are great for skin health. It improves complexion and skin's retaining glow by adding extra moisture. It even relieves irritation and inflammation of the skin!
Brown Sugar: It's particles are soft and small making it a safe exfoliator that won’t tear the skin.
Sugar in the Raw: These grains are large yet gentle enough to rub off the extra dead skin on your body which is needed to bring out your healthy glow.
Pumpkin Pie Spice, Ground Cinnamon and Nutmeg: These three powerhouses work great together. Not only do they bring the yummy smell of fall to your scrub, but they also have anti-inflammatory properties and help diminish the appearance of scars and marks.
Let’s get started…
This is pretty much a dump and pour recipe, so you can’t really go wrong!
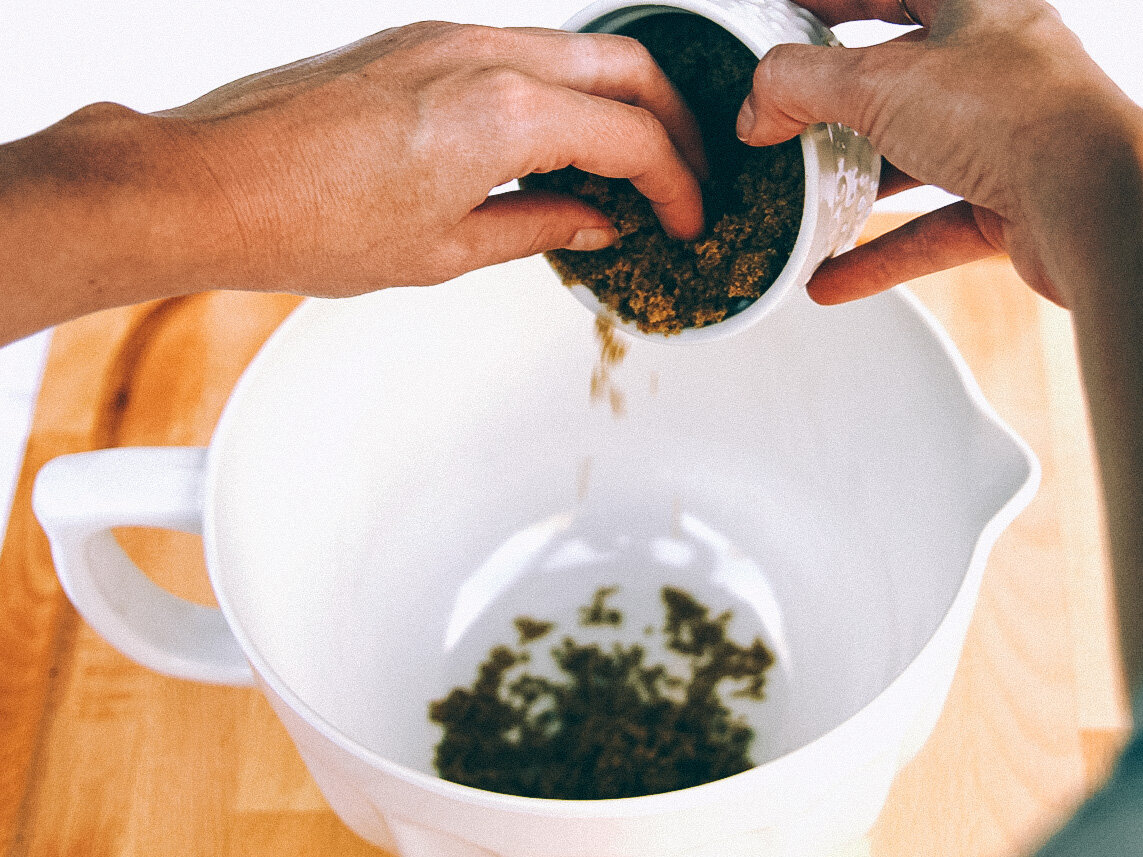
1. Grab a medium mixing bowl
2. Toss in the required amounts of the dry ingredients (everything but the Almond Oil)
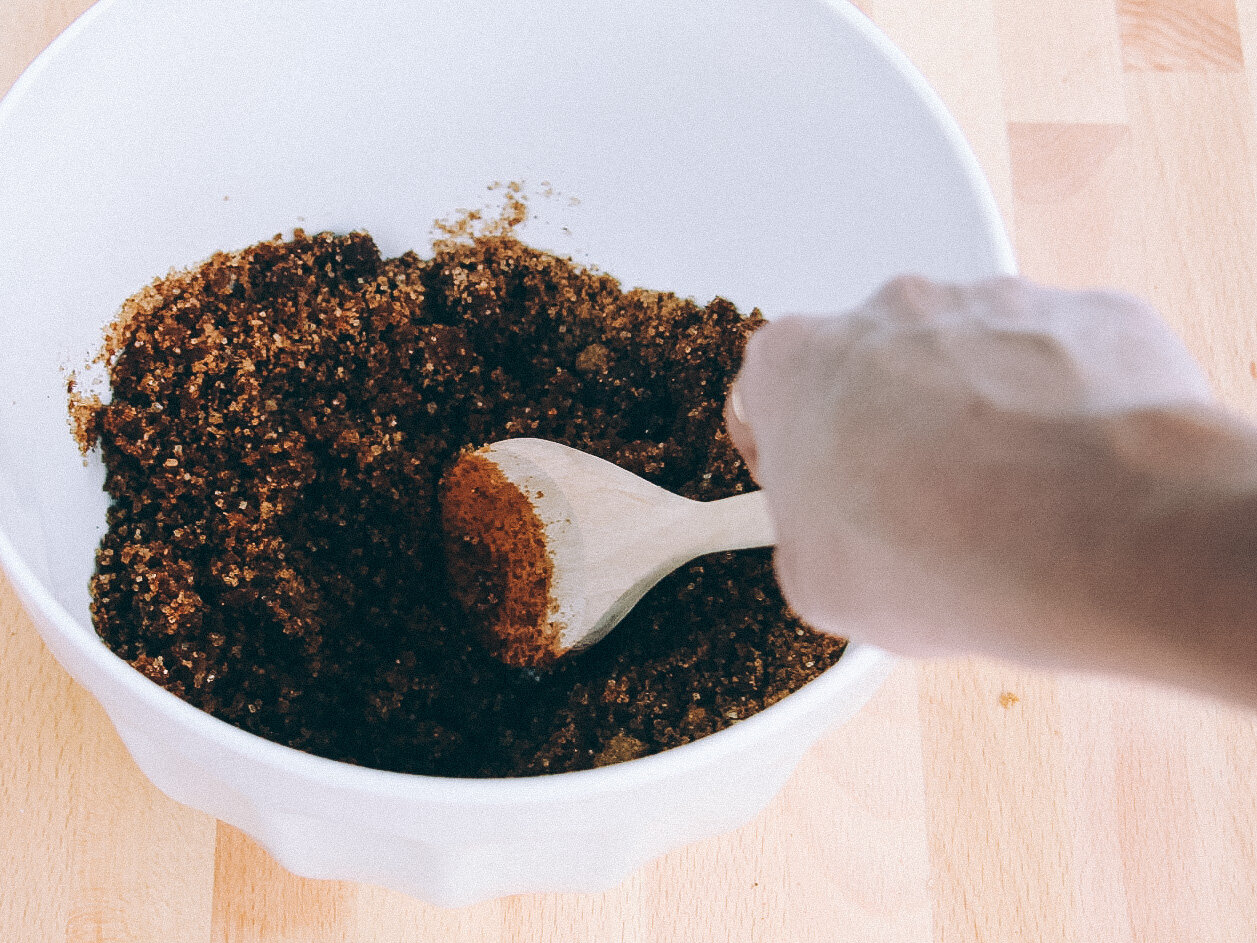
3. Stir together with spoon
4. Begin to pour the Almond Oil in gently while continuing to mix with the other hand
5. Depending on your desired consistency, add more oil as needed to make a moist mixture
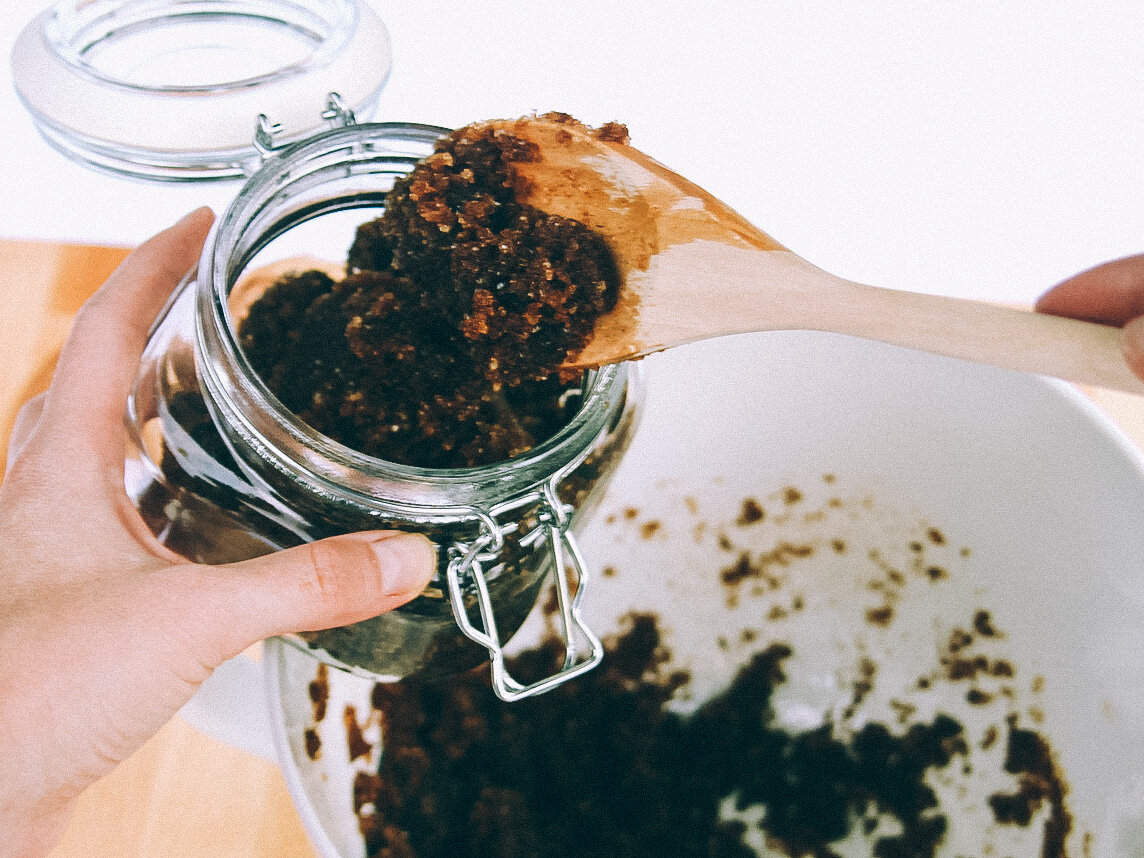
6. Time for the fun part! Scoop your scrub into your favorite resealable jar
Remember to pamper yourself often as your skin and the weather battle the season out. This scrub is bound to leave you smelling delicious and will continue to give you glowing skin like the summer’s kiss never left.
WANT TO SHARE A DIY YOU’VE CREATED WITH THE #ESTCALIFORNIA COMMUNITY? WE’RE TAKING SUBMISSIONS!


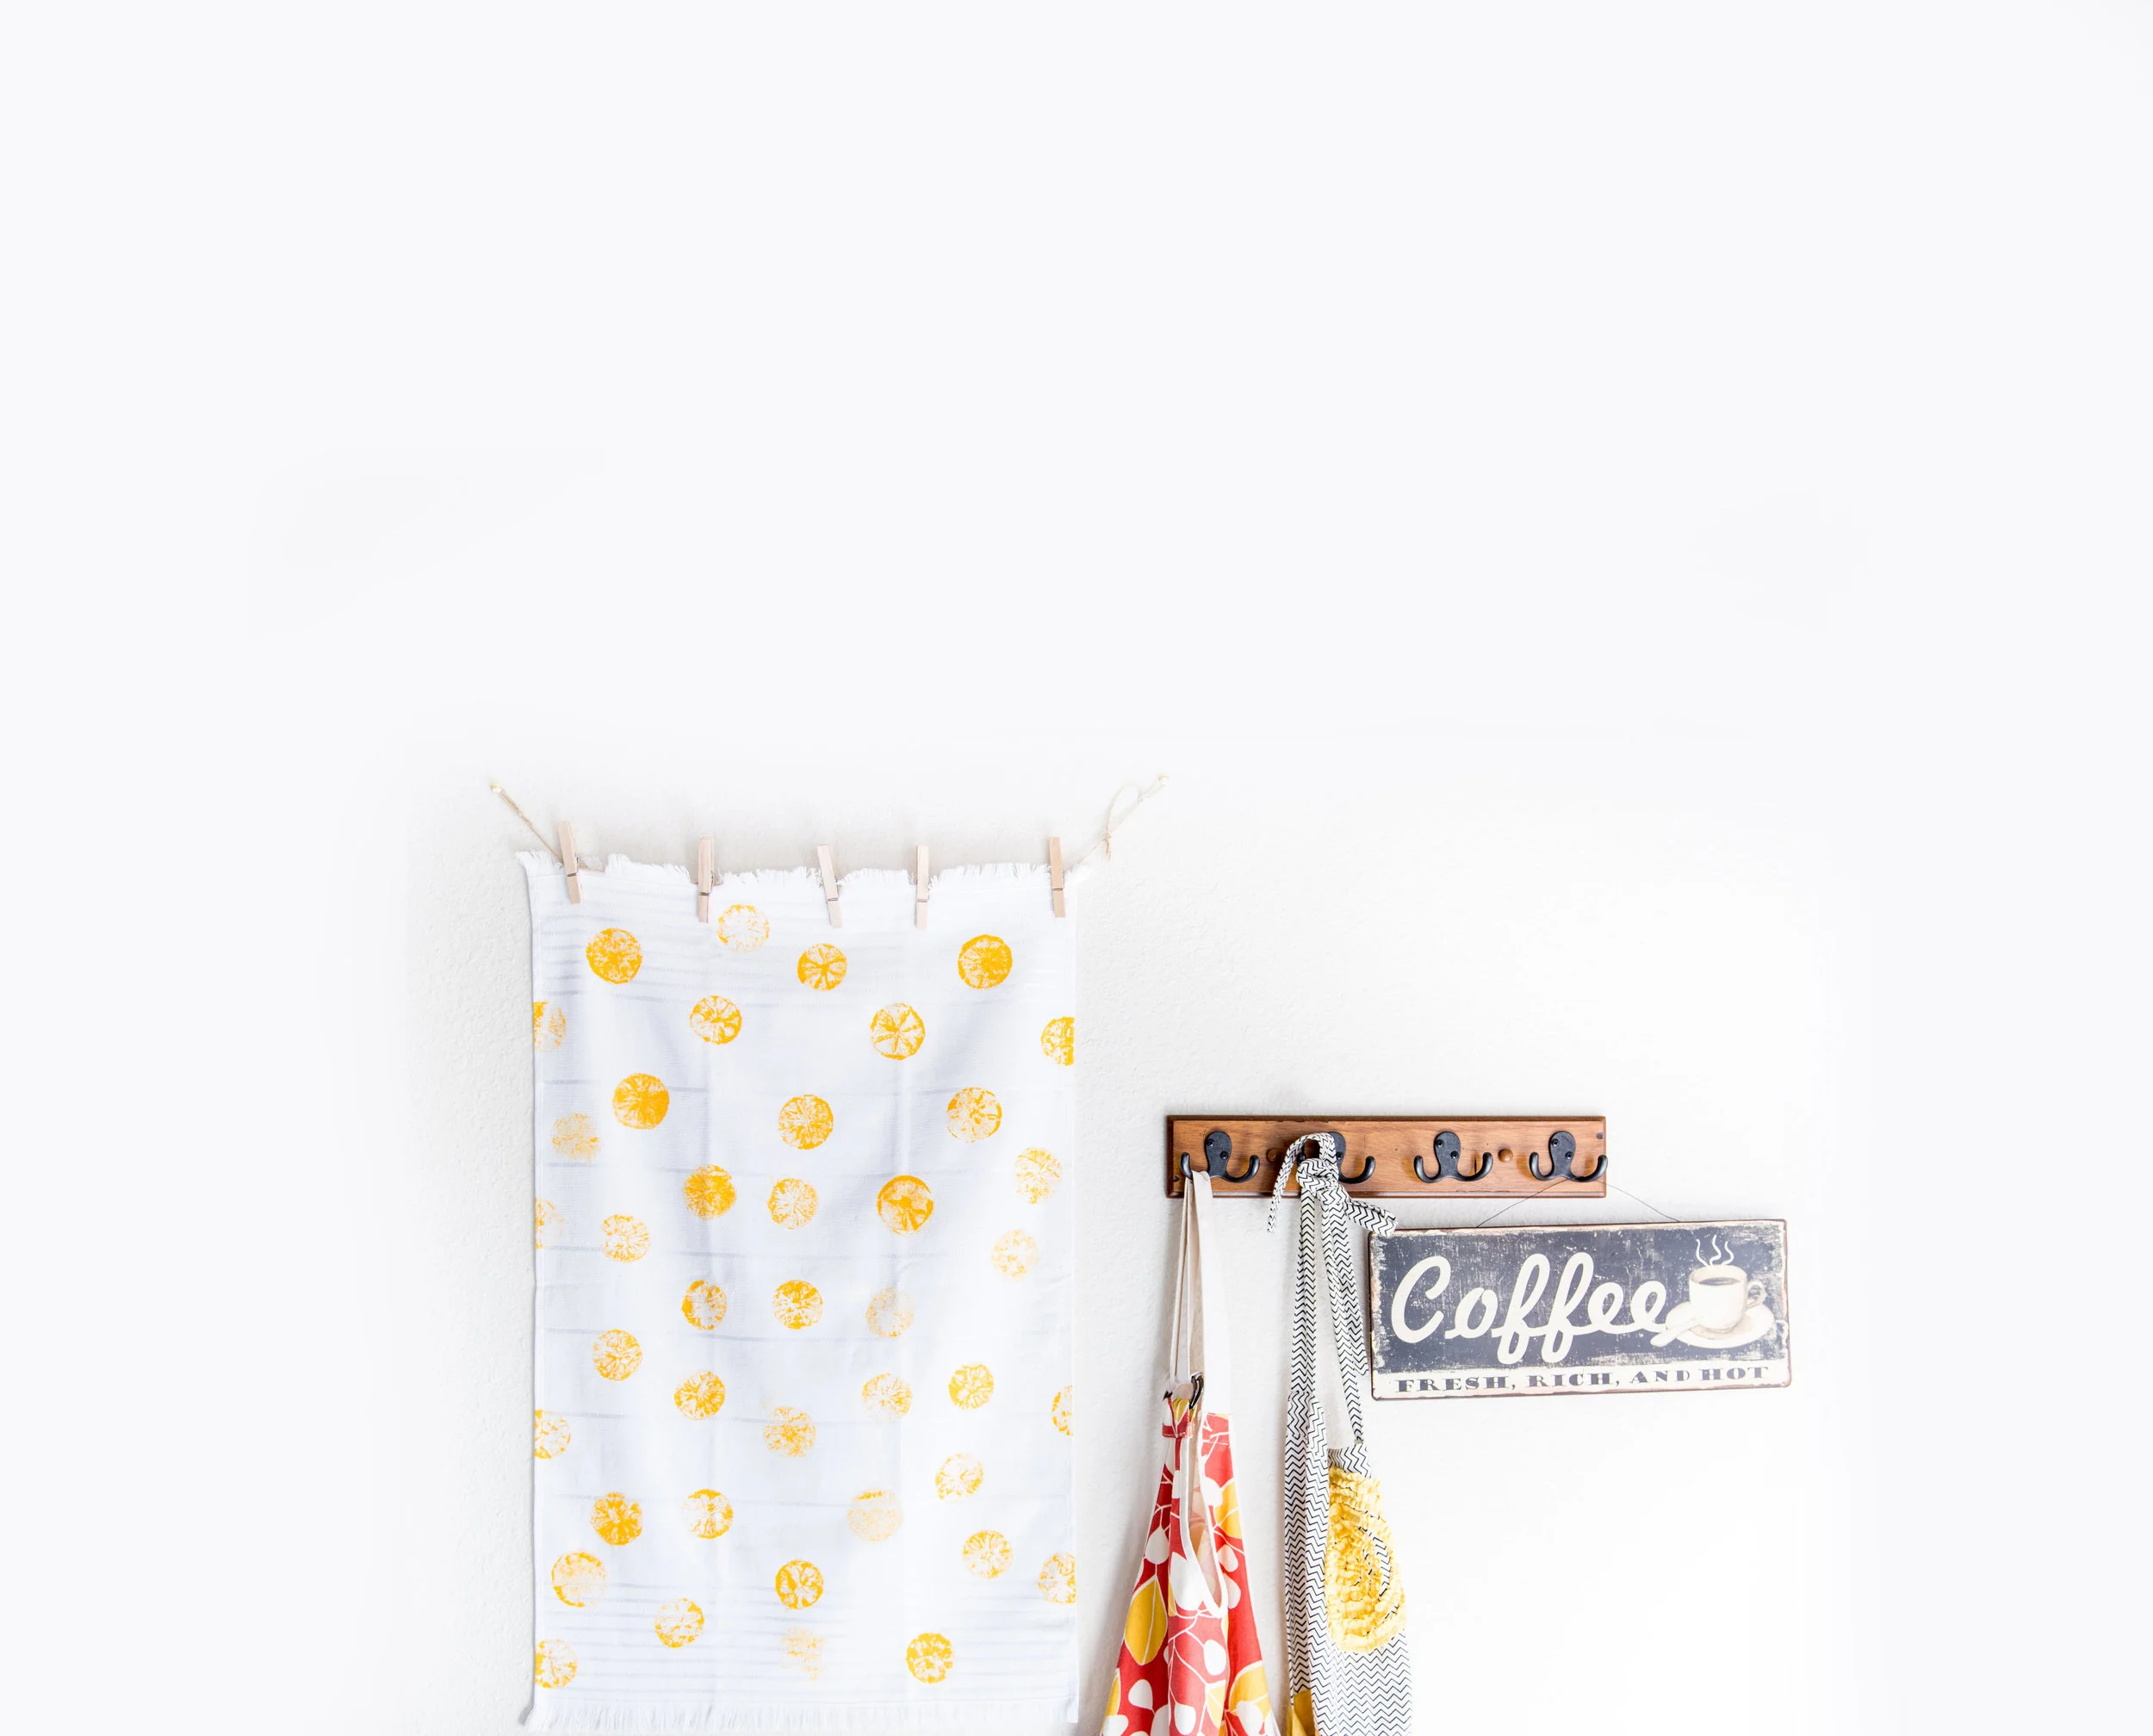
DIY: Citrus Printed Towels from Dulcet Creative
Today we thought it would be fun to share some content from our blog. We love to blog about some of our own personal creative outlets!

A LIFESTYLE “DIY” PROJECT FOR ANYONE
Contributed by previous Guest Editors, Kayla and Amber of The Dulcet Creative
Hey Established California readers!!
Today we thought it would be fun to share some content from our blog. We love to blog about some of our own personal creative outlets like crafting, cooking and travel. Here is one of our most recent summery DIYs we think you may enjoy!!
There is something so fun and addicting about pulling your paints out and getting a little messy! This week we are sharing with you how to make your own hand painted dish towels. This was such a simple little project but a great way to dress up an ordinary item in your kitchen.


What you will need:
Plain white dishtowels
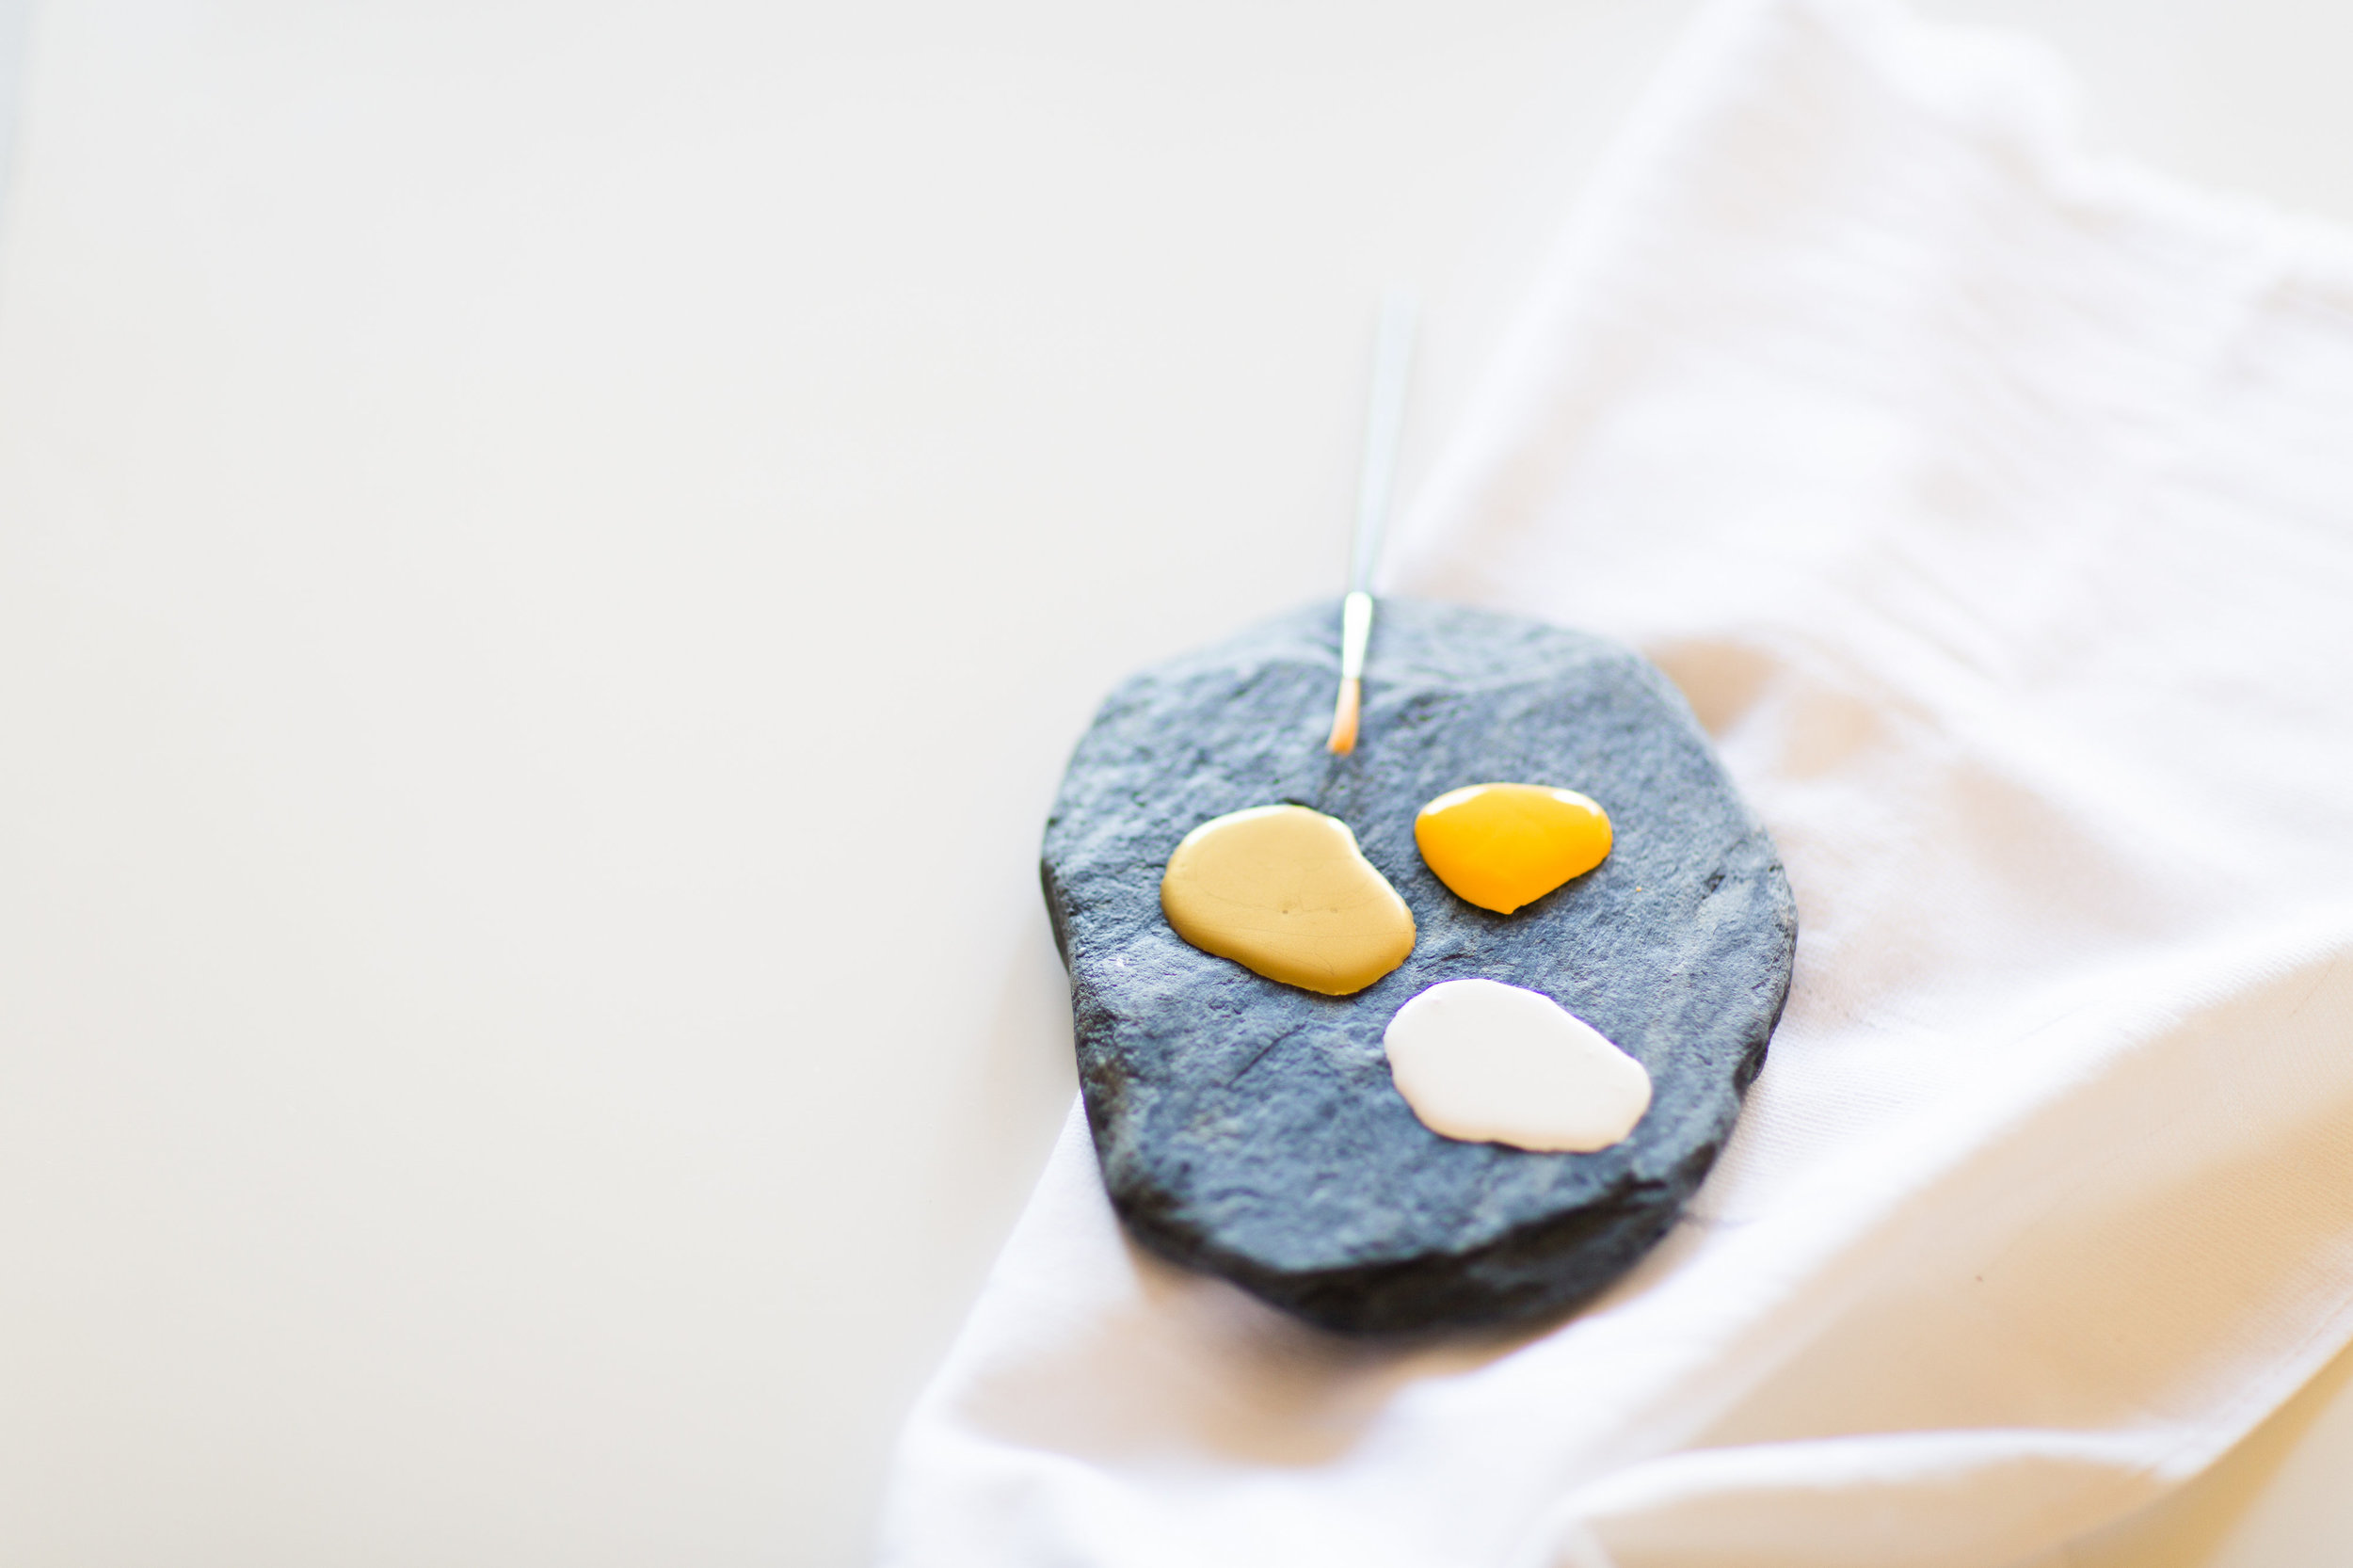
Fabric paint
Paint brush
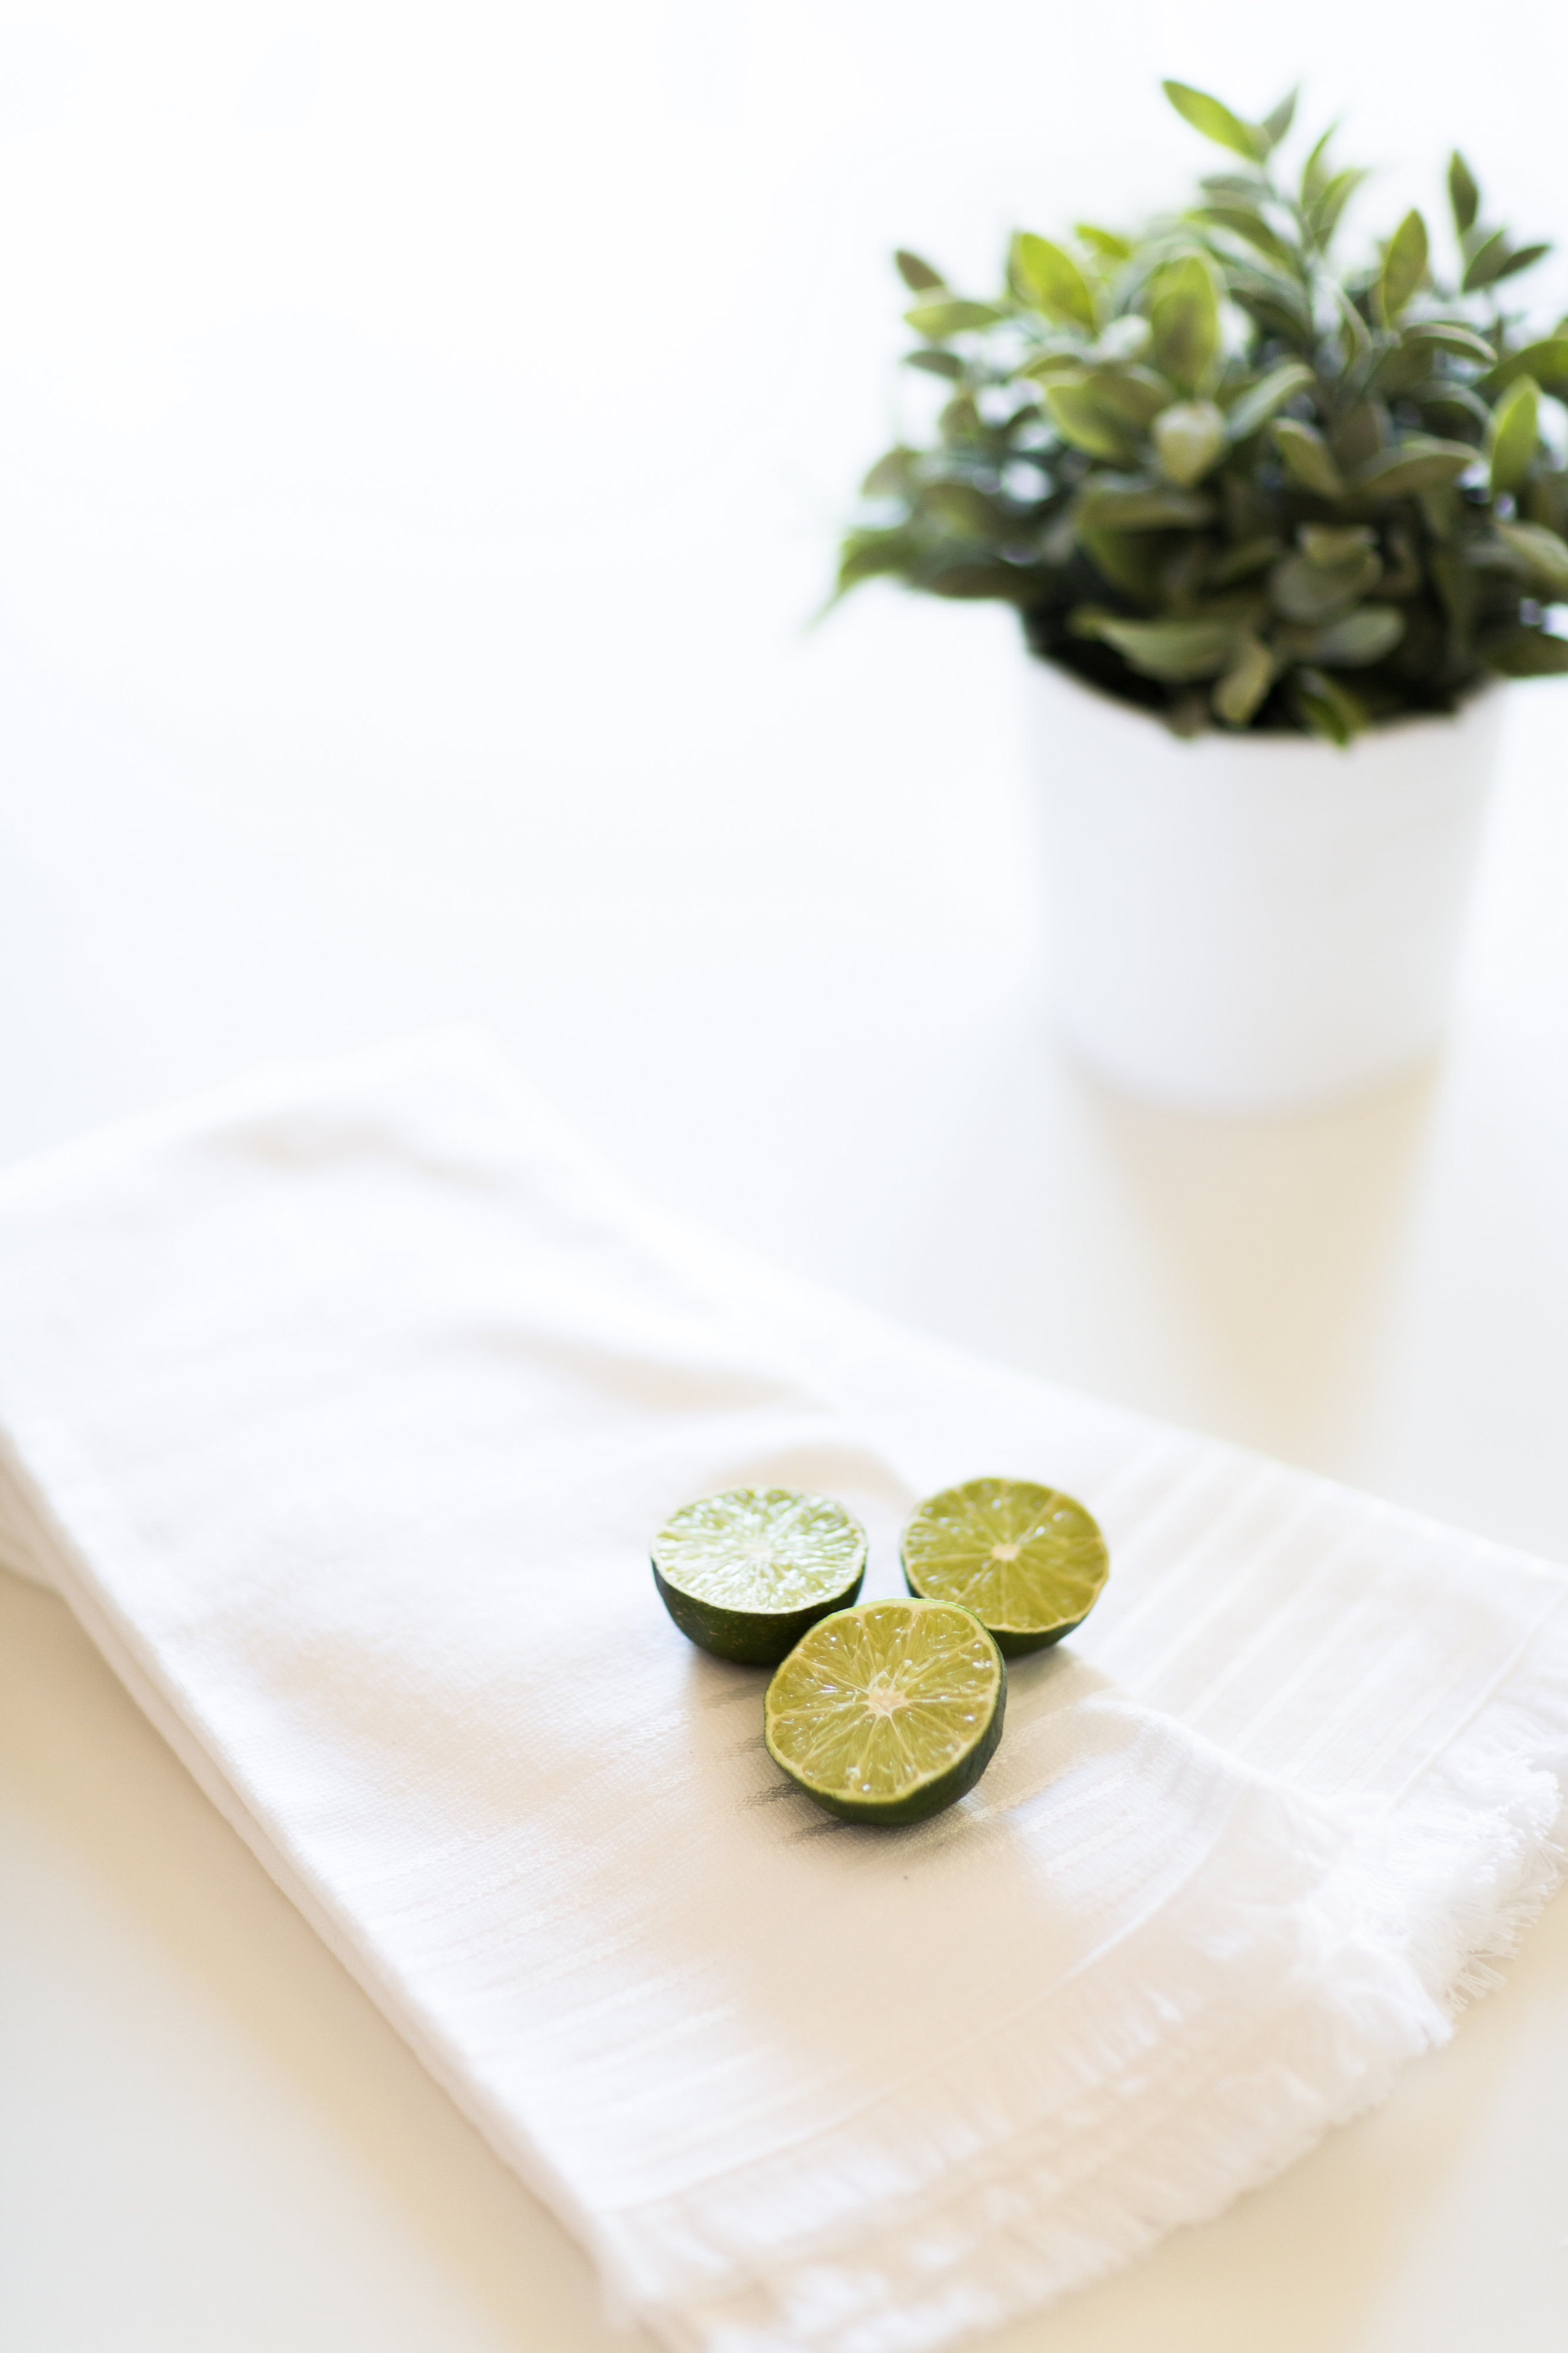
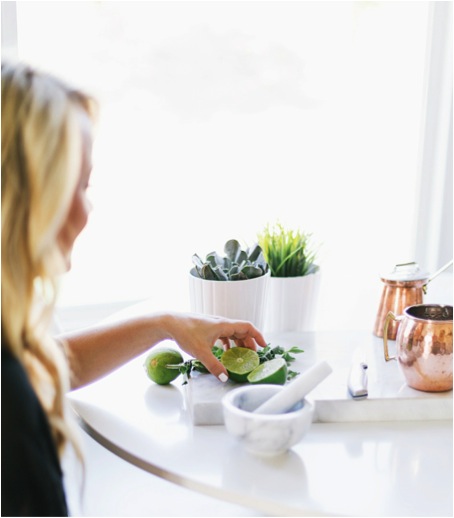
Lemons or limes

What to do:
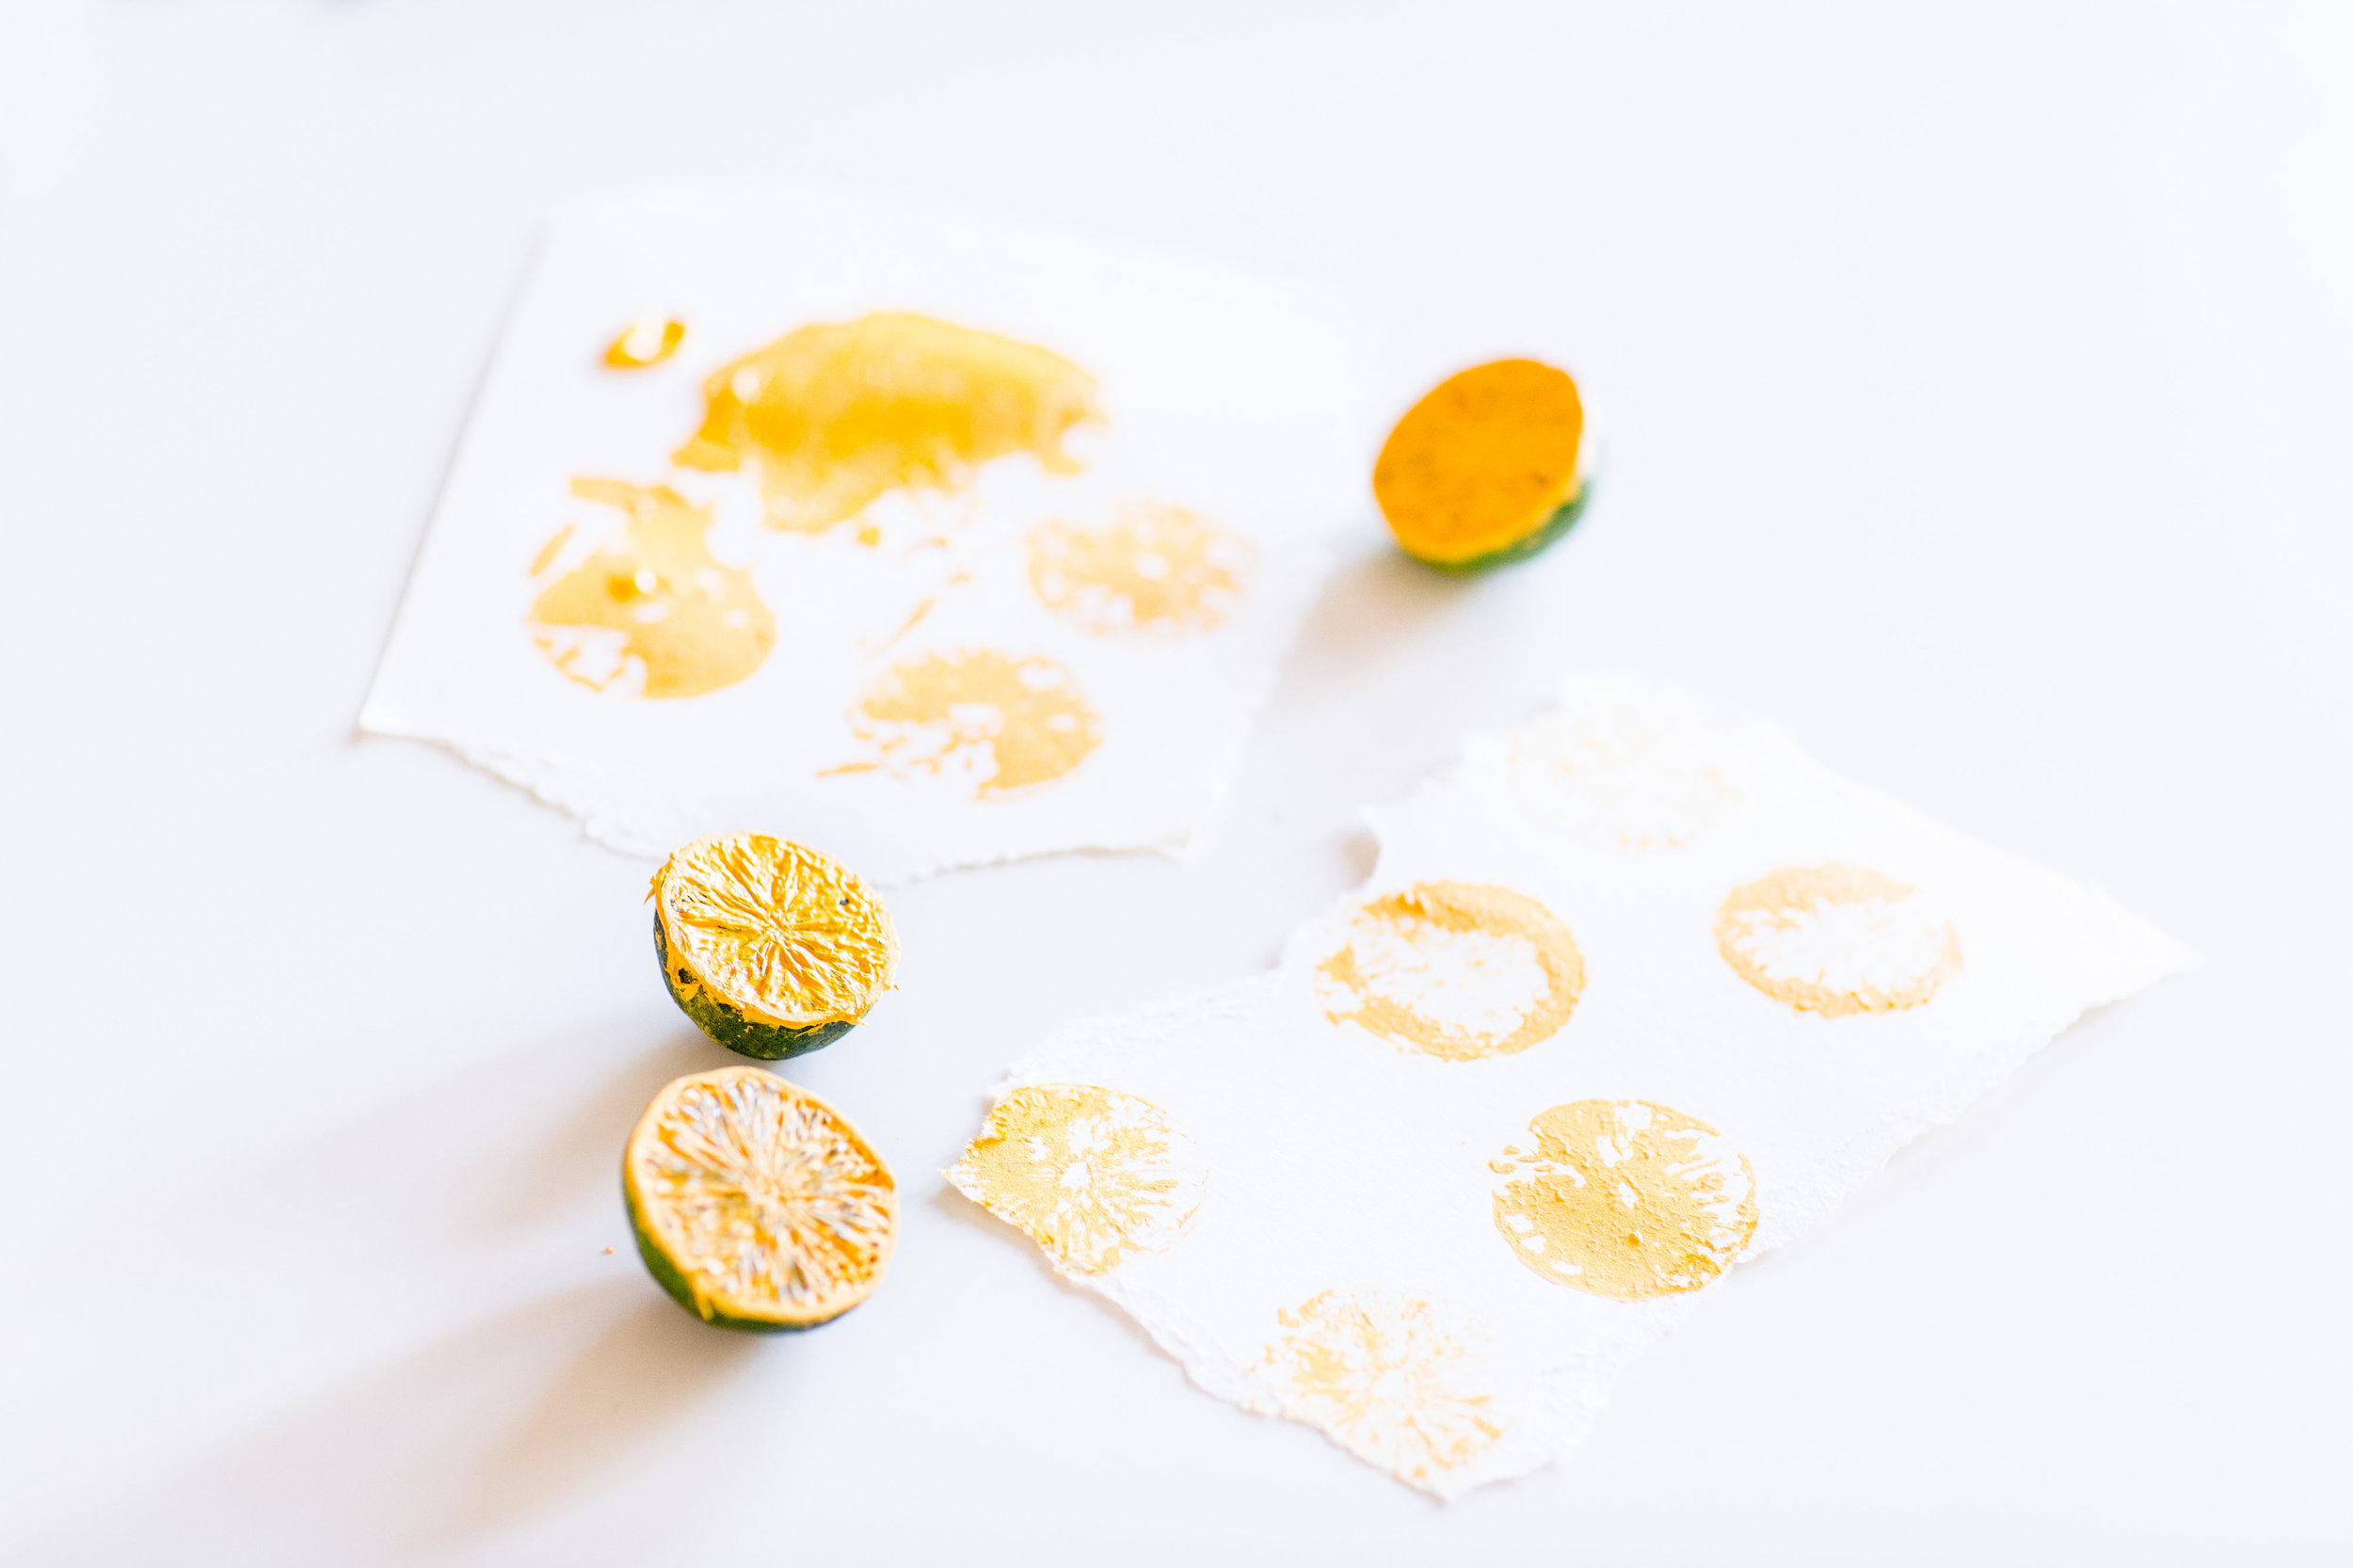
Cut lemon or lime in half and allow to sit out for about an hour to dry out.
Lay your dishtowel out on a flat surface.
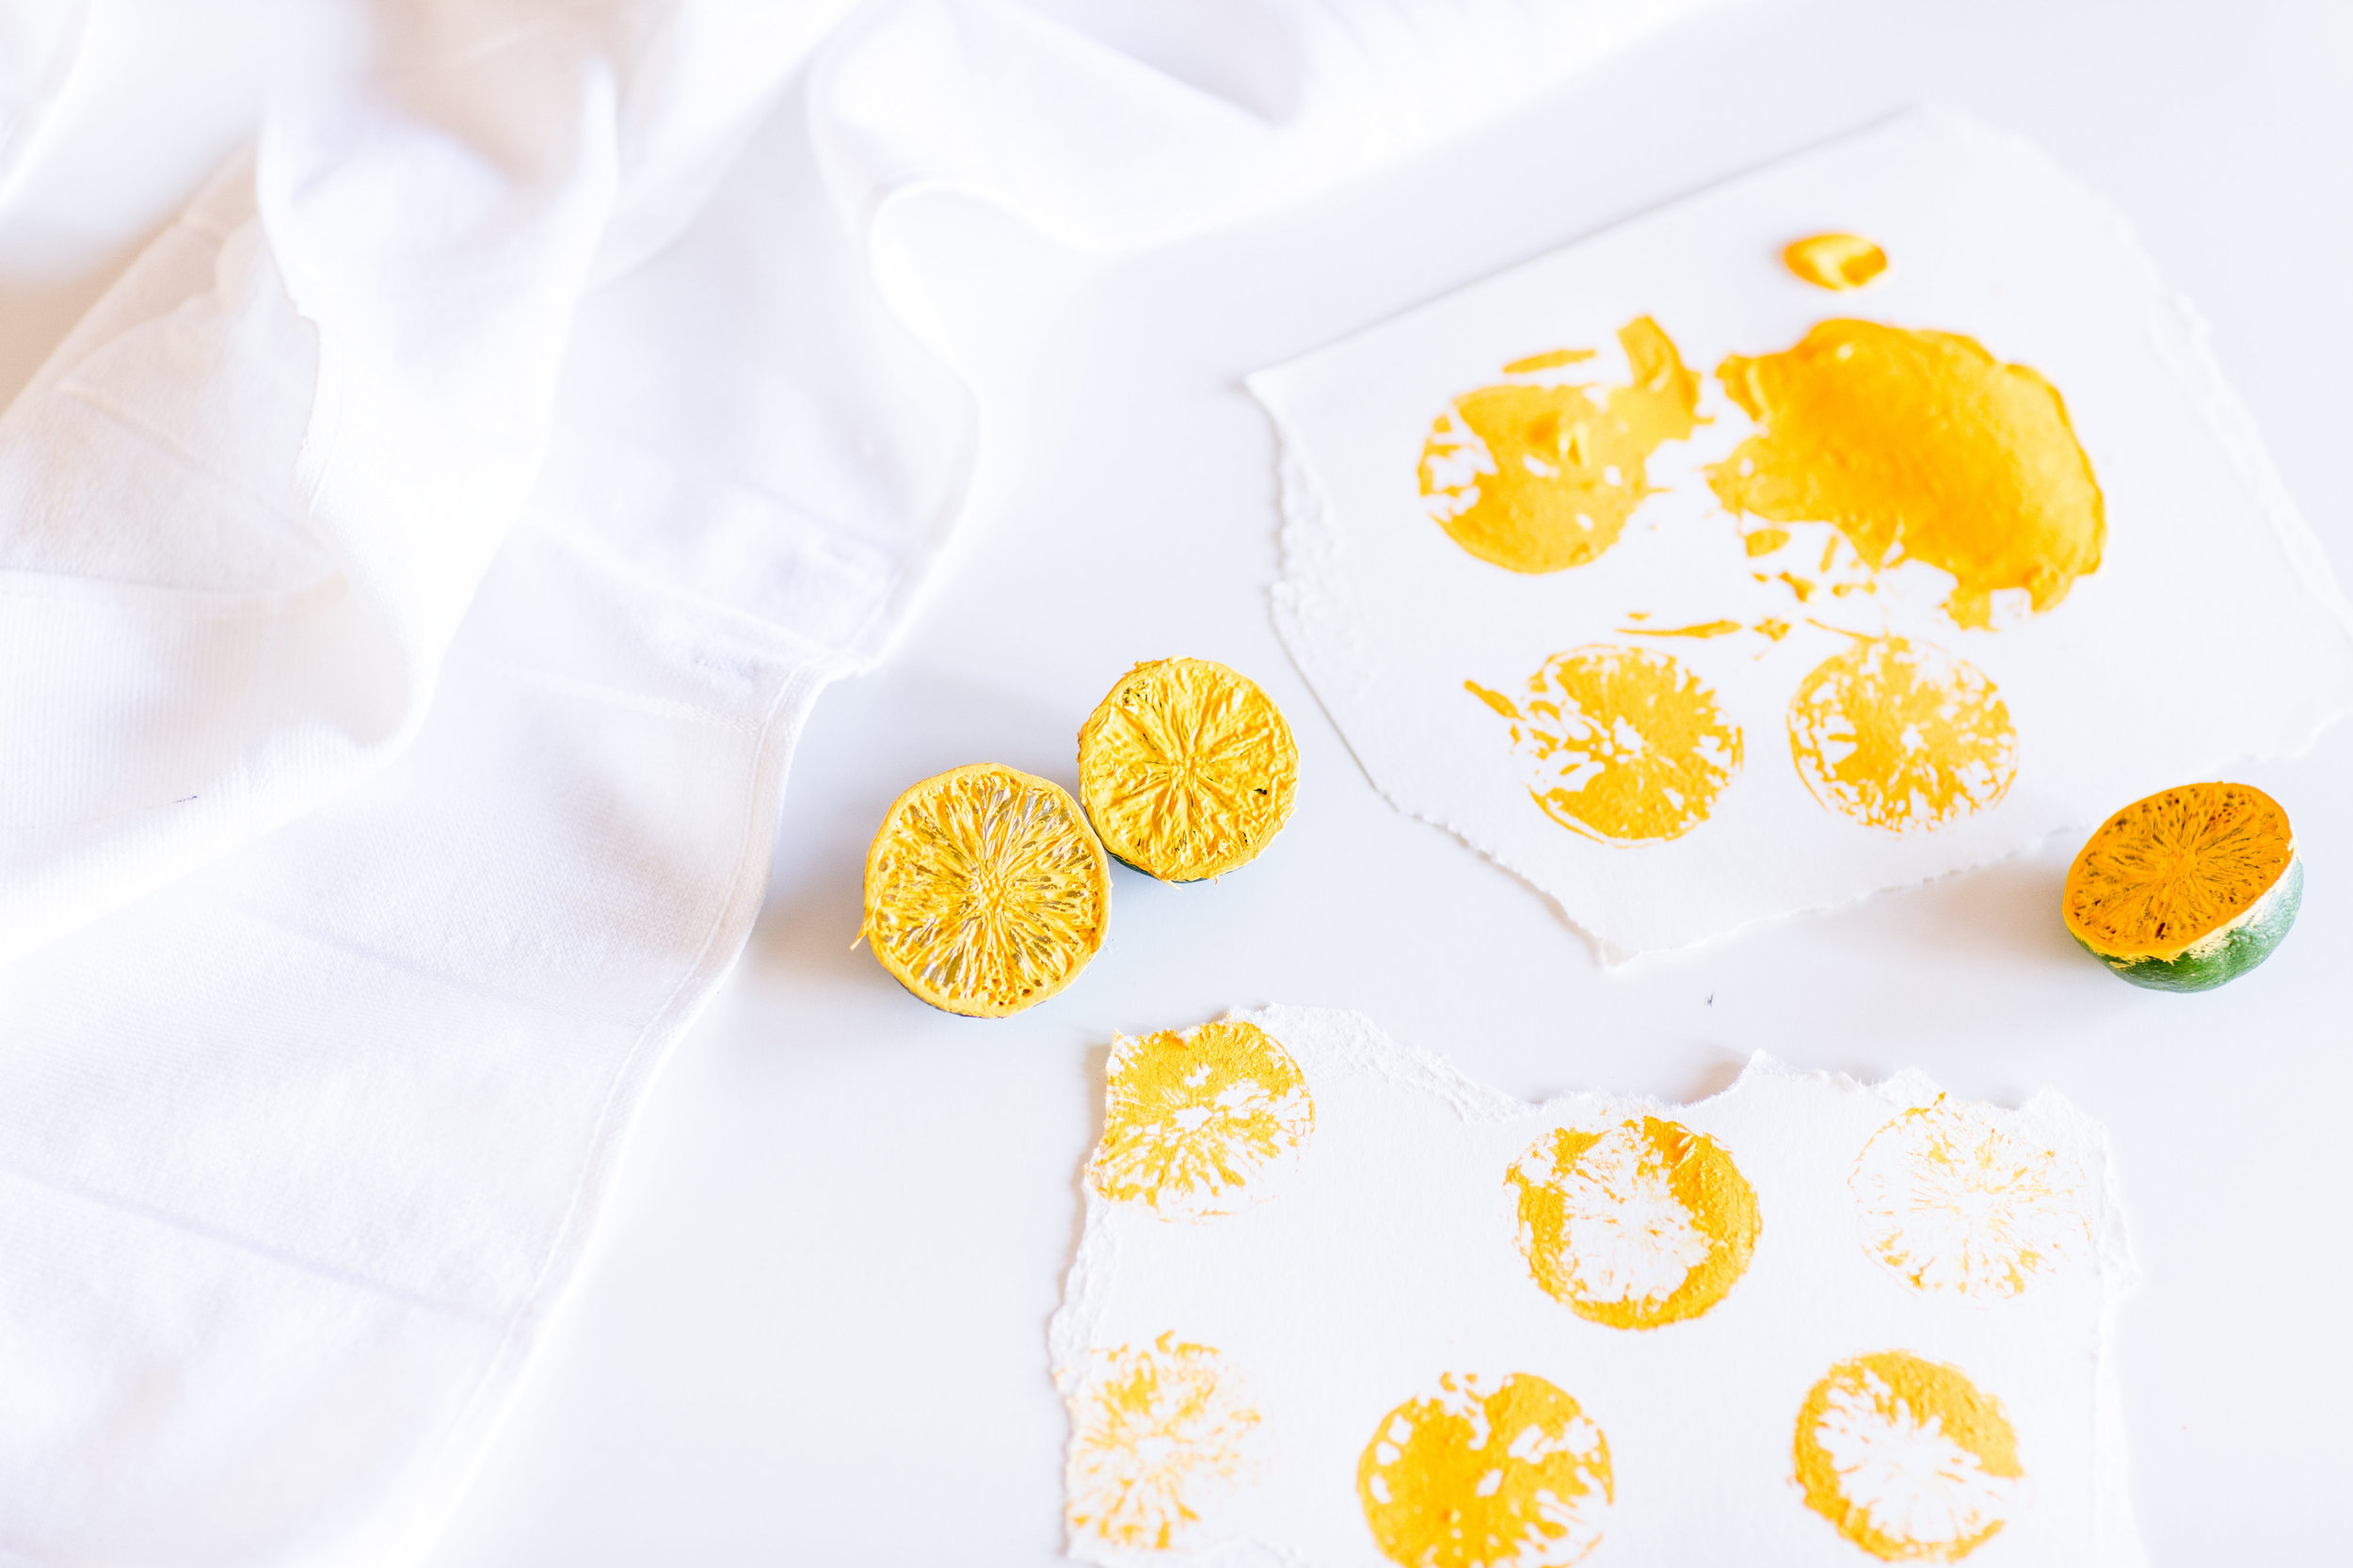
Dab the fruit with fabric paint. Cover the entire surface lightly then go back and add extra paint to the areas you would like to highlight like the rim and the triangular ridges.
Practice a few times on a piece of paper to make sure the pattern looks right.
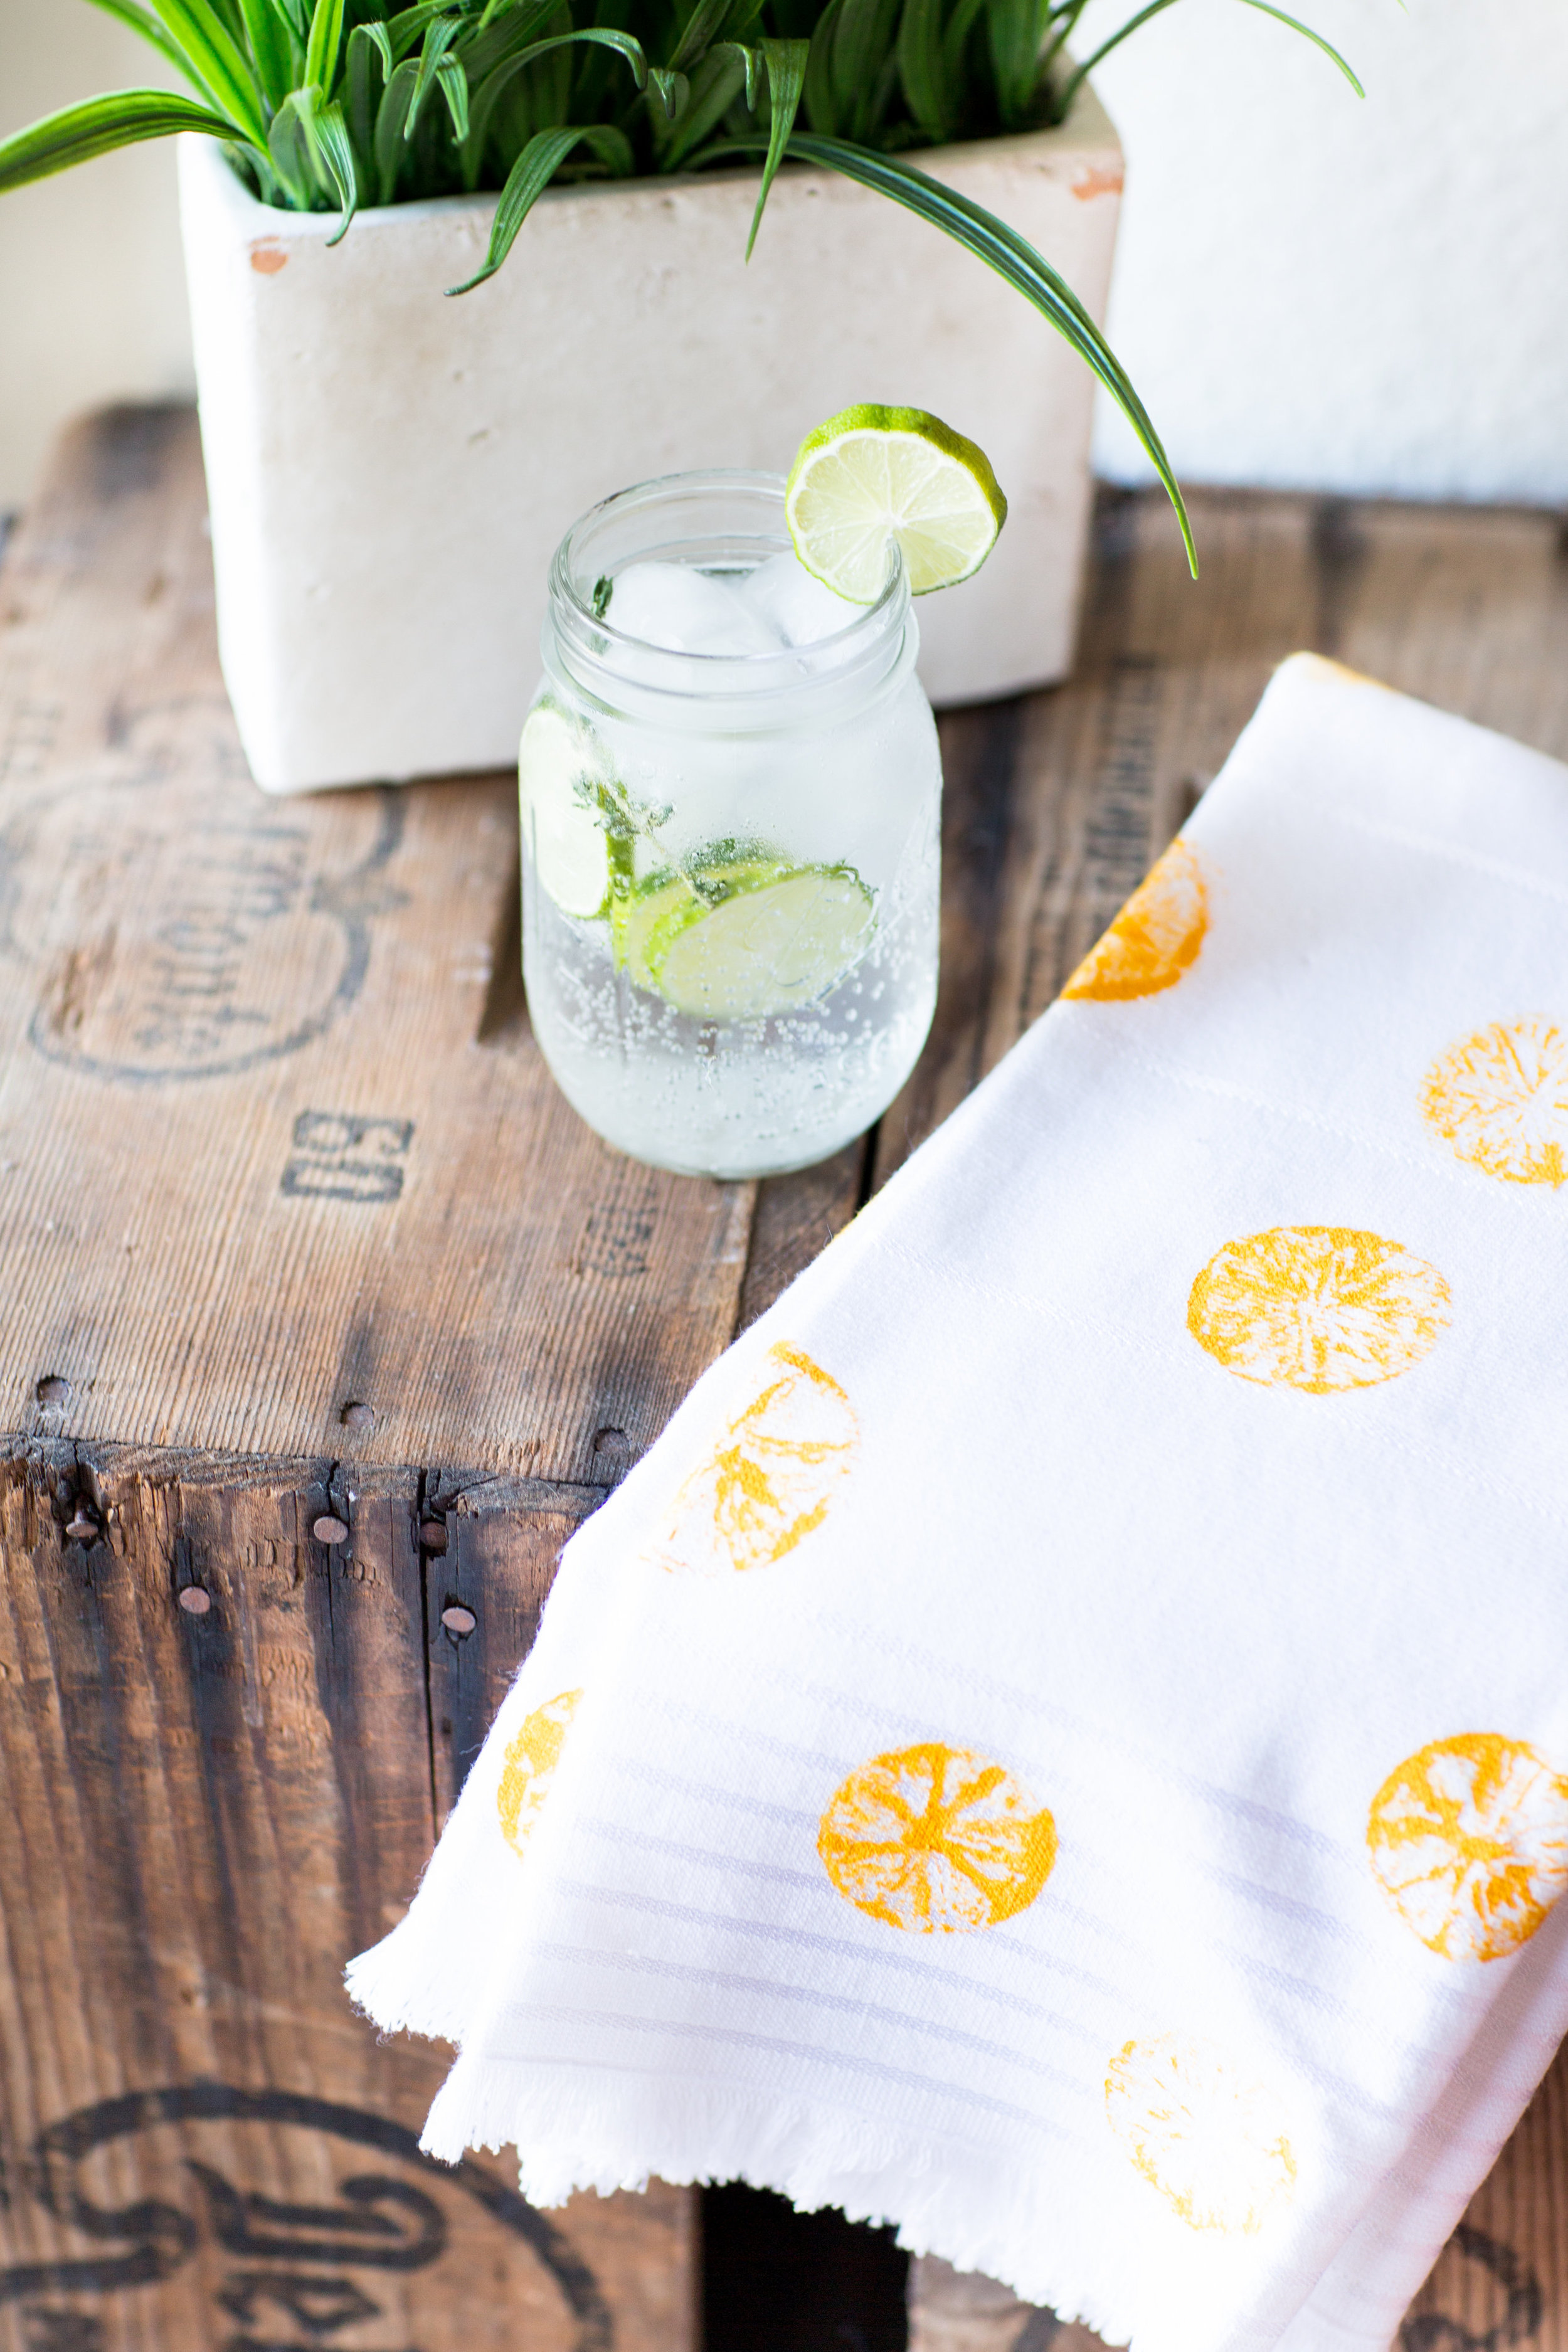
Press fruit stamp onto your dishtowel.
Hang to dry!
Wash the towels before using and enjoy this bright new summer-filled accent to your kitchen!


A Succulent Love Affair: Five Tips for a Successful Relationship
Where do I begin with my love affair of succulents? They are one of the best relationships to have. It’s a low maintenance relationship, requiring very little attention.

Five Tips for a Successful Relationship… with Succulents. Photo by Orlova Maria
LIFESTYLE TIPS FOR THE HOME
Post contributed by Nora Allen
Where do I begin with my love affair of succulents? They are one of the best relationships to have. It’s a low maintenance relationship, requiring very little attention. It doesn’t complain about my busy schedule, in fact, they fit right in with it! And they come in options; you don’t have to settle on just one. Most importantly, like me, they prove big things can come in small packages! I love what an impact they make no matter what the size. The list of reasons goes on and on.
If you are new to a relationship with succulents, here are some pointers to help ease you into your newfound love. The beginning of what promises to be a great relationship!

Our cup runneth over with love. Photo by Jennifer Burk

Look at these cuties. We wouldn’t mind bringing them home to meet our parents. Photo by Annie Spratt (Unsplash)
BUILD A STRONG FOUNDATION
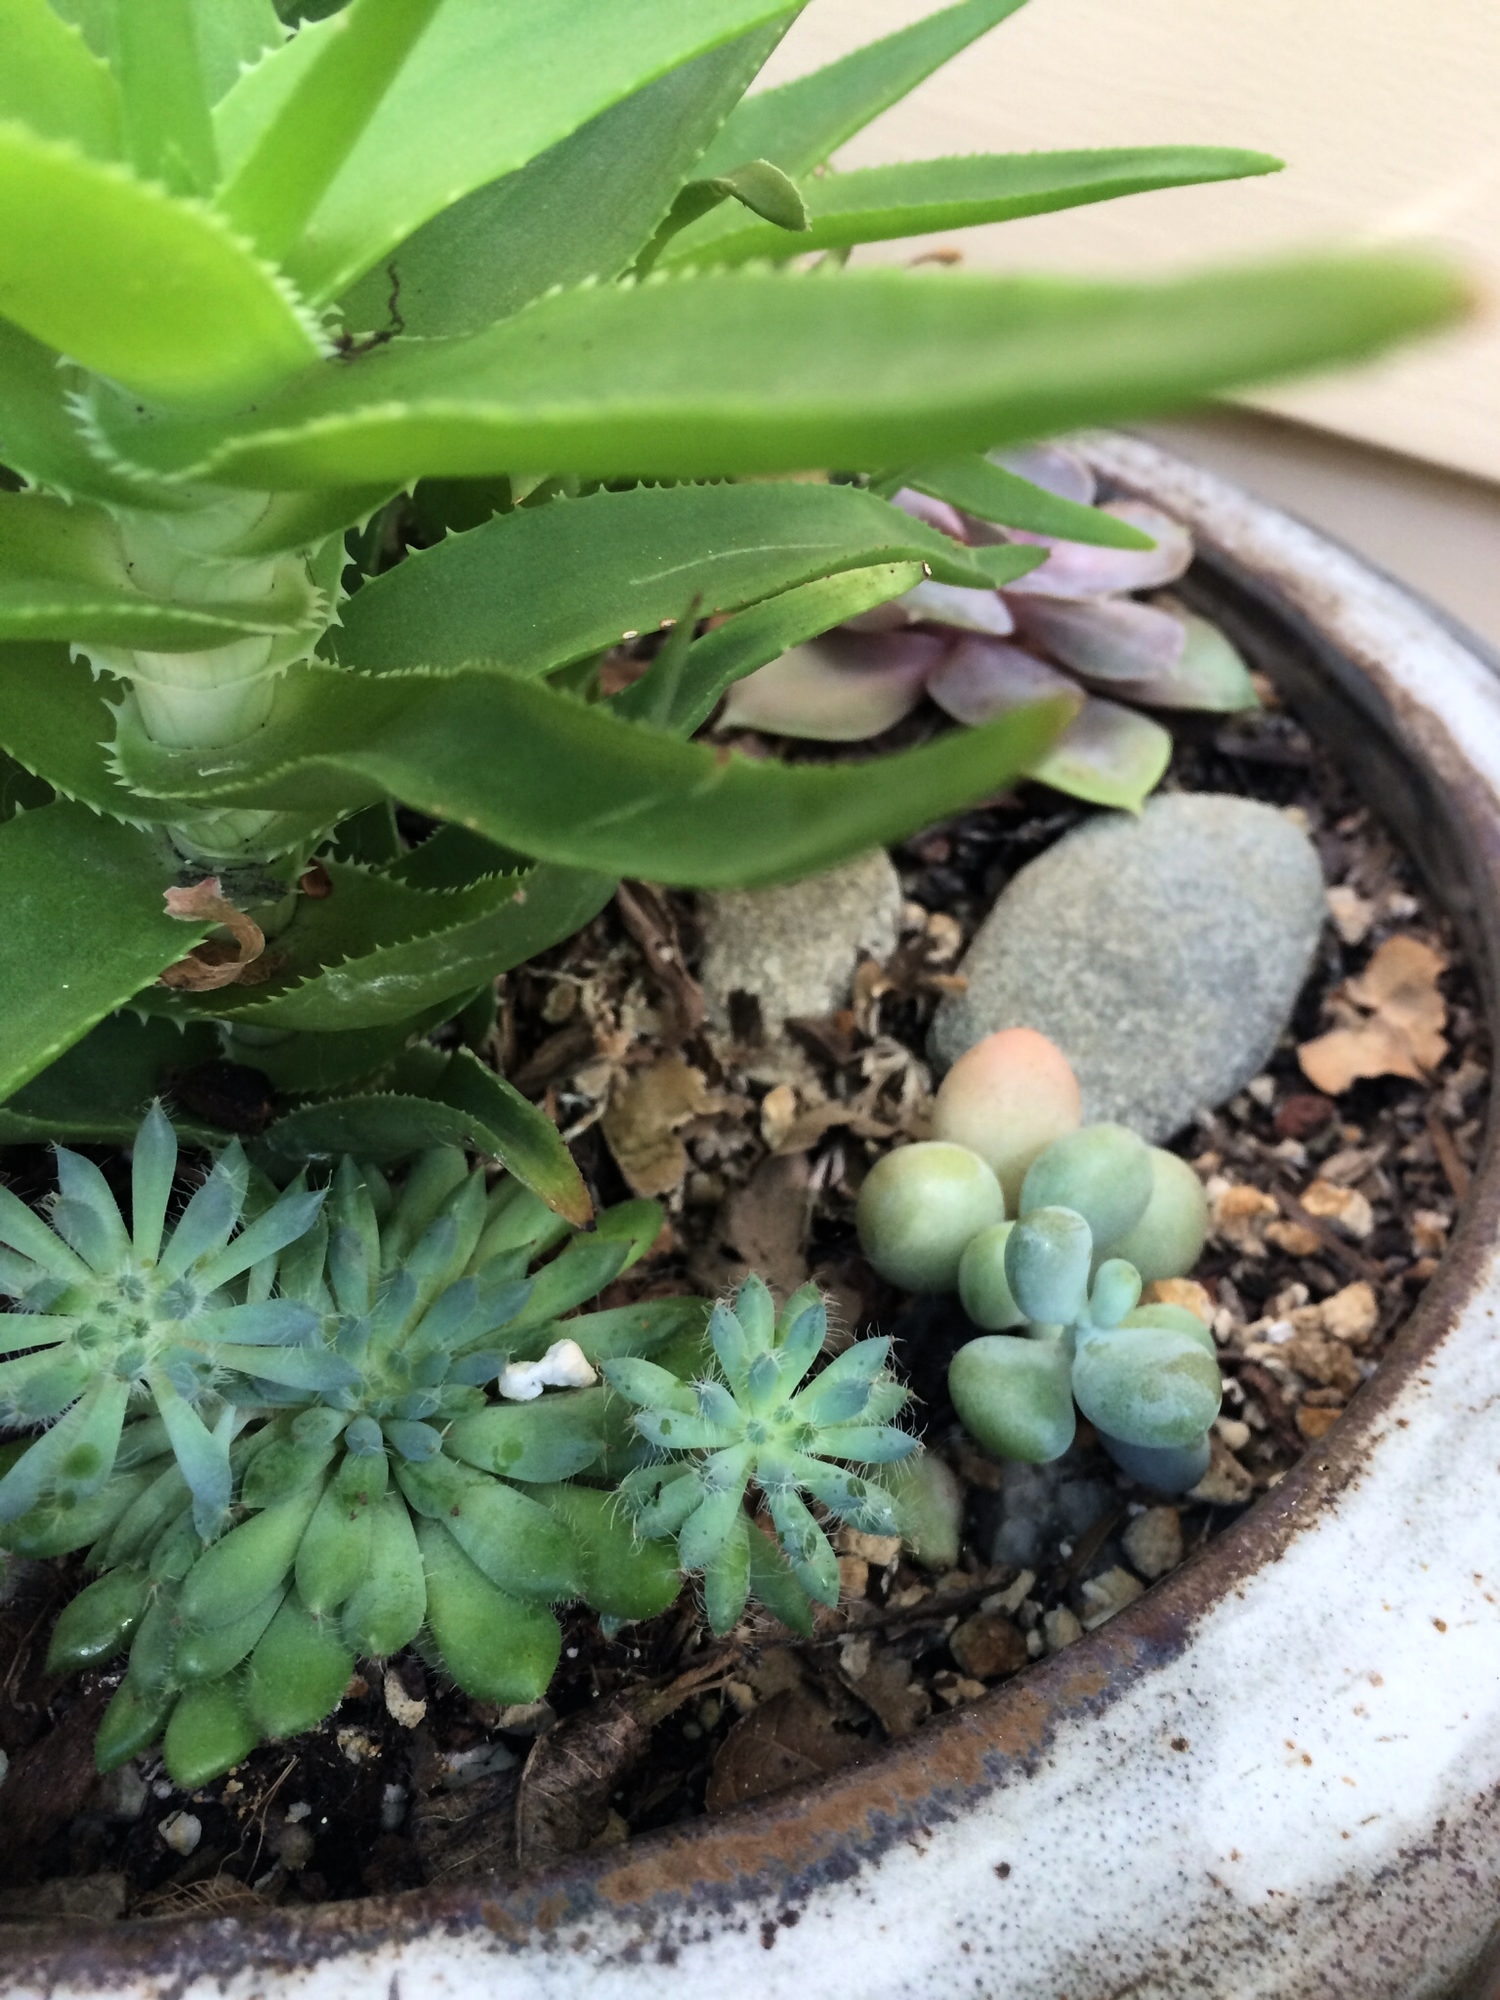
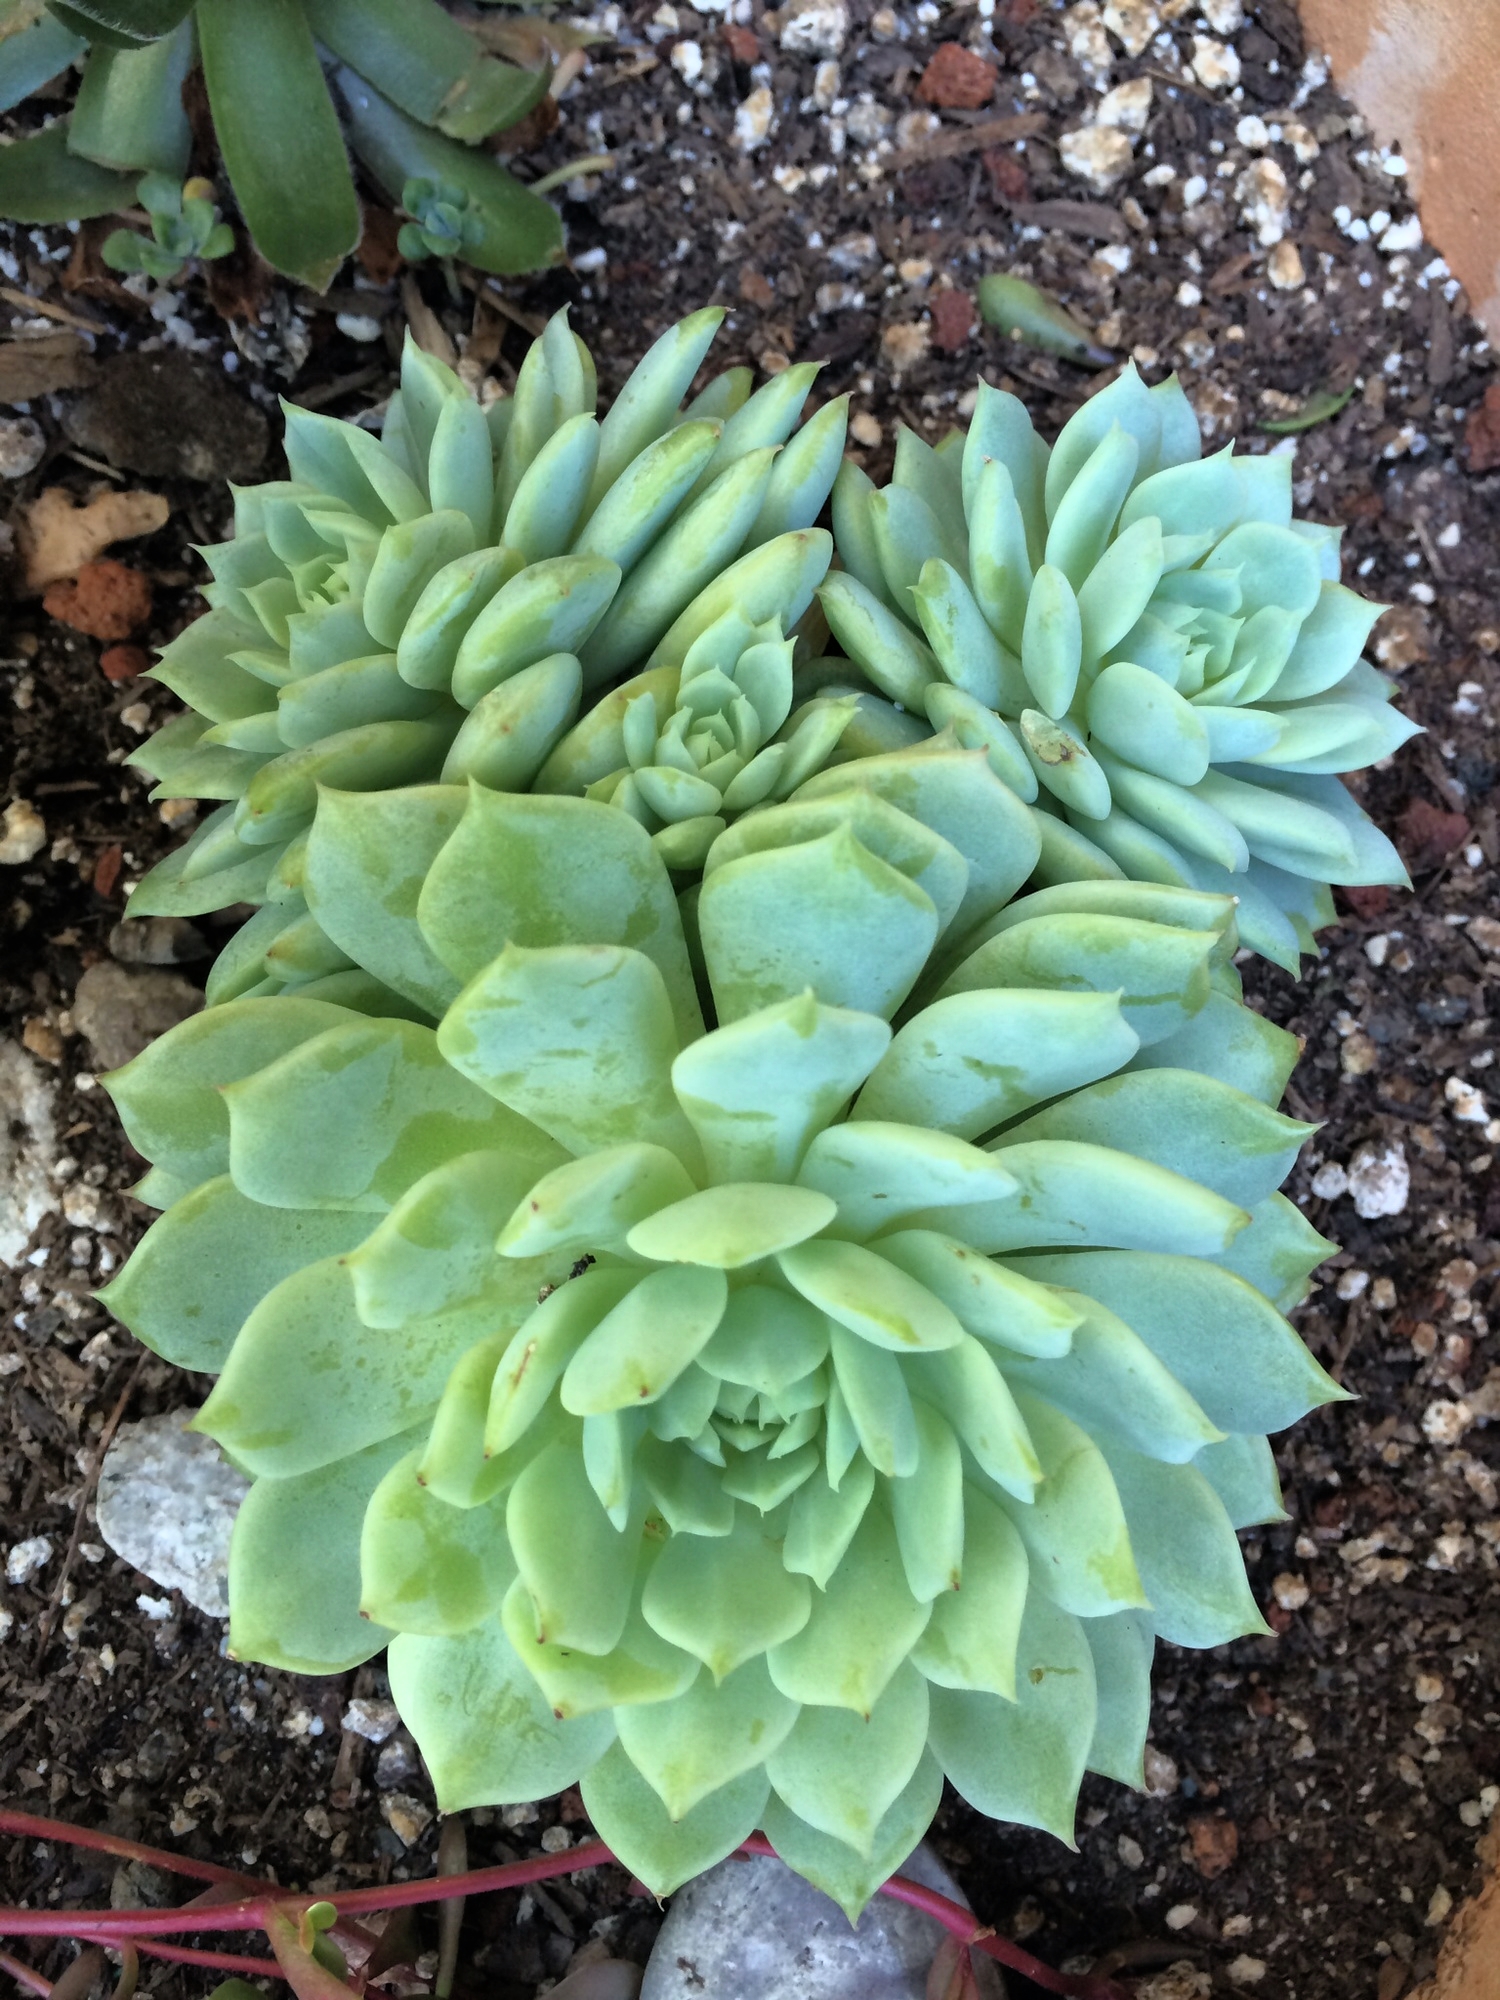
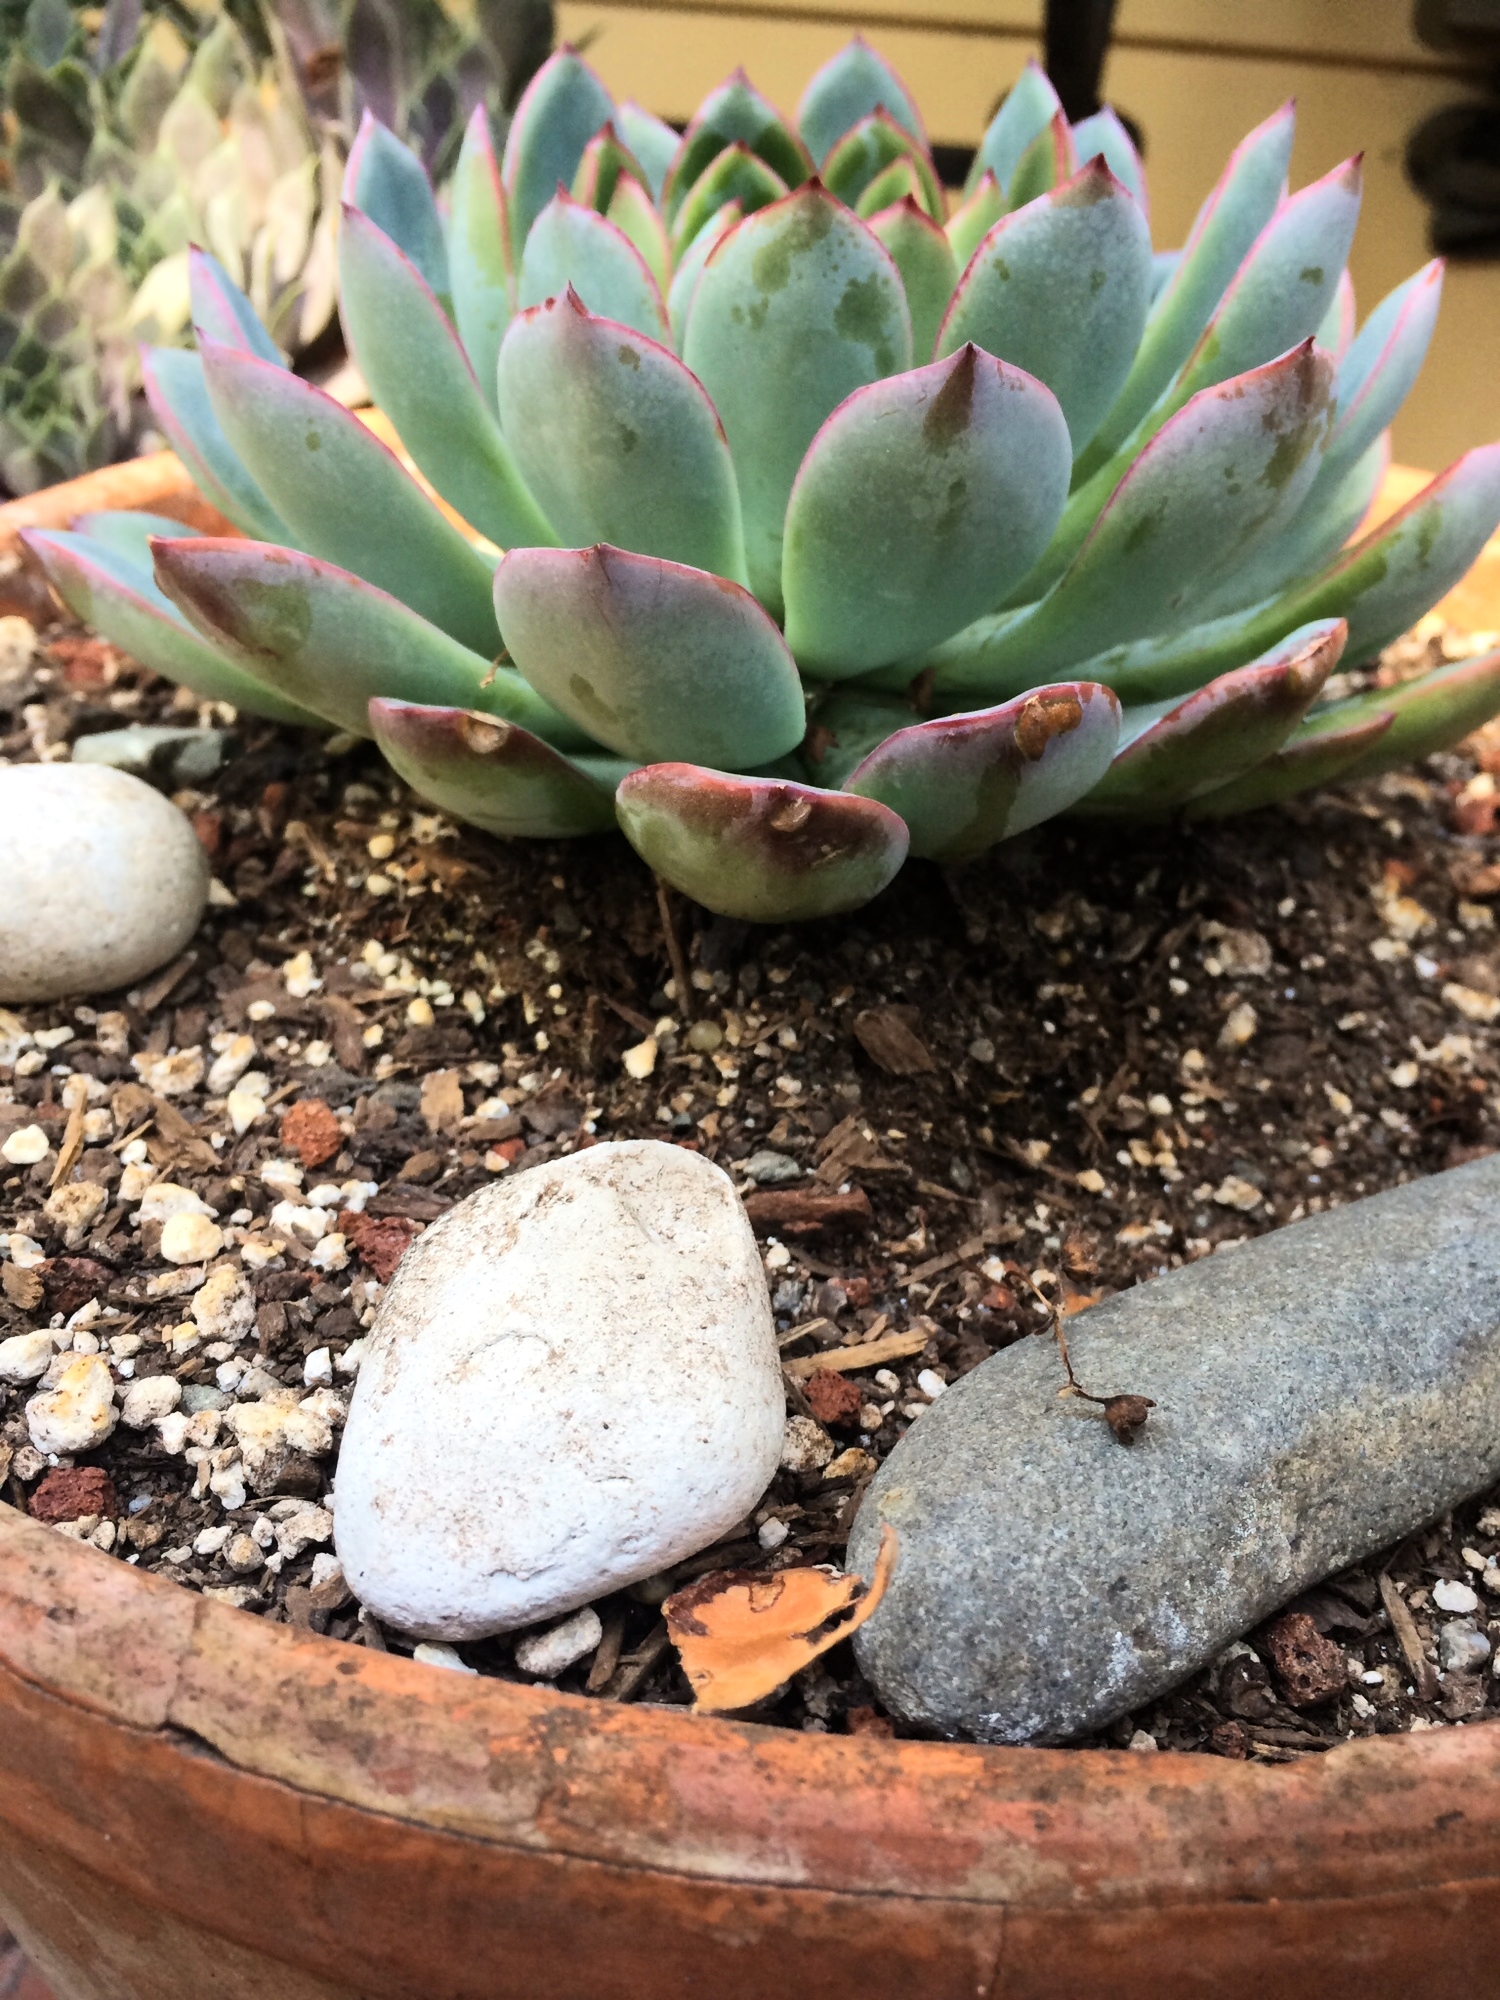
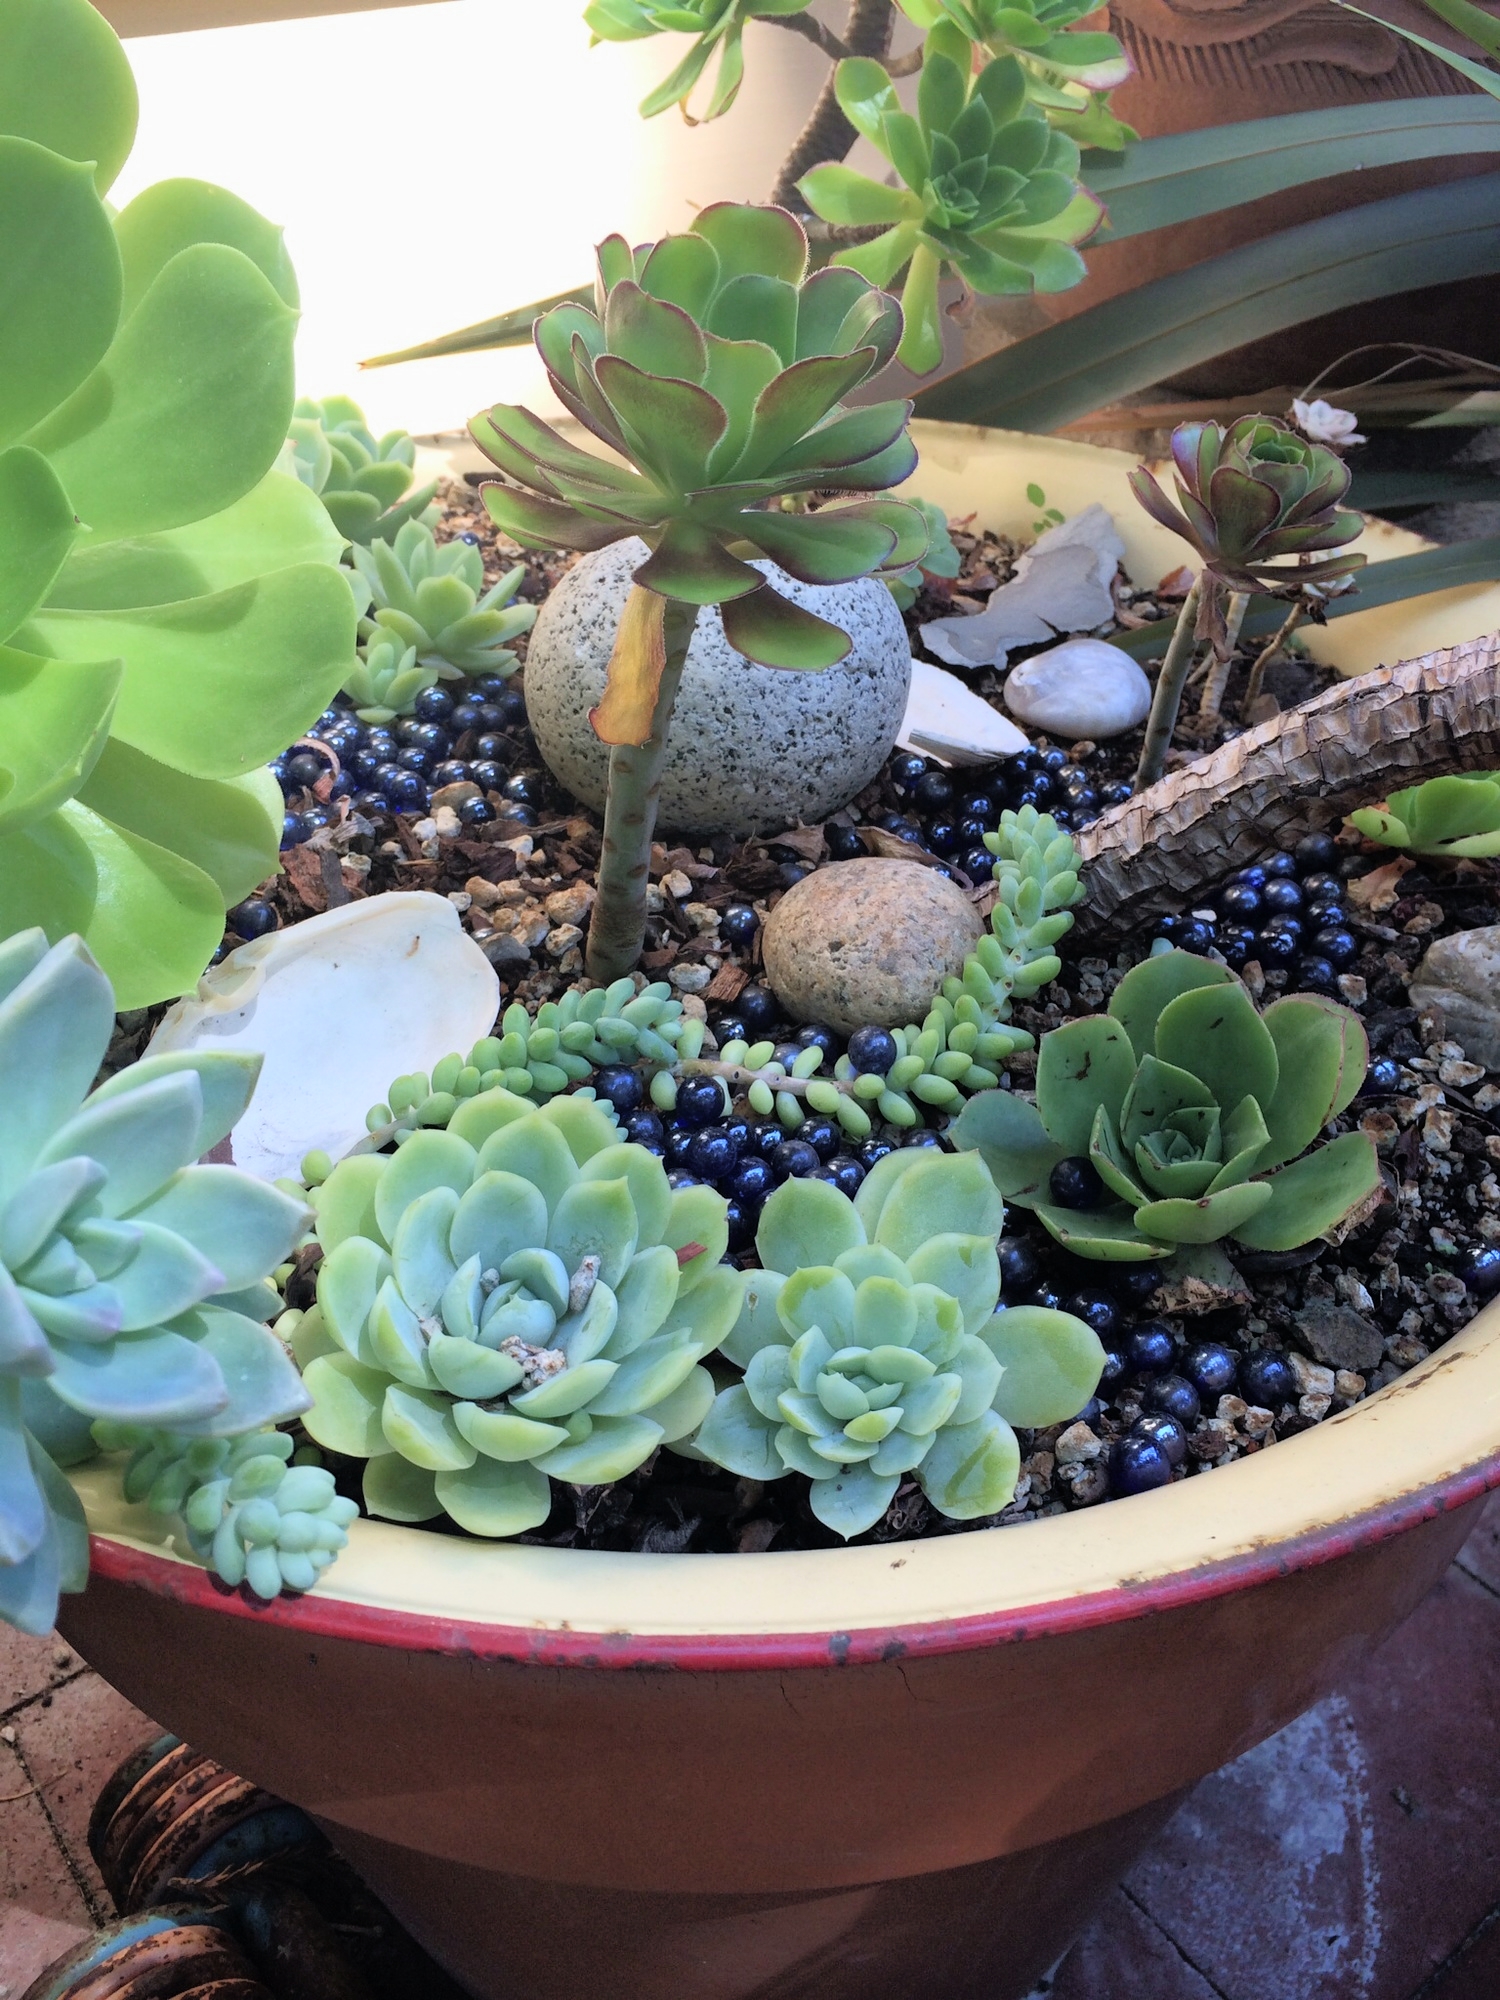
Look for a container with drainage if you want to really establish your succulents. You can plant a selection of them together or go for the statement or just do one. But the key is giving them room to grow. Feel free to get creative with you placement but make sure to space them out as many succulents not only grow larger but also can multiply.
SHOW YOUR LOVE
There is really no wrong way to showcase your succulents. My favorite ways to showcase my succulents are in either glazed ceramic planters or terra cotta planters. If you are lucky like me, to have a gardener for a mom, you get most of the pots from her stash! But you can find a great selection in the garden department of your local hardware store. Once planted, make this display as unique as you want. I like to add a few special touches to mine by using seashells, river rocks, marbles, sea glass or whatever California treasures I’ve collected.
Between us, this is a great place to add that broken dish you once loved in the dirt for some added color. Or if you want a little more pop, I love the look of adding neon aquarium rocks on top of the dirt.
CONSIDER ONLINE DATING
Some of my favorite succulents are from Home Depot (For real! And a great price)! You can also always find great options at local nurseries. My favorite for specialty gardens is Cali’s own Succulent Gardens! What a lot of people don’t realize is this is similar to online dating, you can digitally find your match! Head to Etsy, you can order bags of the clippings. And just like most relationships, you can always go back; clip from an existing succulent and re-plant. But ask if it’s not yours! :)
RELATIONSHIPS NEED WORK
Now how do you care for your succulent you ask? So easy! I like to plant mine in a cactus mix for good drainage and I water them once a week (Sundays, that’s my watering day if you are curious). And that’s it, I told you this relationship would be the easiest you’ve had! But keep in mind Succulents like Vitamin D (just like me)! So you can keep your succulents inside but make sure to let them get weekly sunlight at the least or leave them outside all the time and they will THRIVE.
IT’S NOT YOU, IT’S ME
Don’t cry if your succulent breaks off! You can re-plant it. Just stick it in the dirt and water like normal (once a week) and in about 2-3 weeks it will have re rooted itself. You will have a whole new succulent in your planter. But like any relationship that doesn’t work out, consider noting what you could do differently next time.
Now enjoy your new relationship, may it flourish!
Happy low-maintenance planting,
xo Nora

Photo by Jacalyn Beales (Unsplash)


Did you try this? Tell us about it below or tag us on your favorite social channel!
LIKE THIS POST? THEN BE SURE TO SHARE IT!

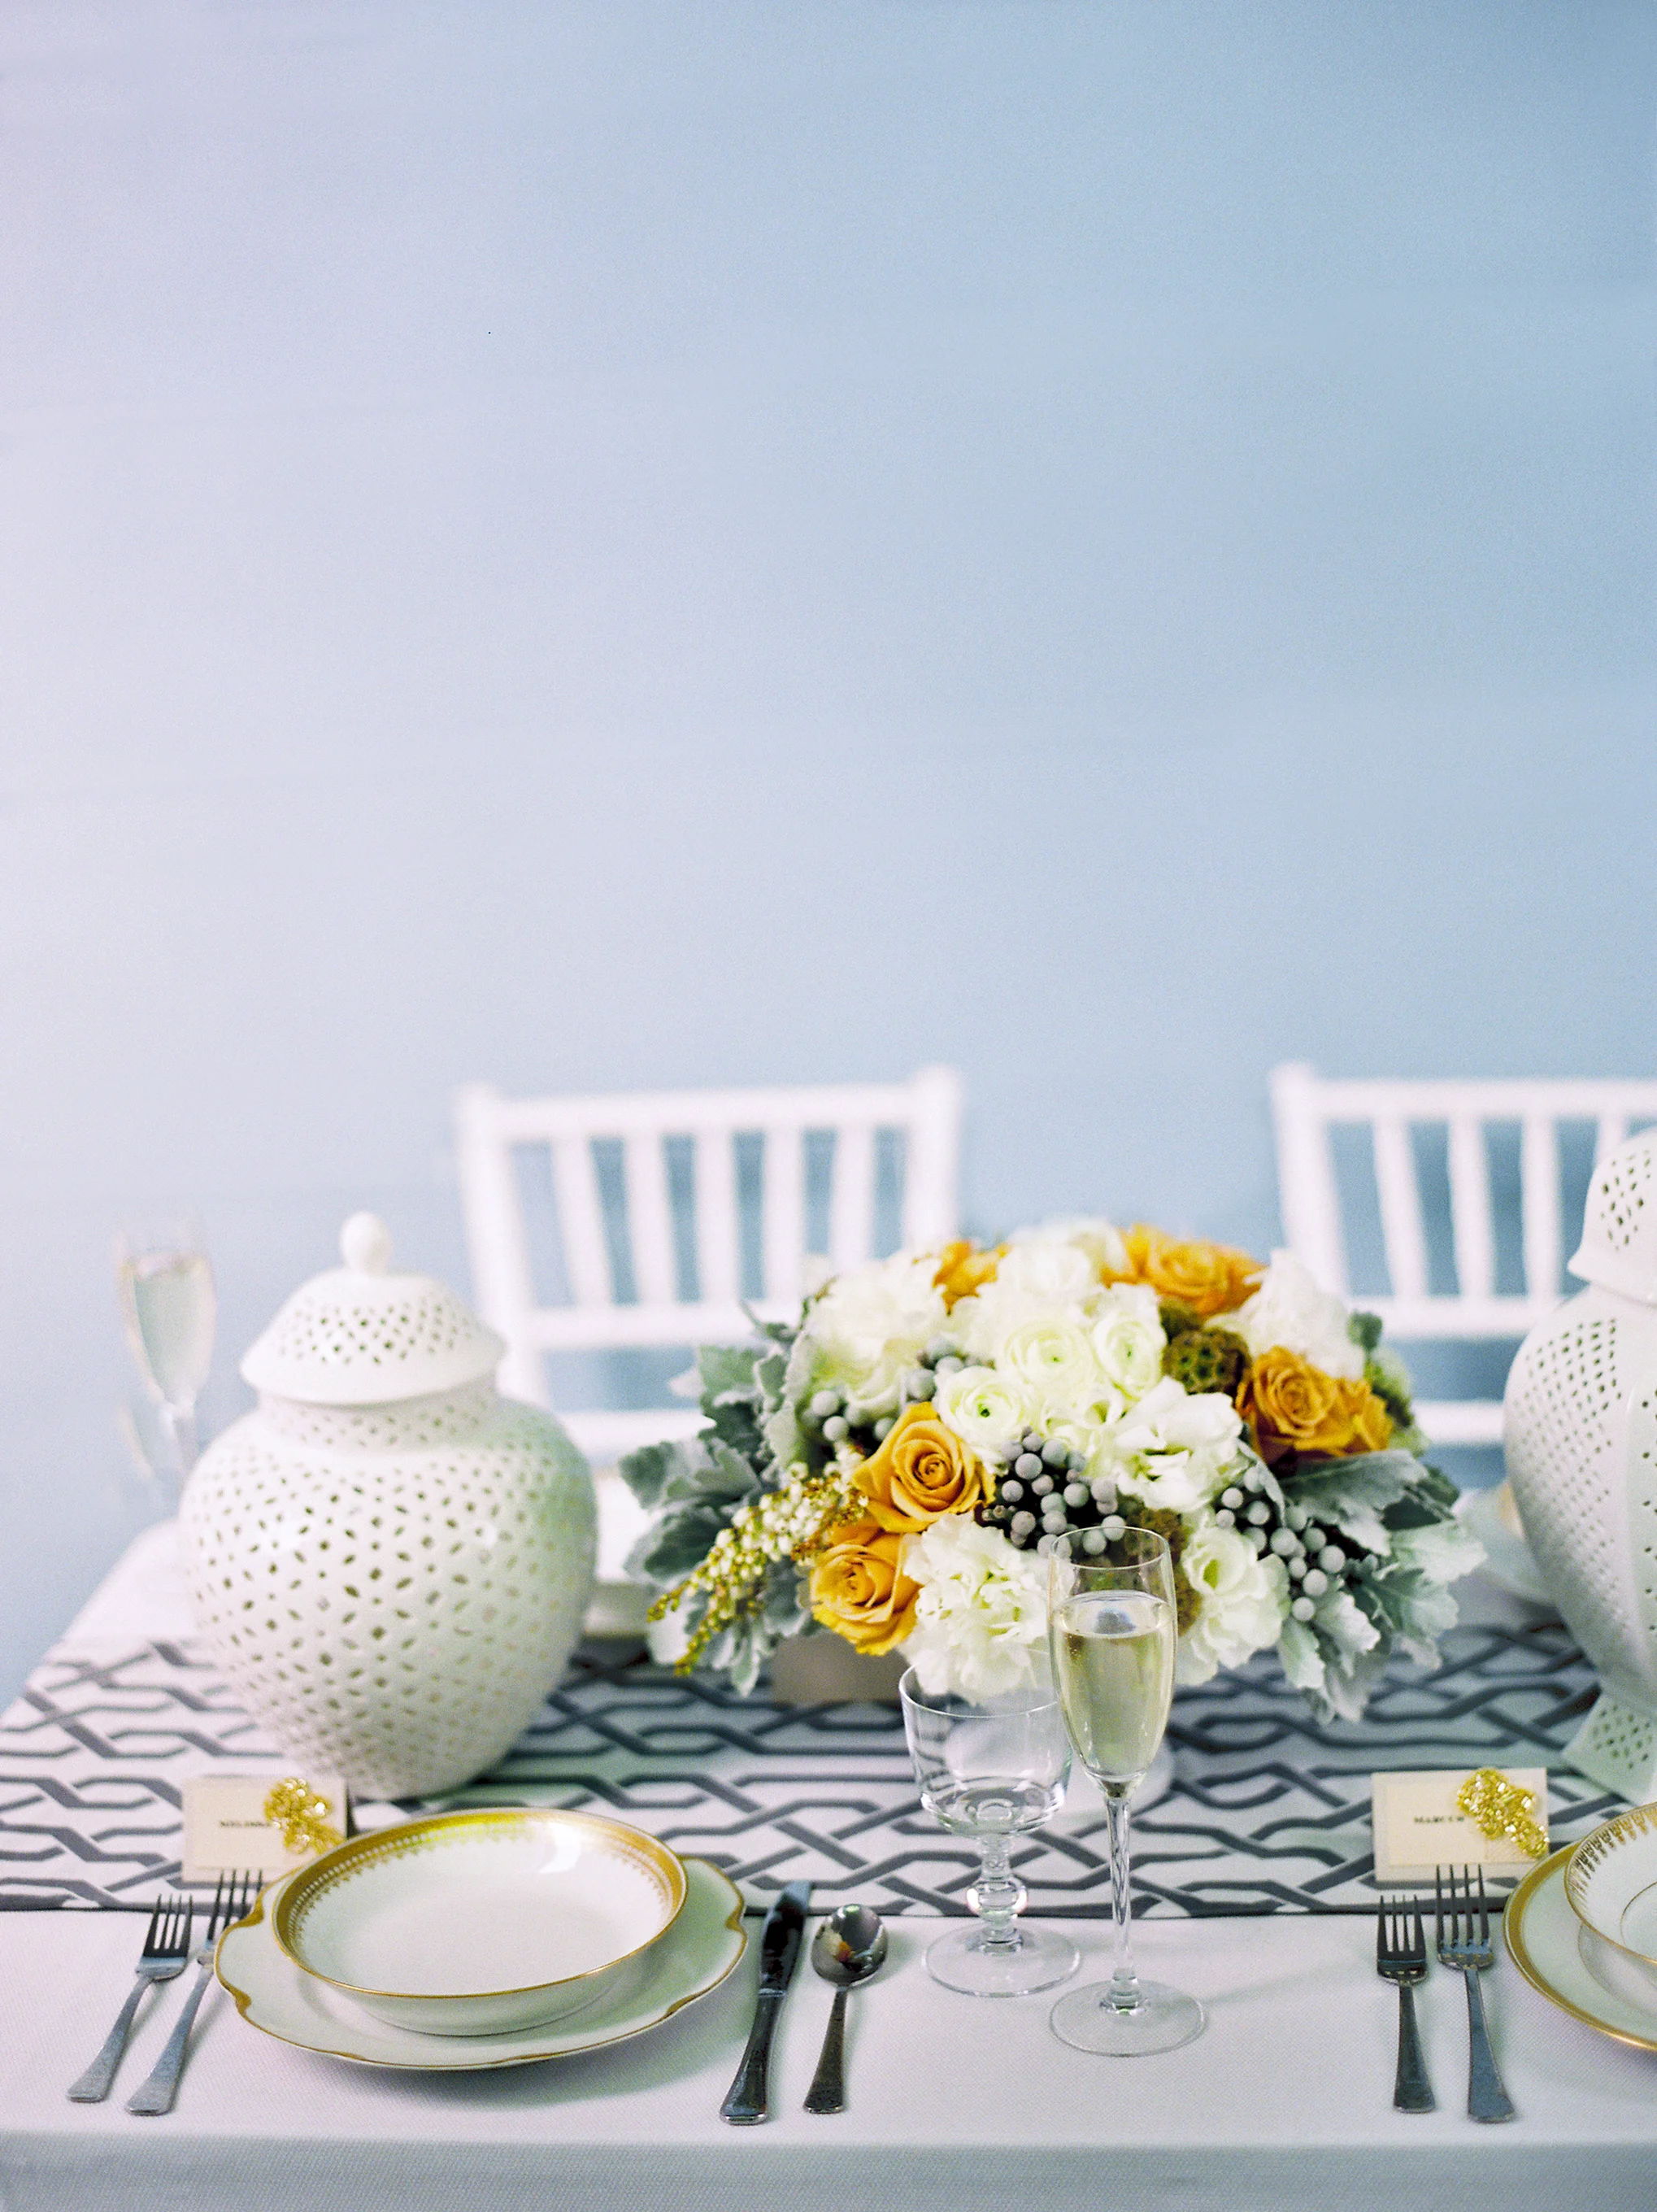
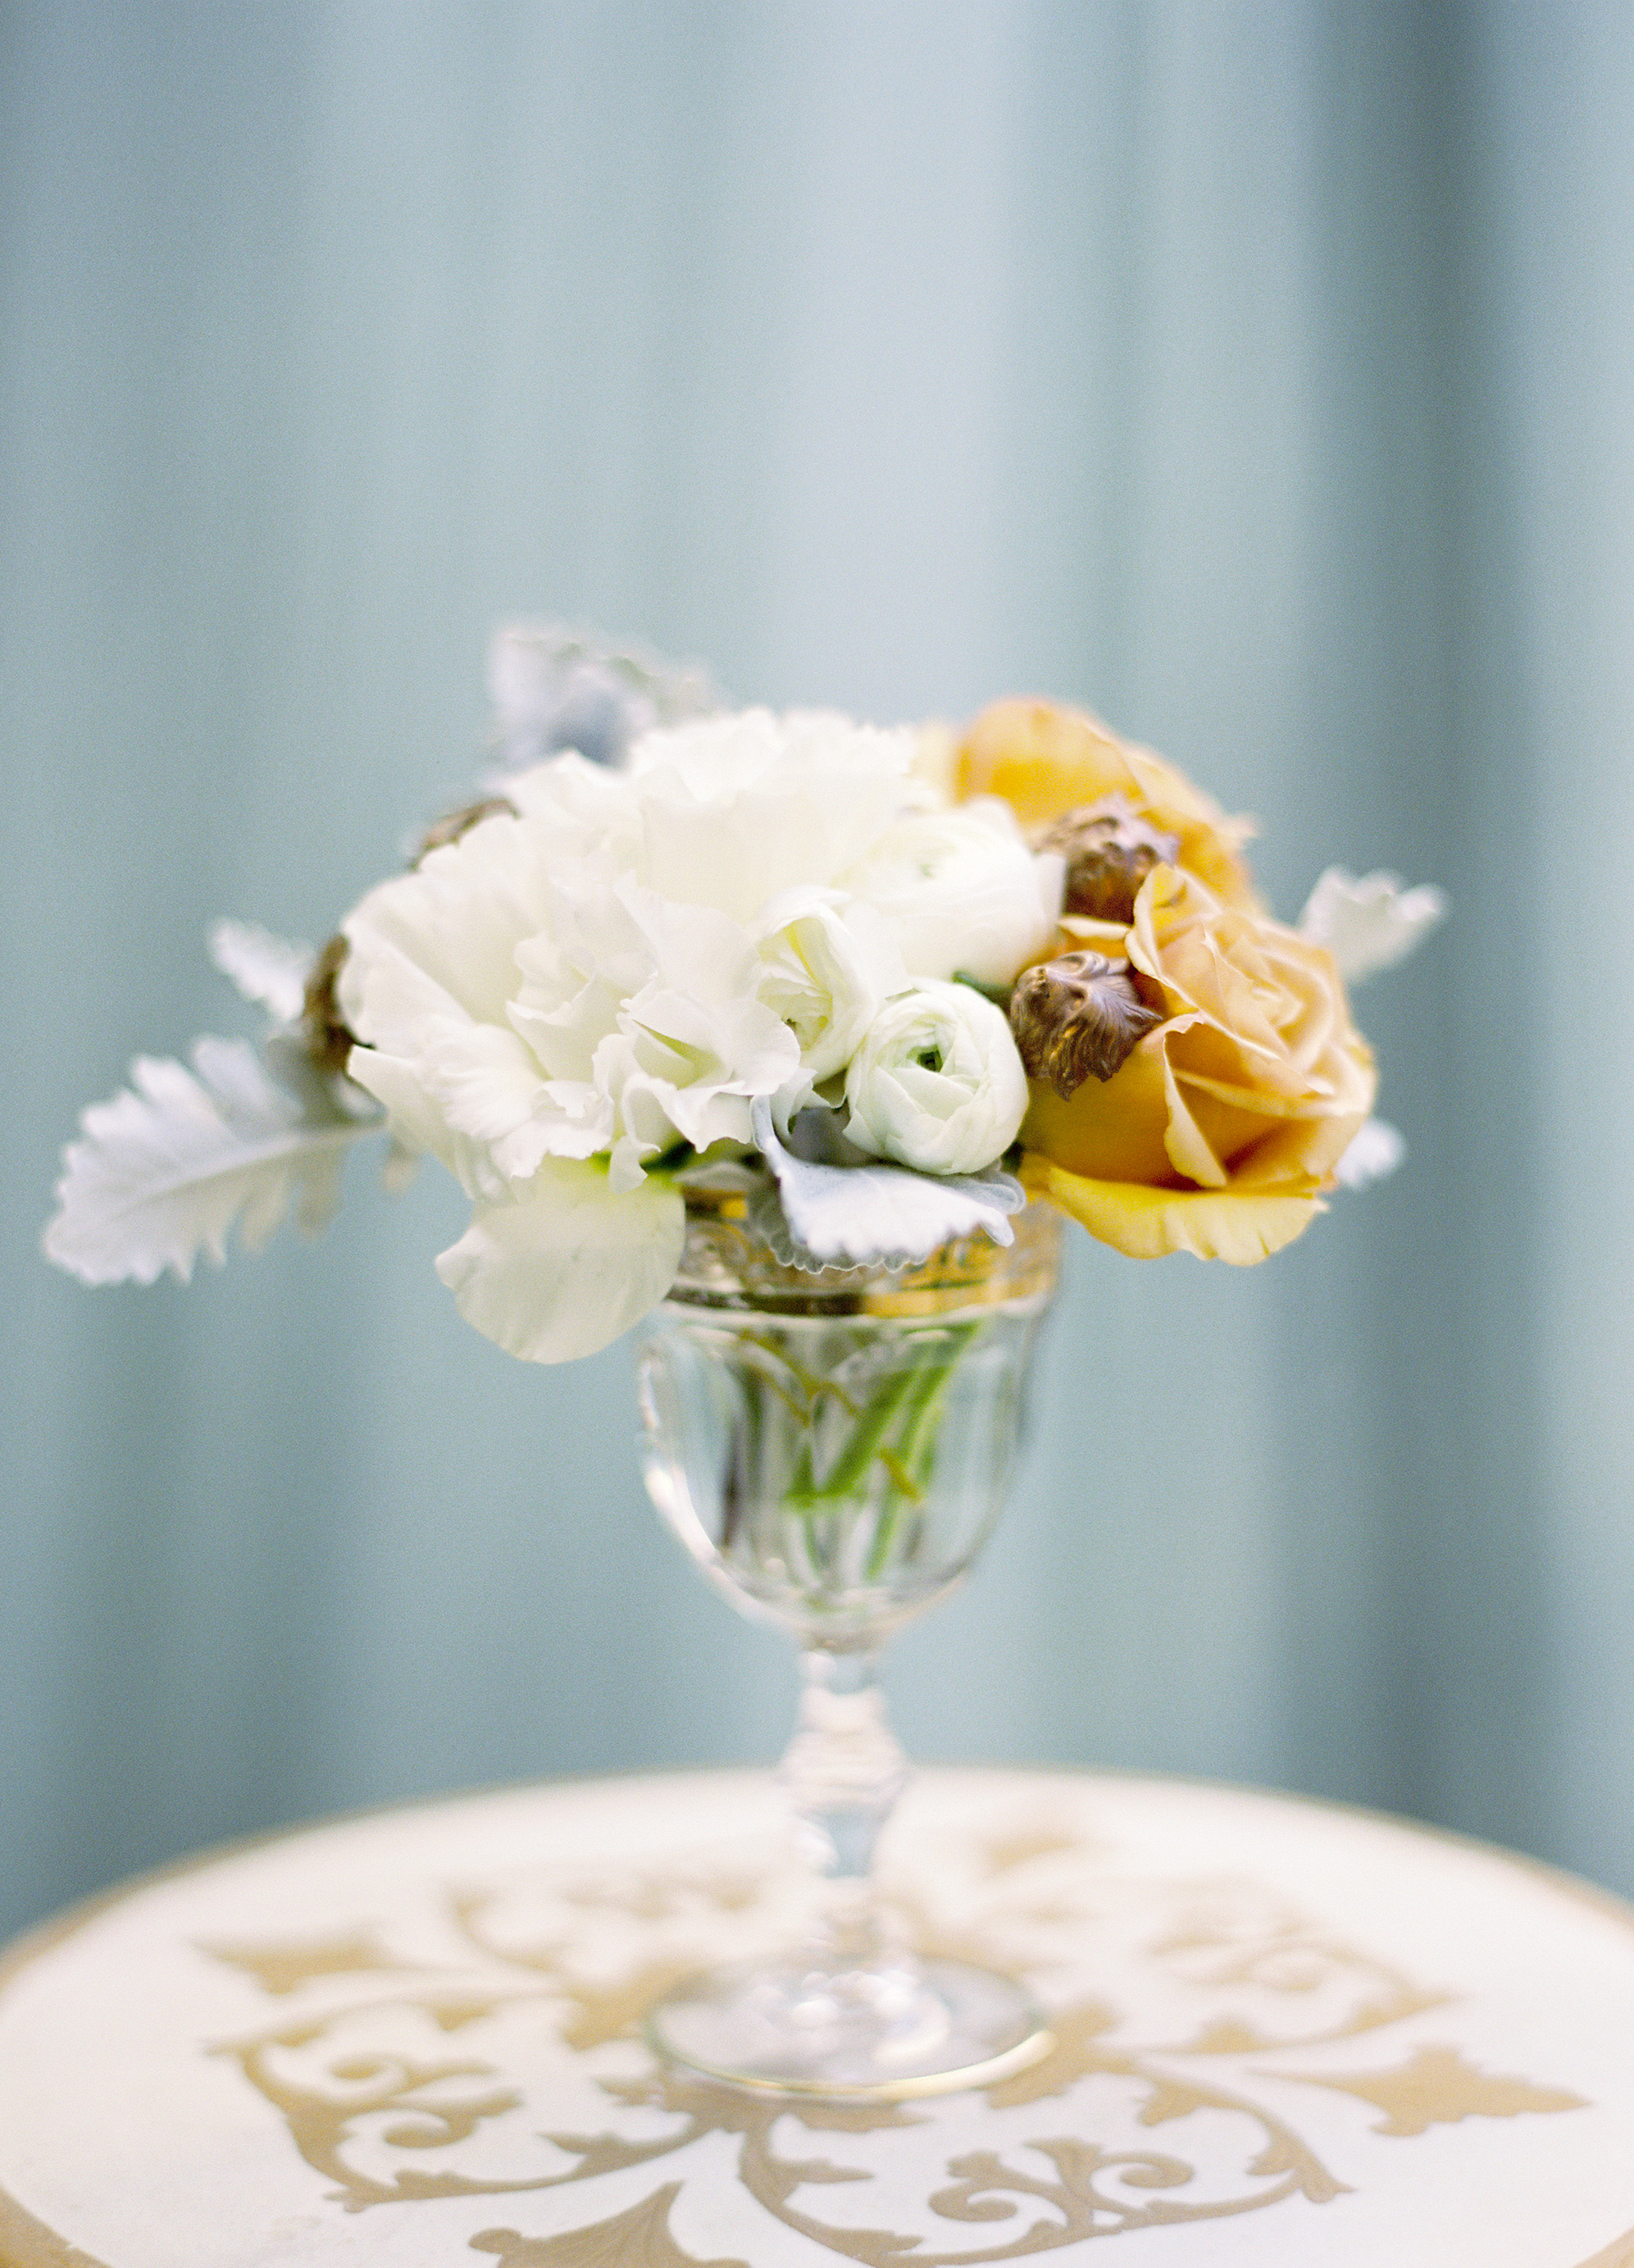
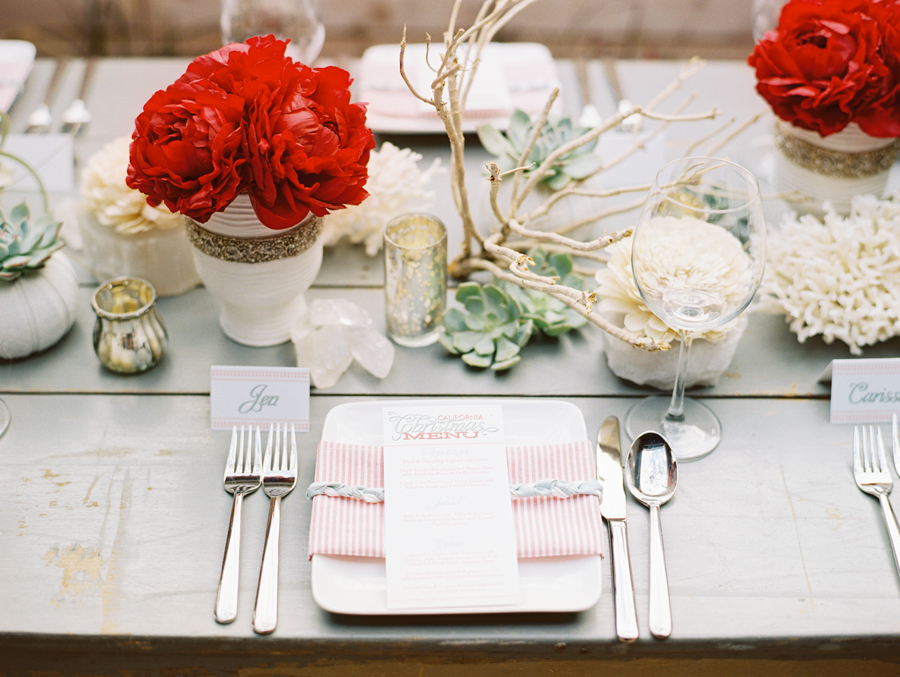
Pretty Peonies: Fresh + Modern Party Inspiration in Los Angeles
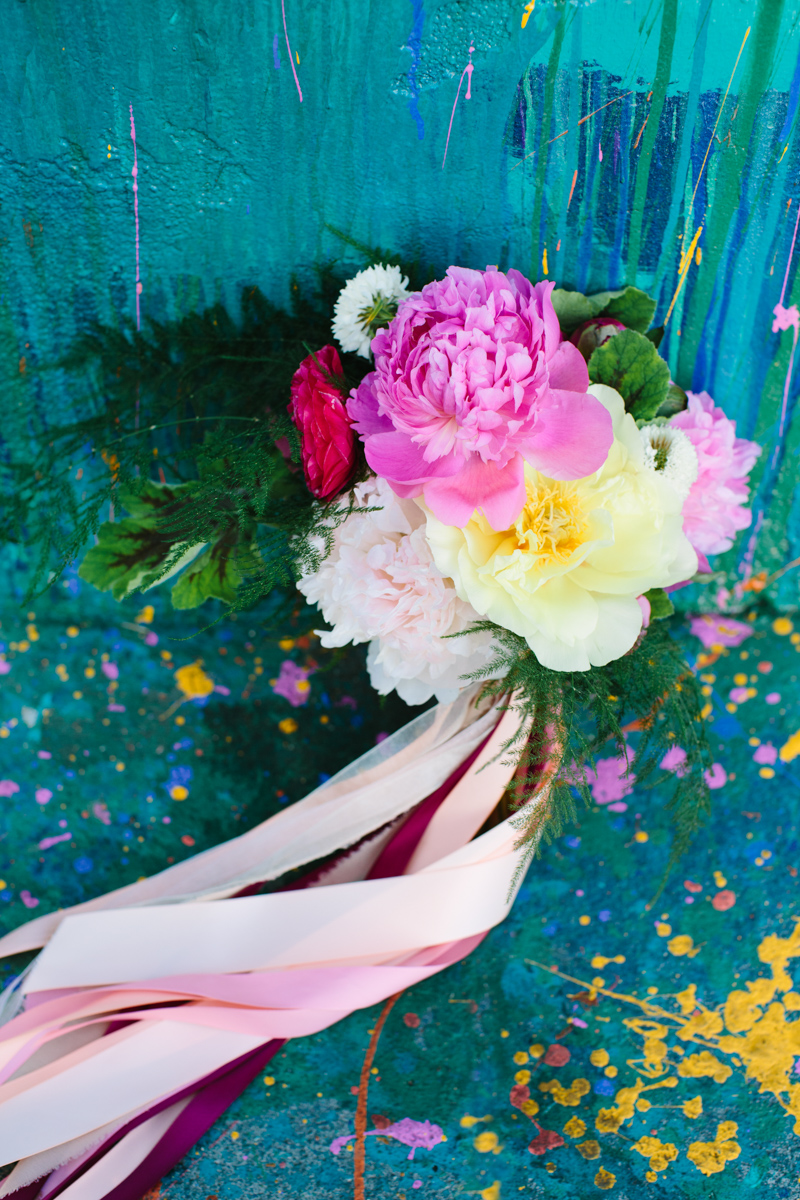
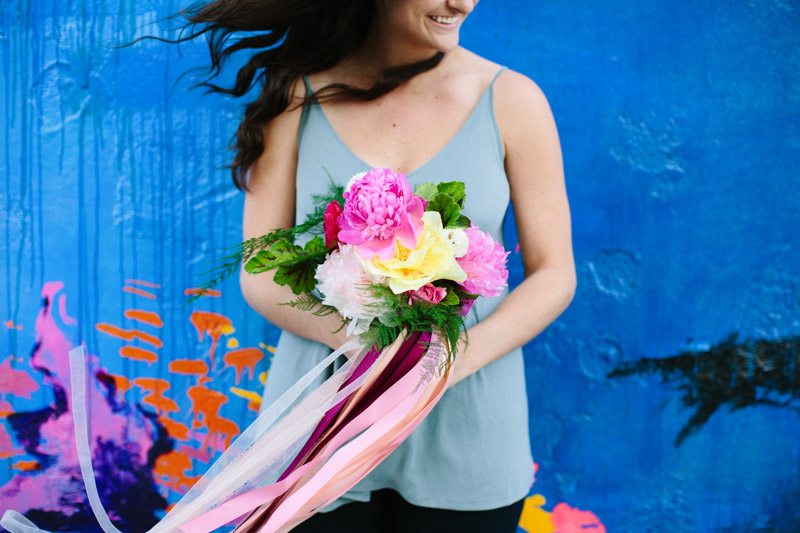
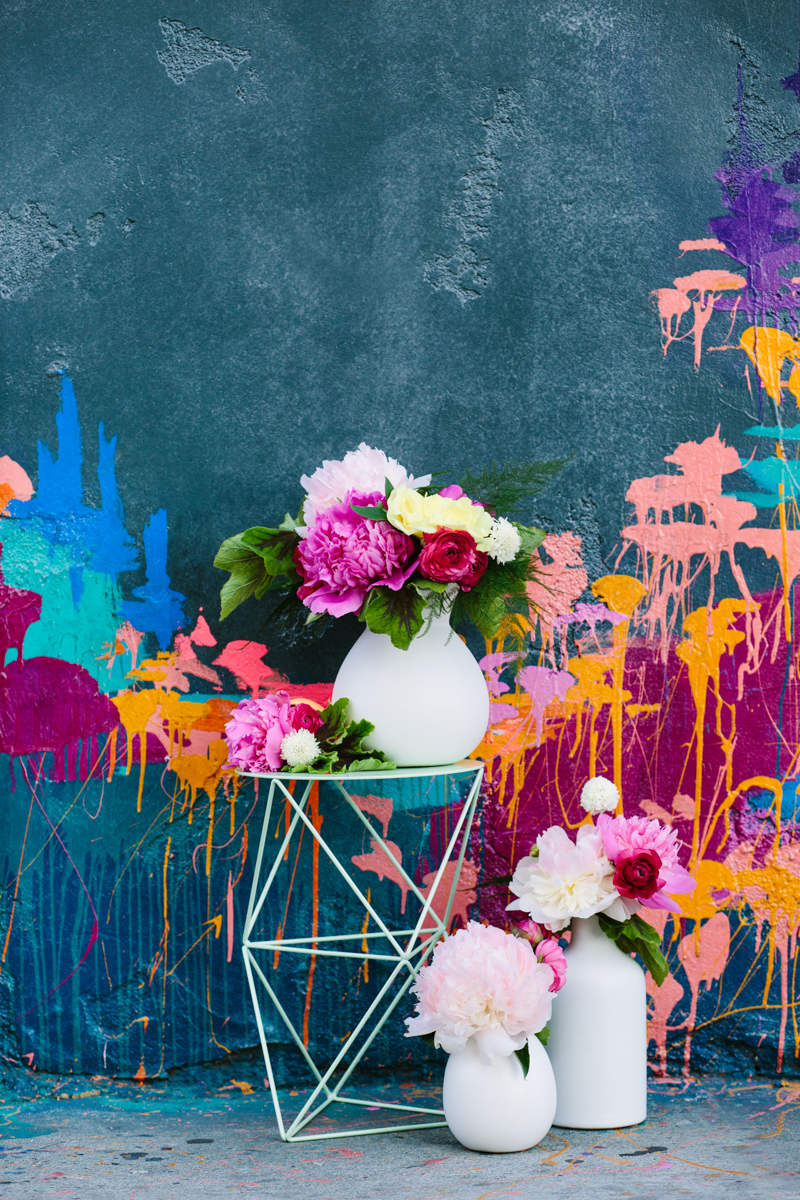
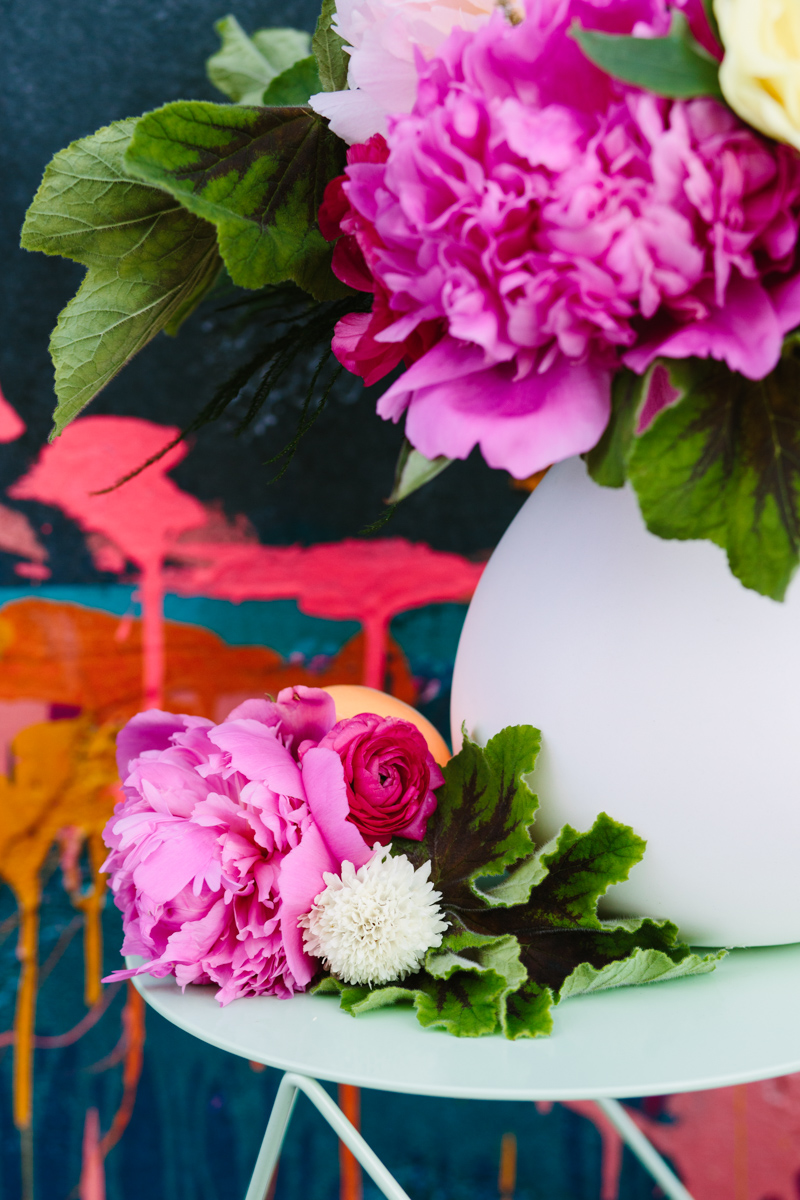
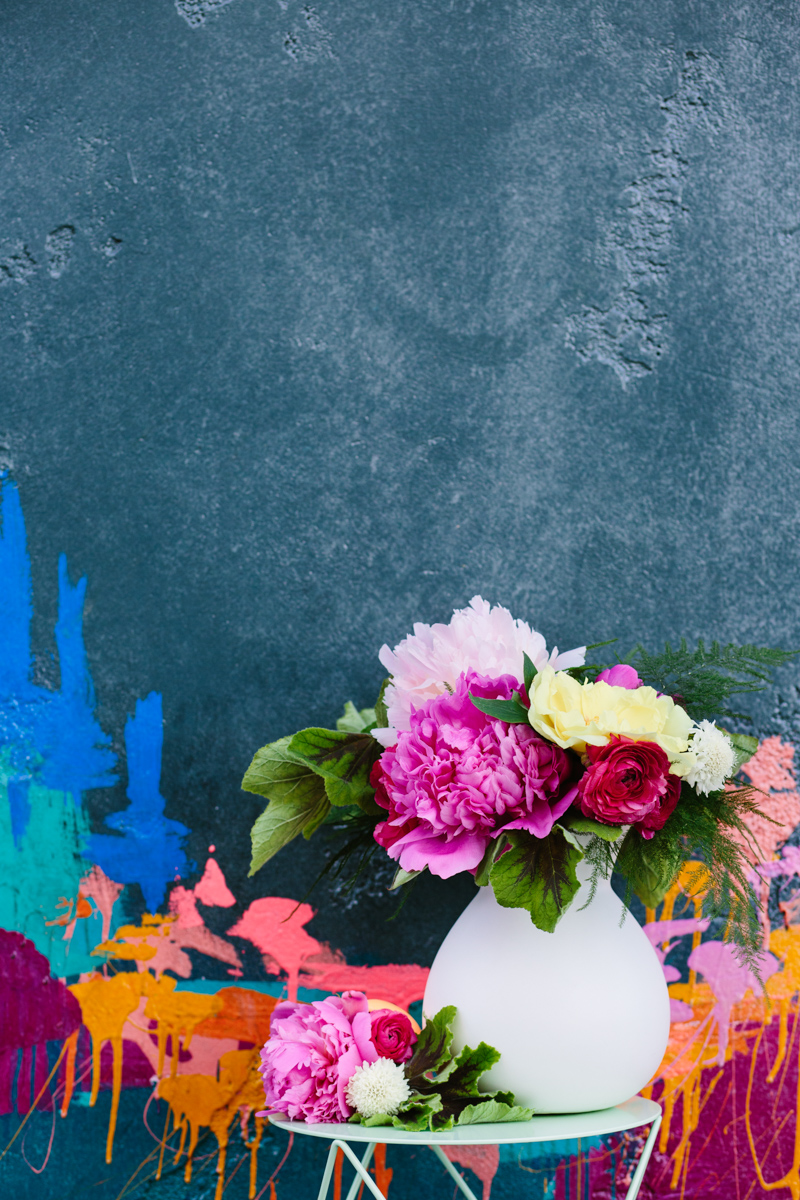
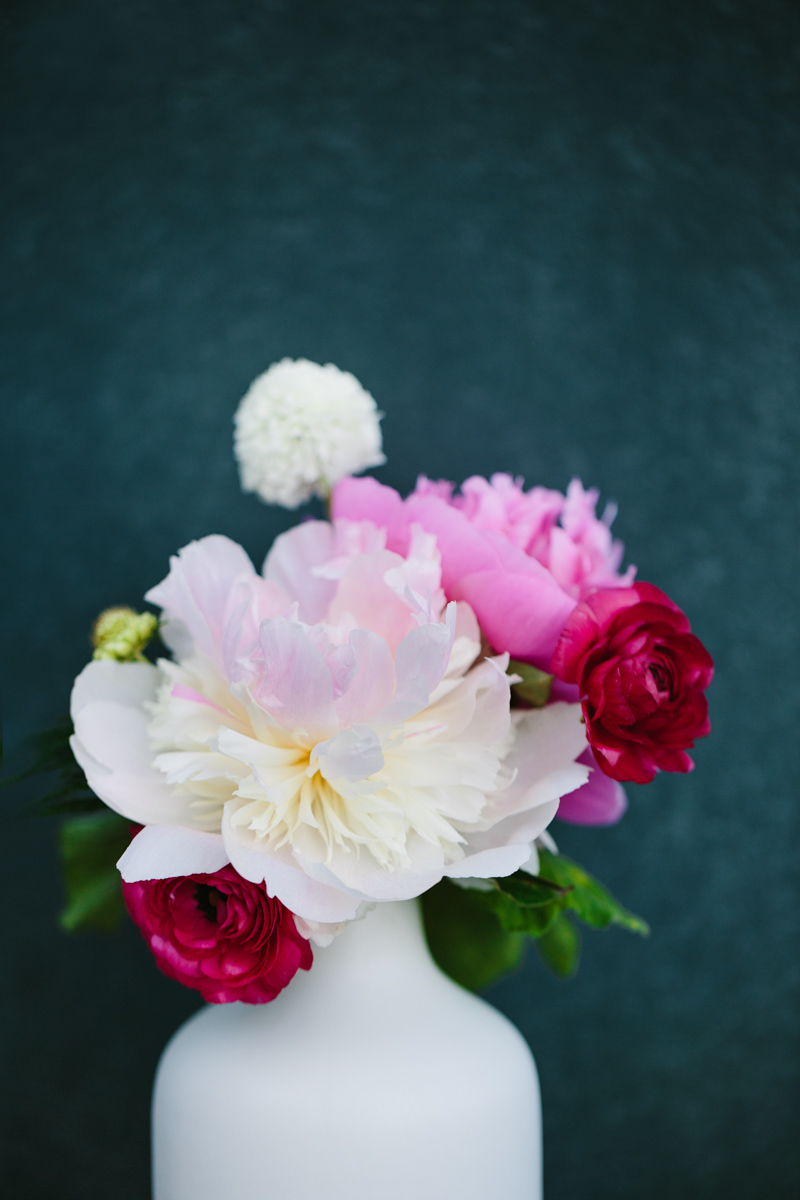
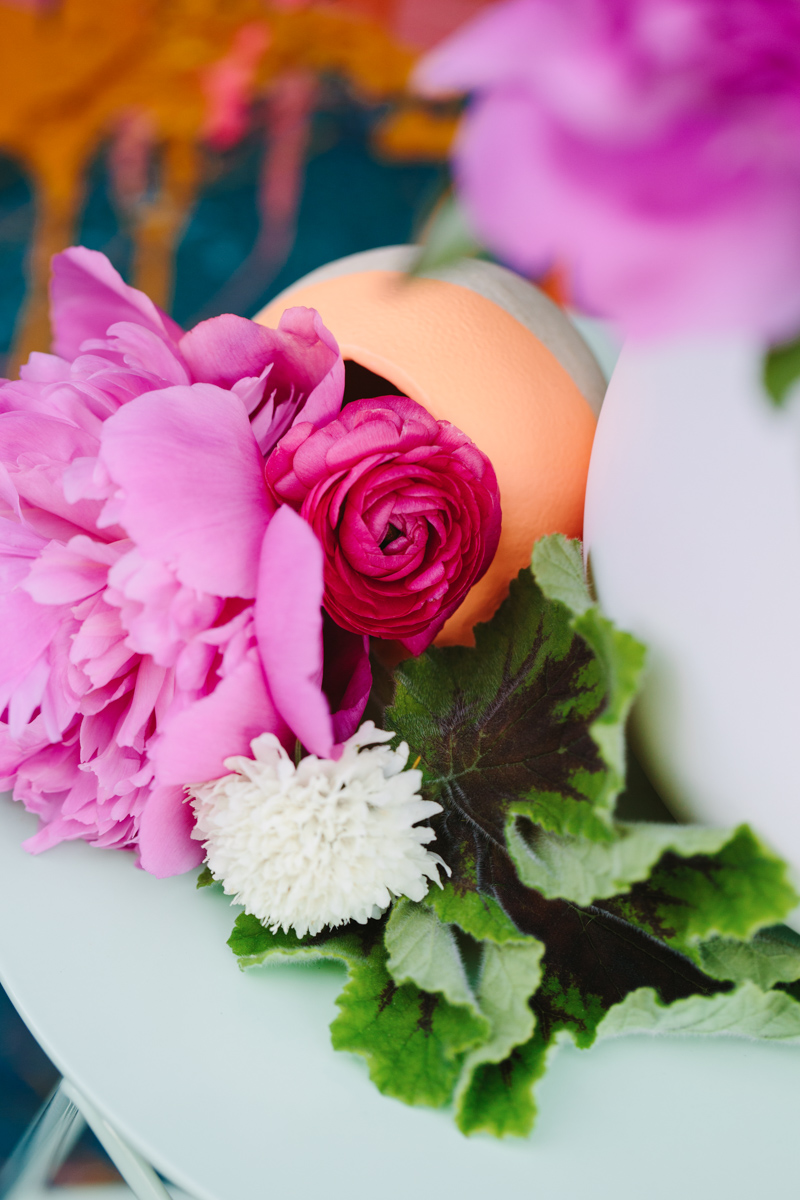
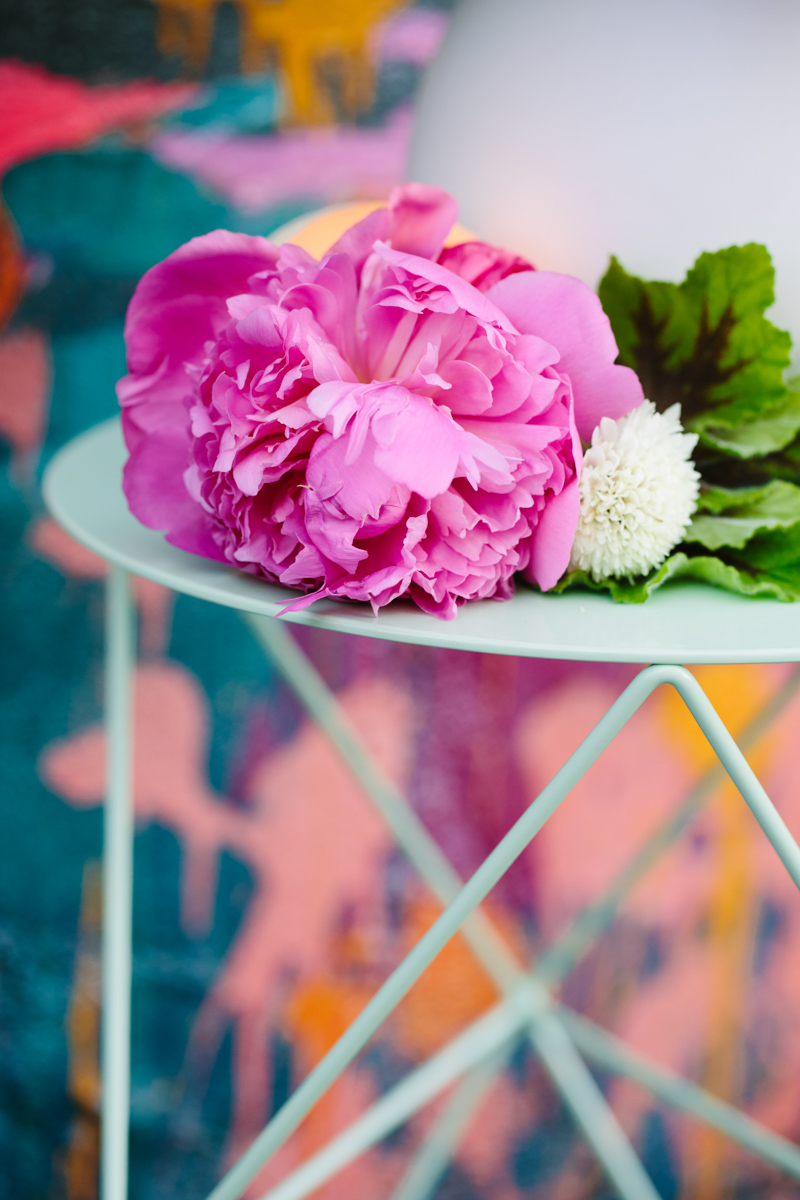
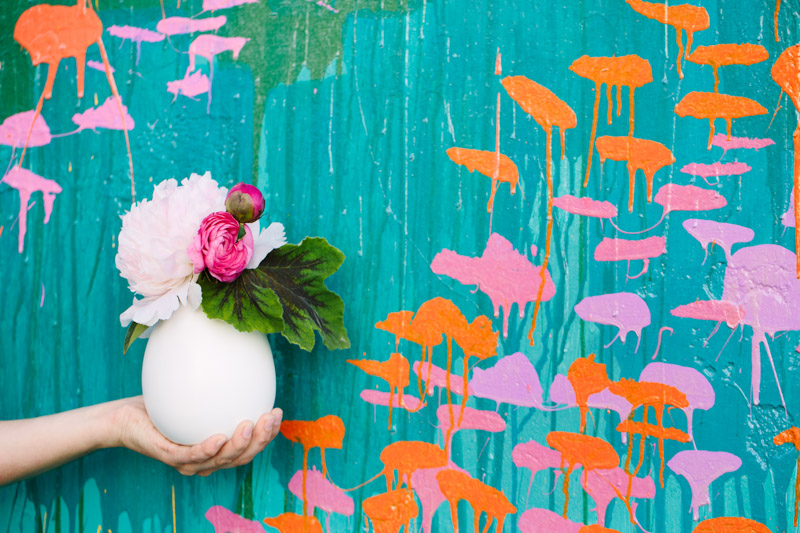
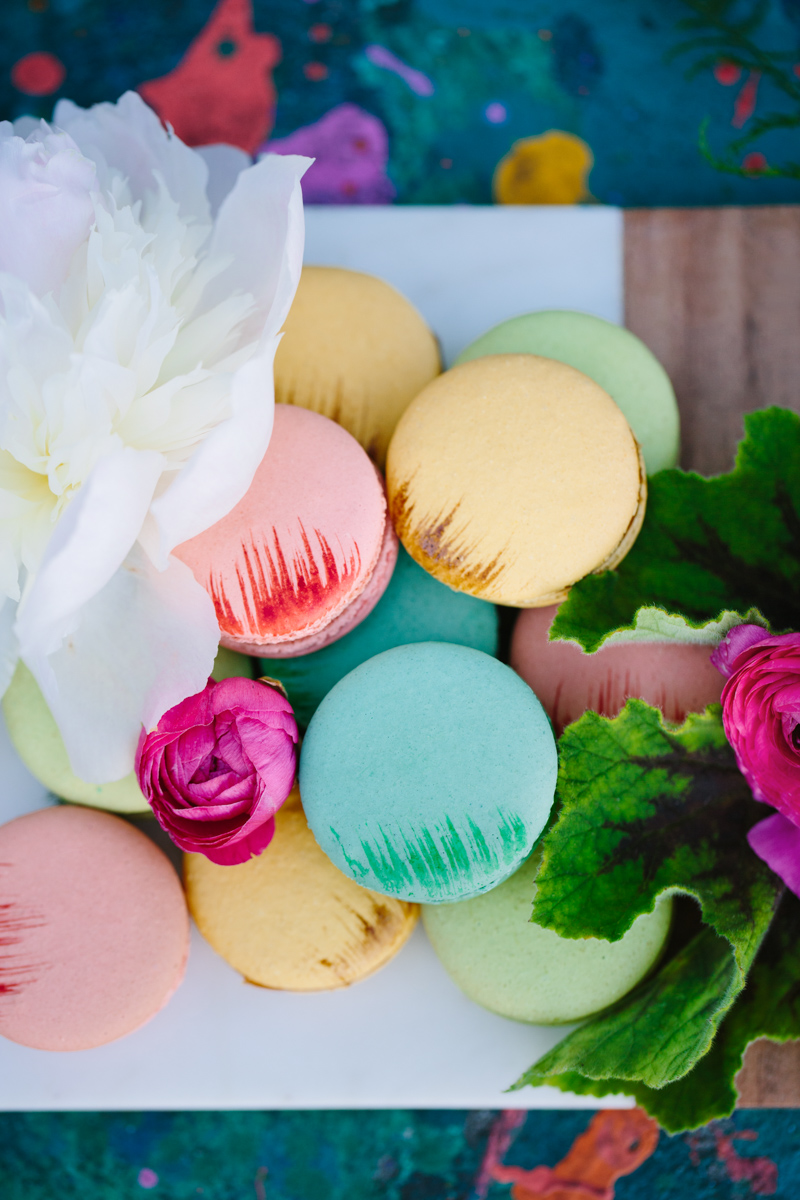
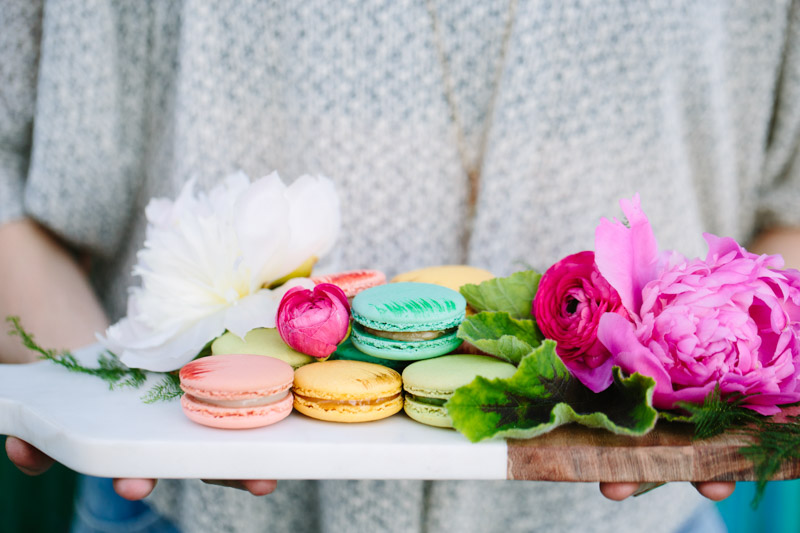
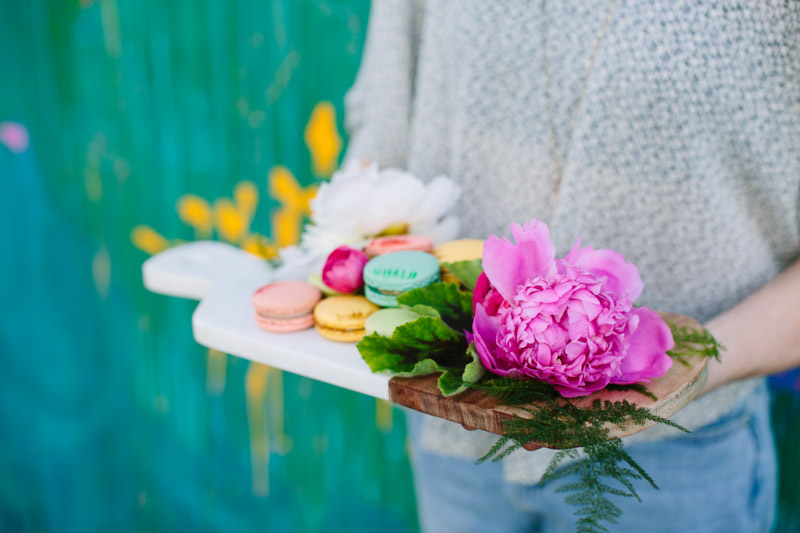
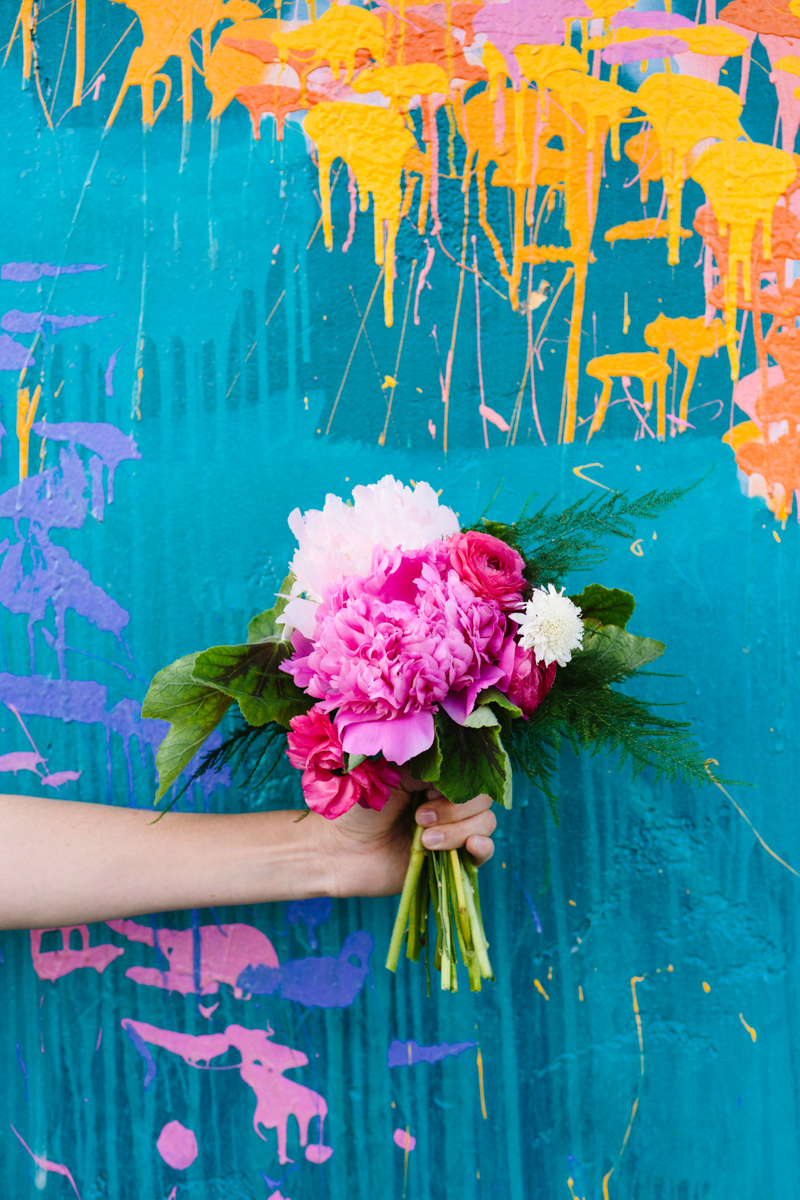
Shindig Chic + Mary Costa Photography teamed up for this minimal bright styled shoot featuring everyone's favorite flower: peonies! We wanted to show how peonies could be incorporated into all aspects of entertaining - perfect for any bridal shower, brunch or birthday.

A STYLED SHOOT FROM SHINDIG CHIC AND MARY COSTA.
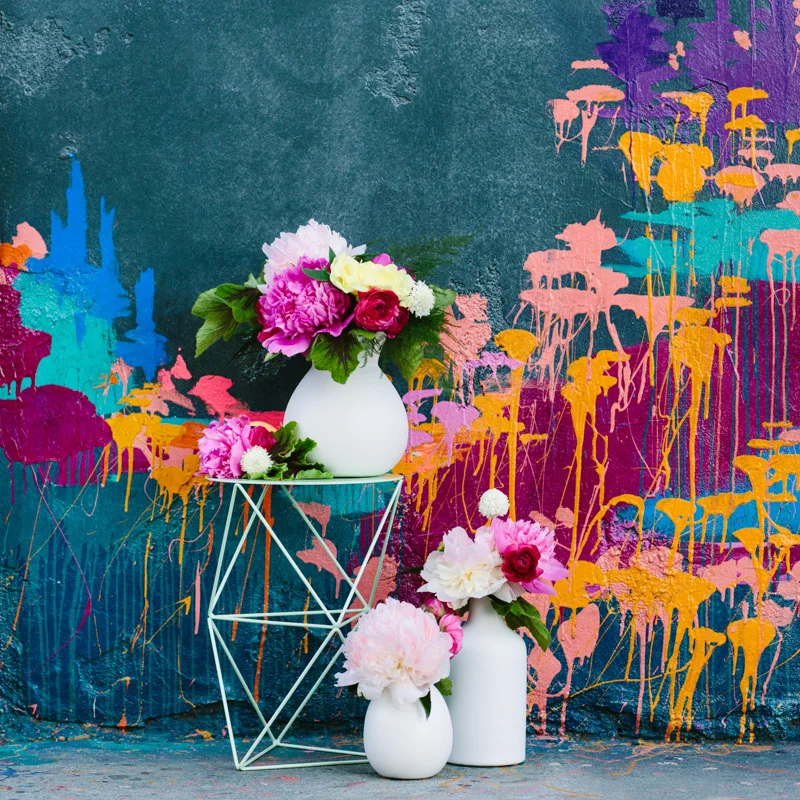
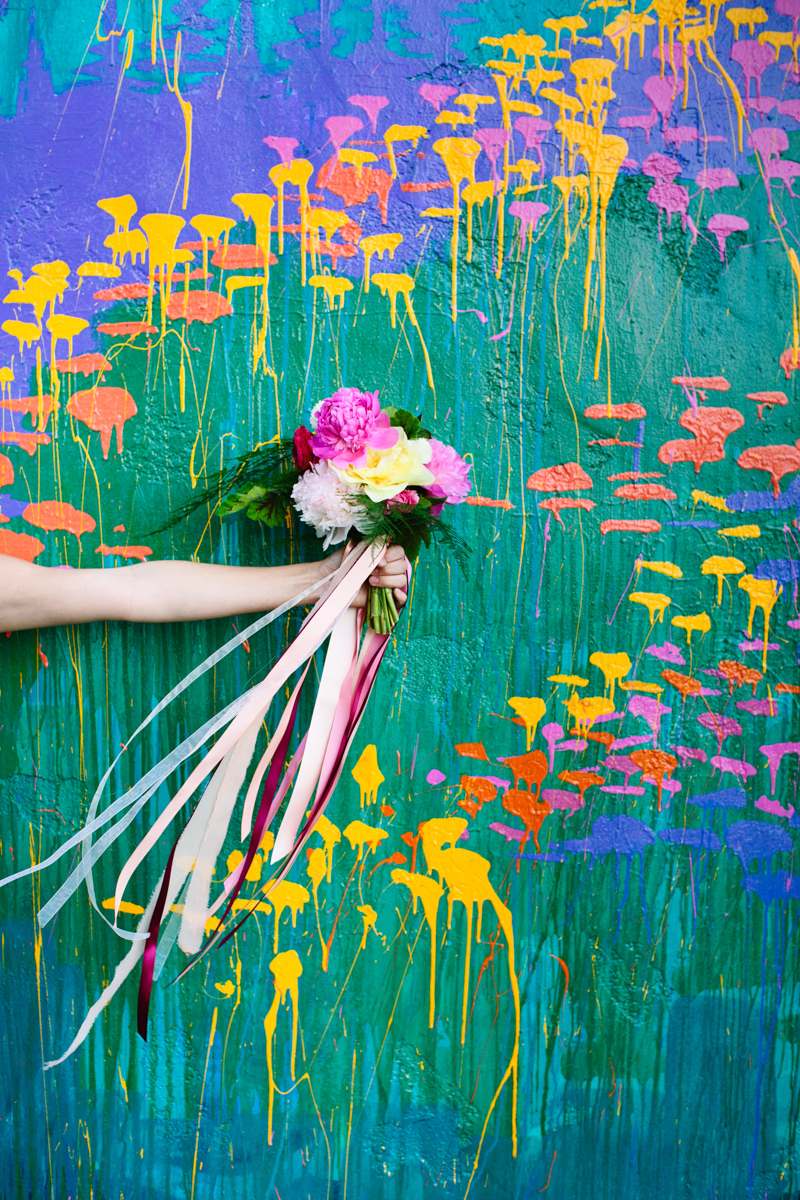
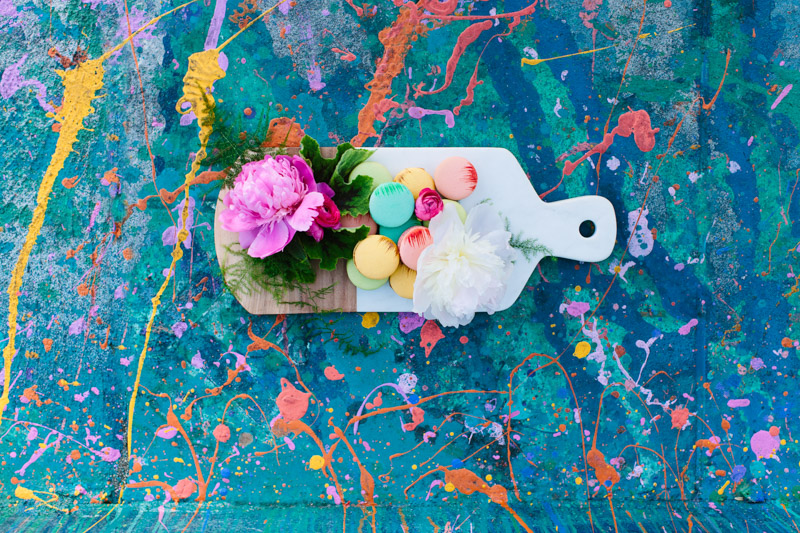
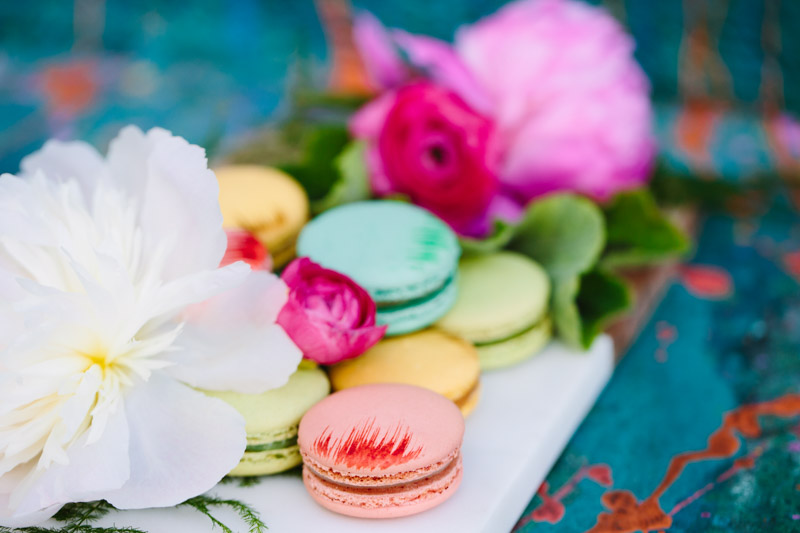
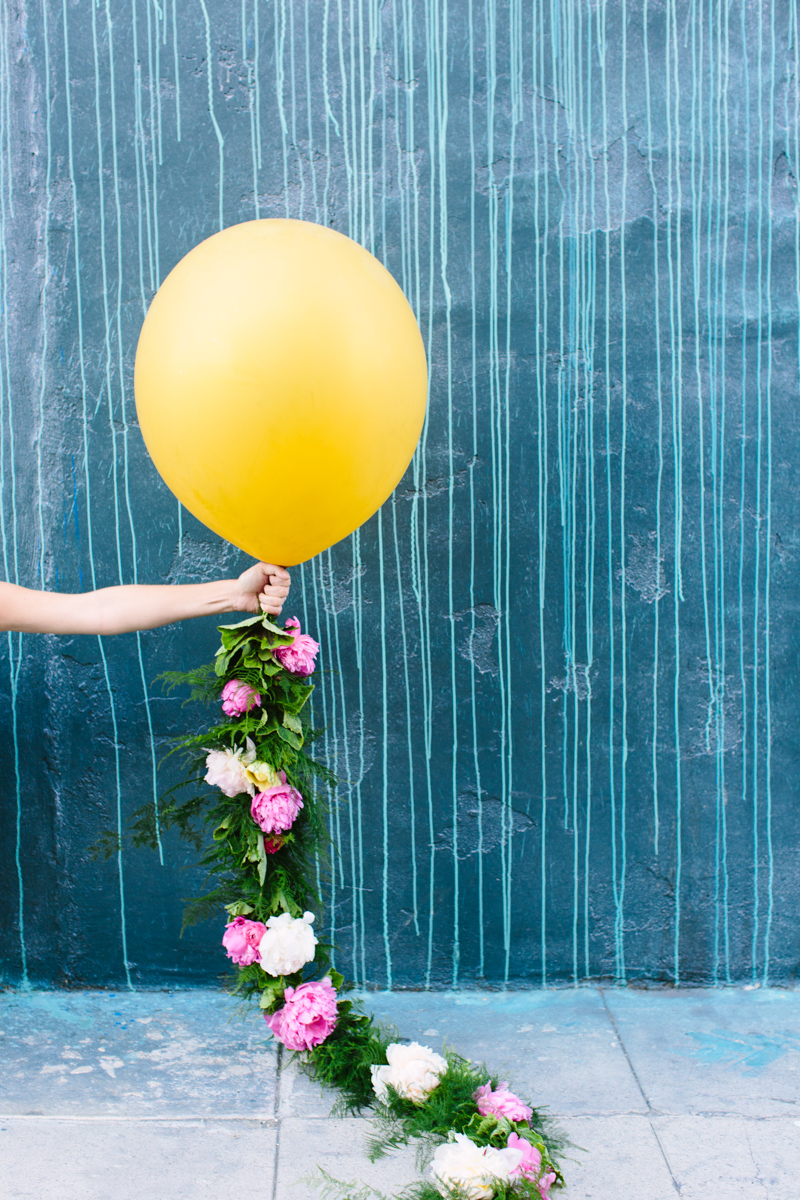
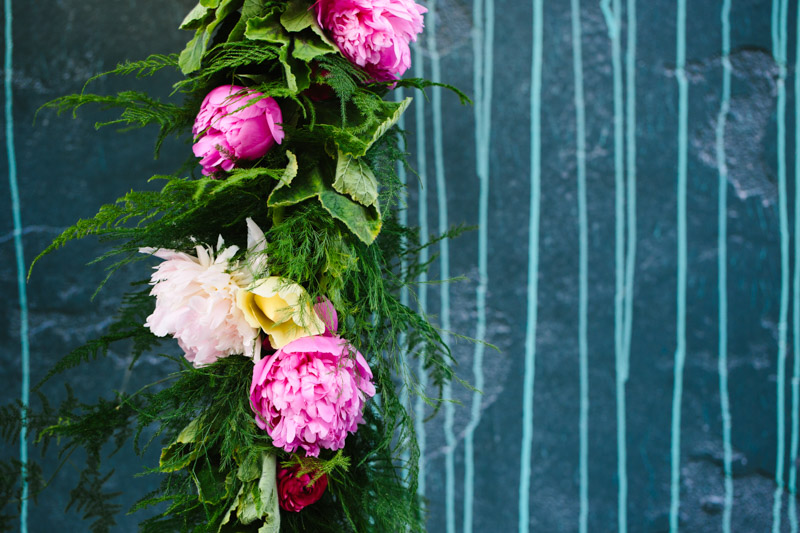
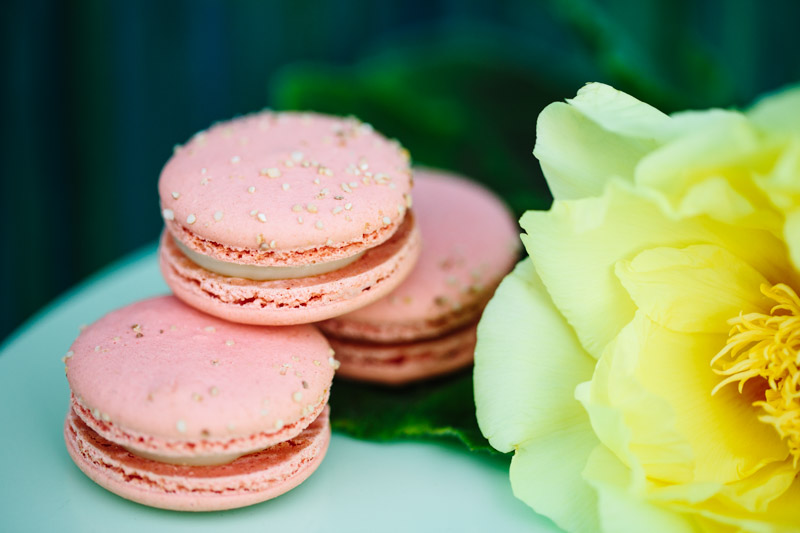
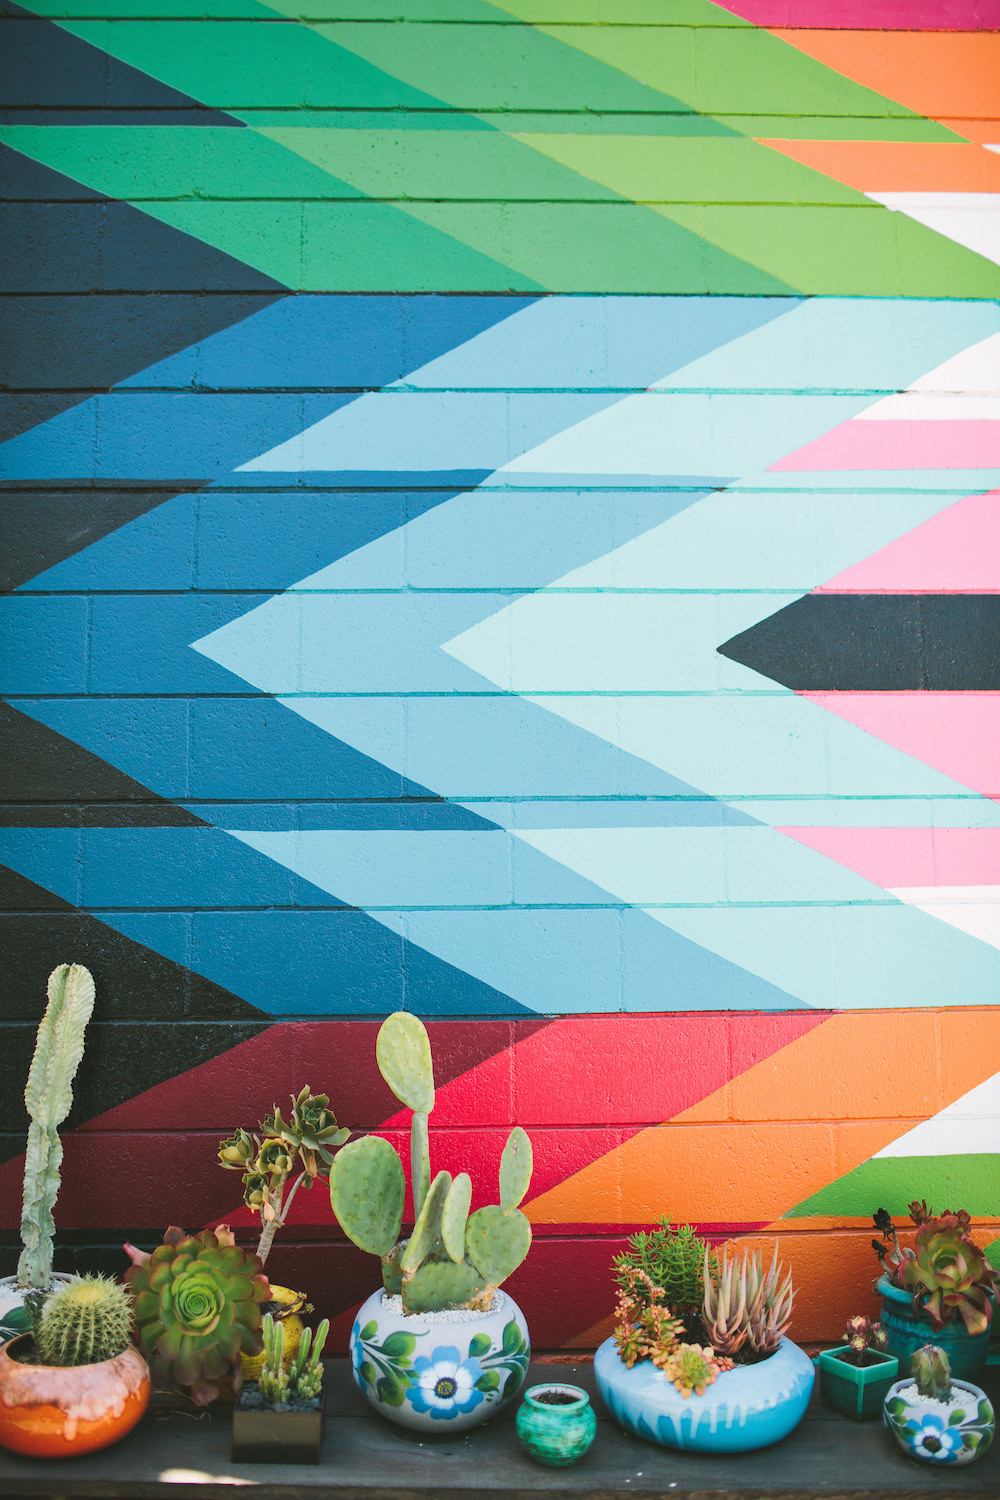
Shindig Chic + Mary Costa Photography teamed up for this minimal bright styled shoot featuring everyone's favorite flower: peonies! We wanted to show how peonies could be incorporated into all aspects of entertaining - perfect for any bridal shower, brunch or birthday. Our backdrop was the stunning piece of street art by Kim West in the Downtown LA Arts District. This painterly masterpiece with it's bright colors and modern edge gives this all such a fun and playful feel. We brought in a few other favorite party must haves: 'Lette Macarons & balloons.
PHOTO: MARY COSTA PHOTOGRAPHY / @MARYCOSTAPHOTO
FLORAL & STYLING: SHINDIG CHIC / @SHINDIGCHIC
BACKDROP WALL: 'ODE TO BOHEMIA' BY KIM WEST, 7TH ST. & MILL ST.
/ @WESTKIM #KIMWESTPAINTING
MACARONS: 'LETTE MACARONS / @LETTEMACARONS
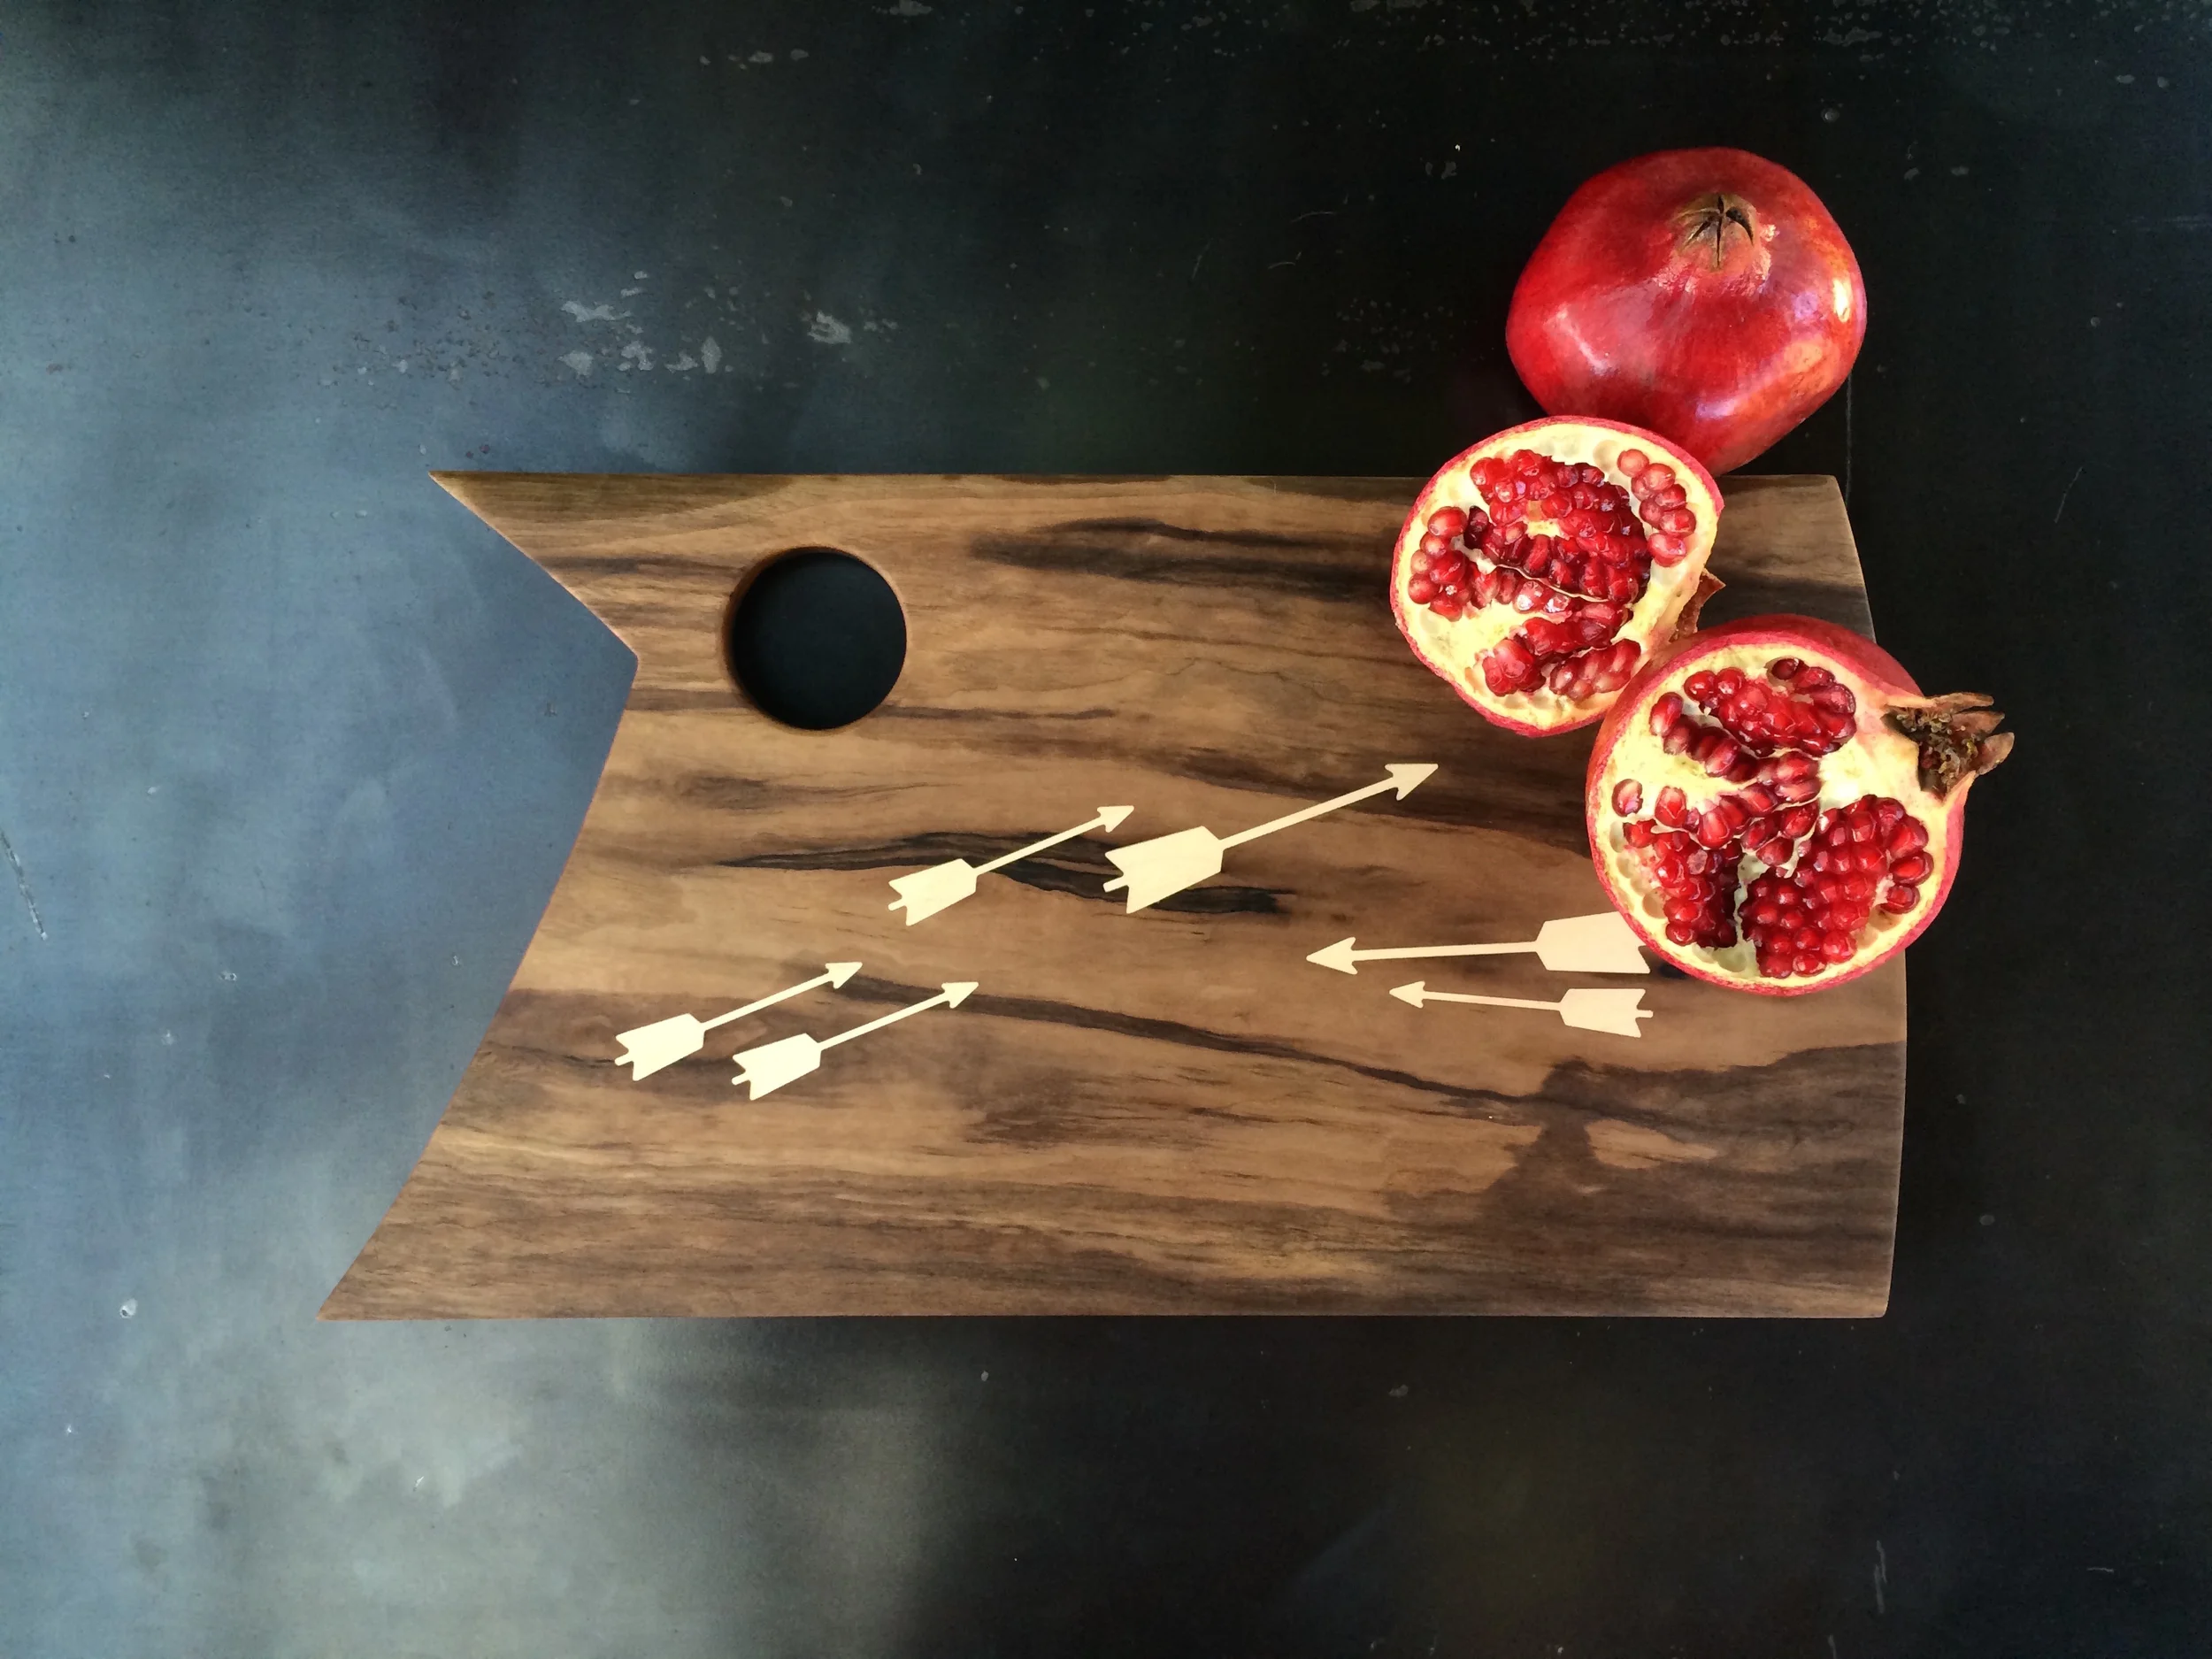
TABLE, VASES & MARBLE CUTTING BOARD: WEST ELM / @WESTELMLA

Angelena Moio is the Owner / Floral Designer of Shindig Chic in LA.
Mary Costa Photography is a wedding and lifestyle photographer who works with some of the top party bloggers in Southern California, best known for her work with Studio DIY.


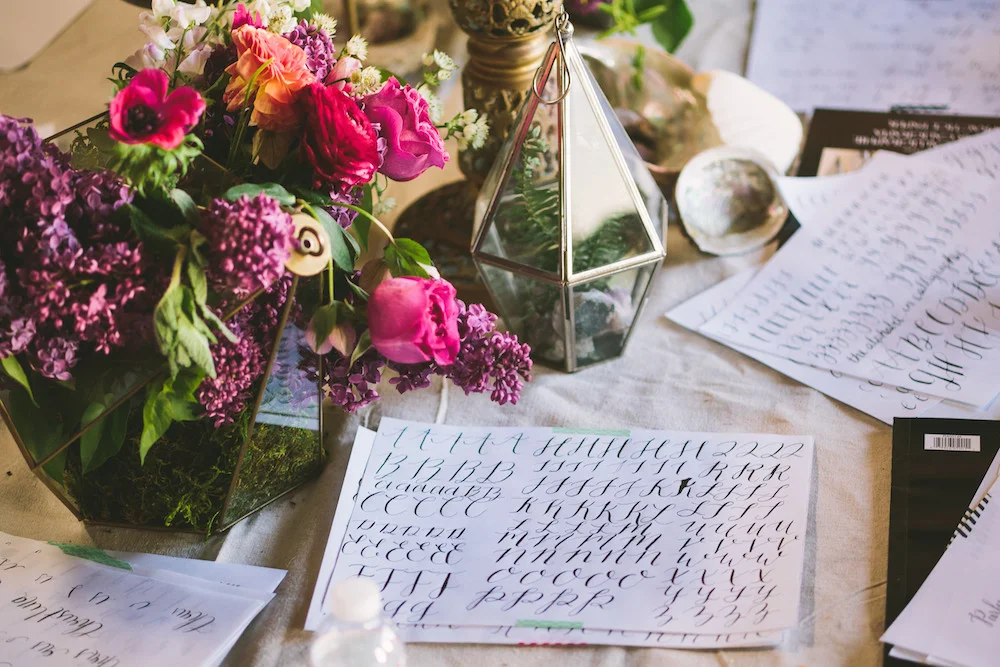
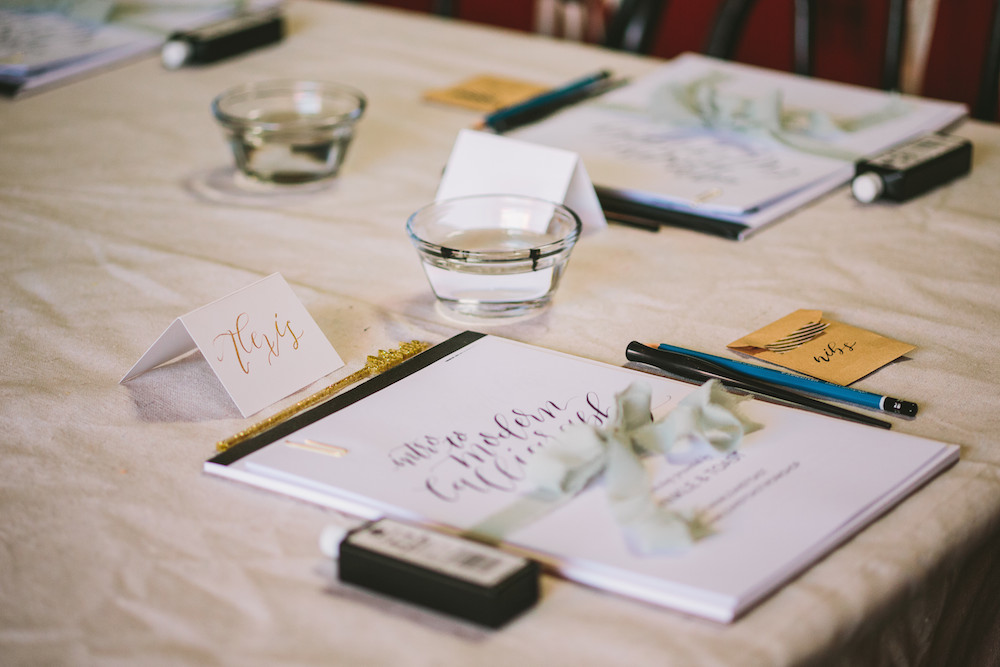
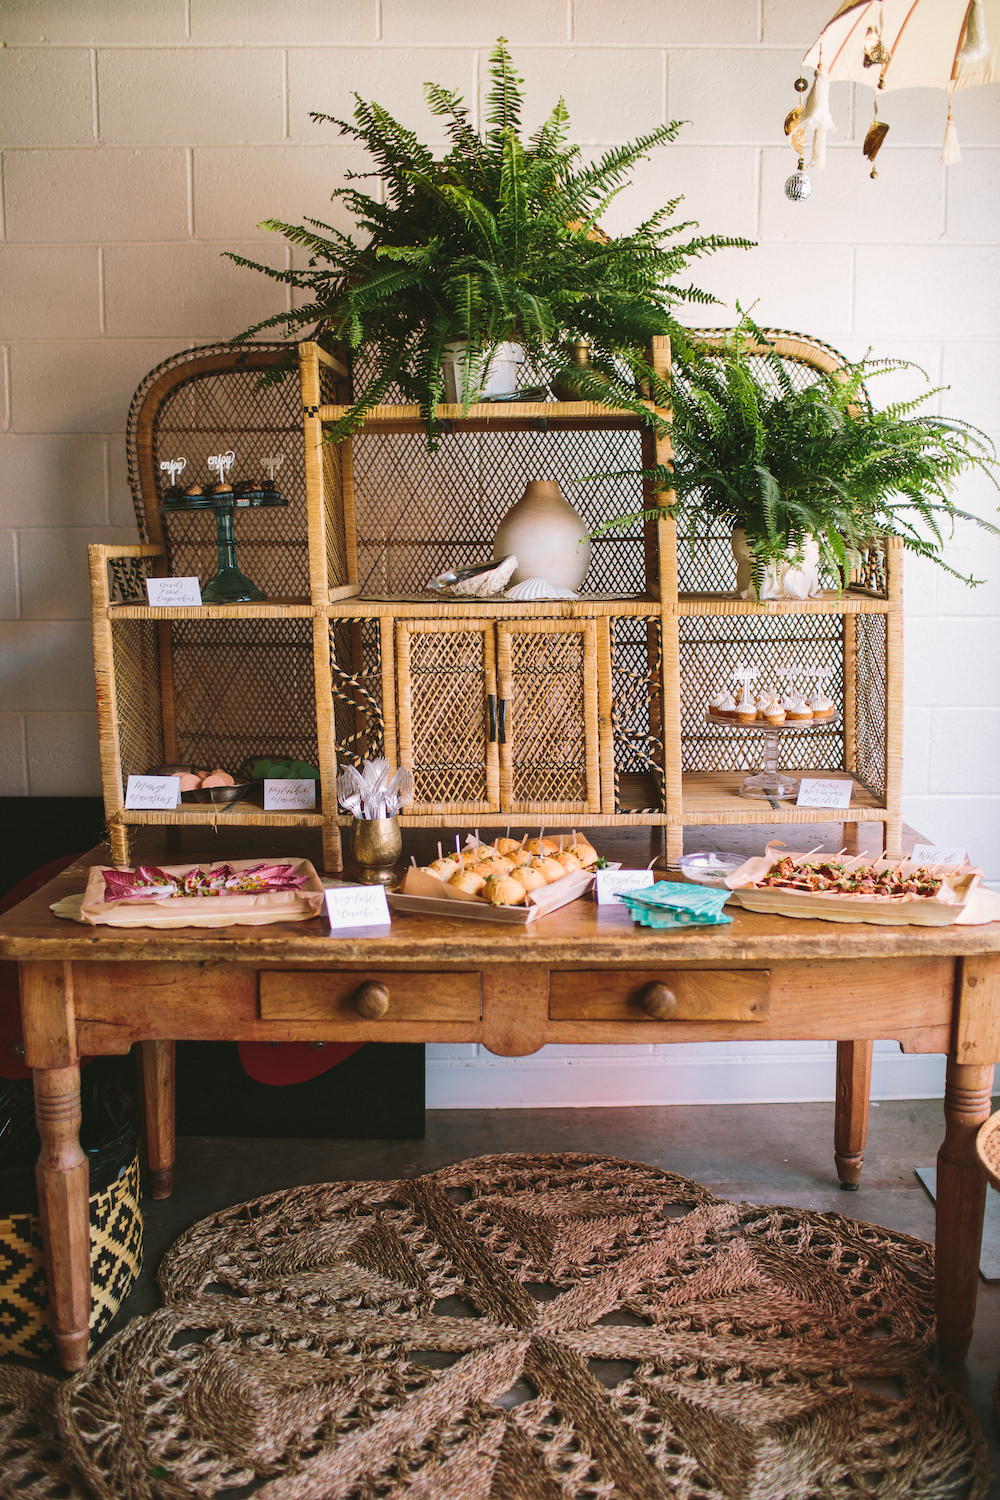
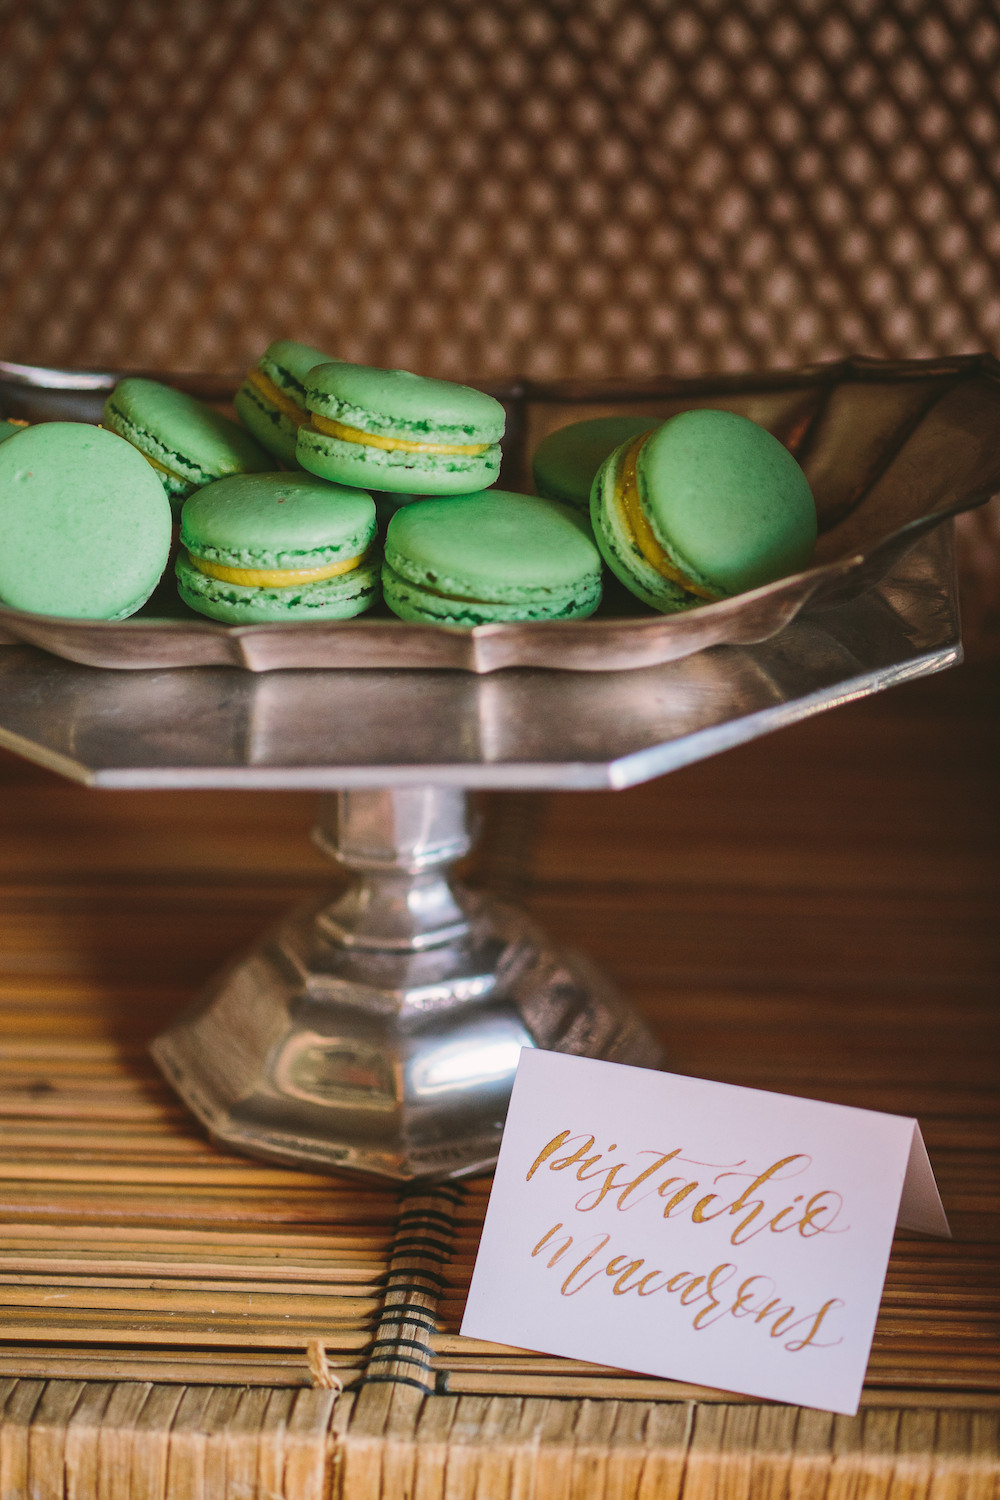
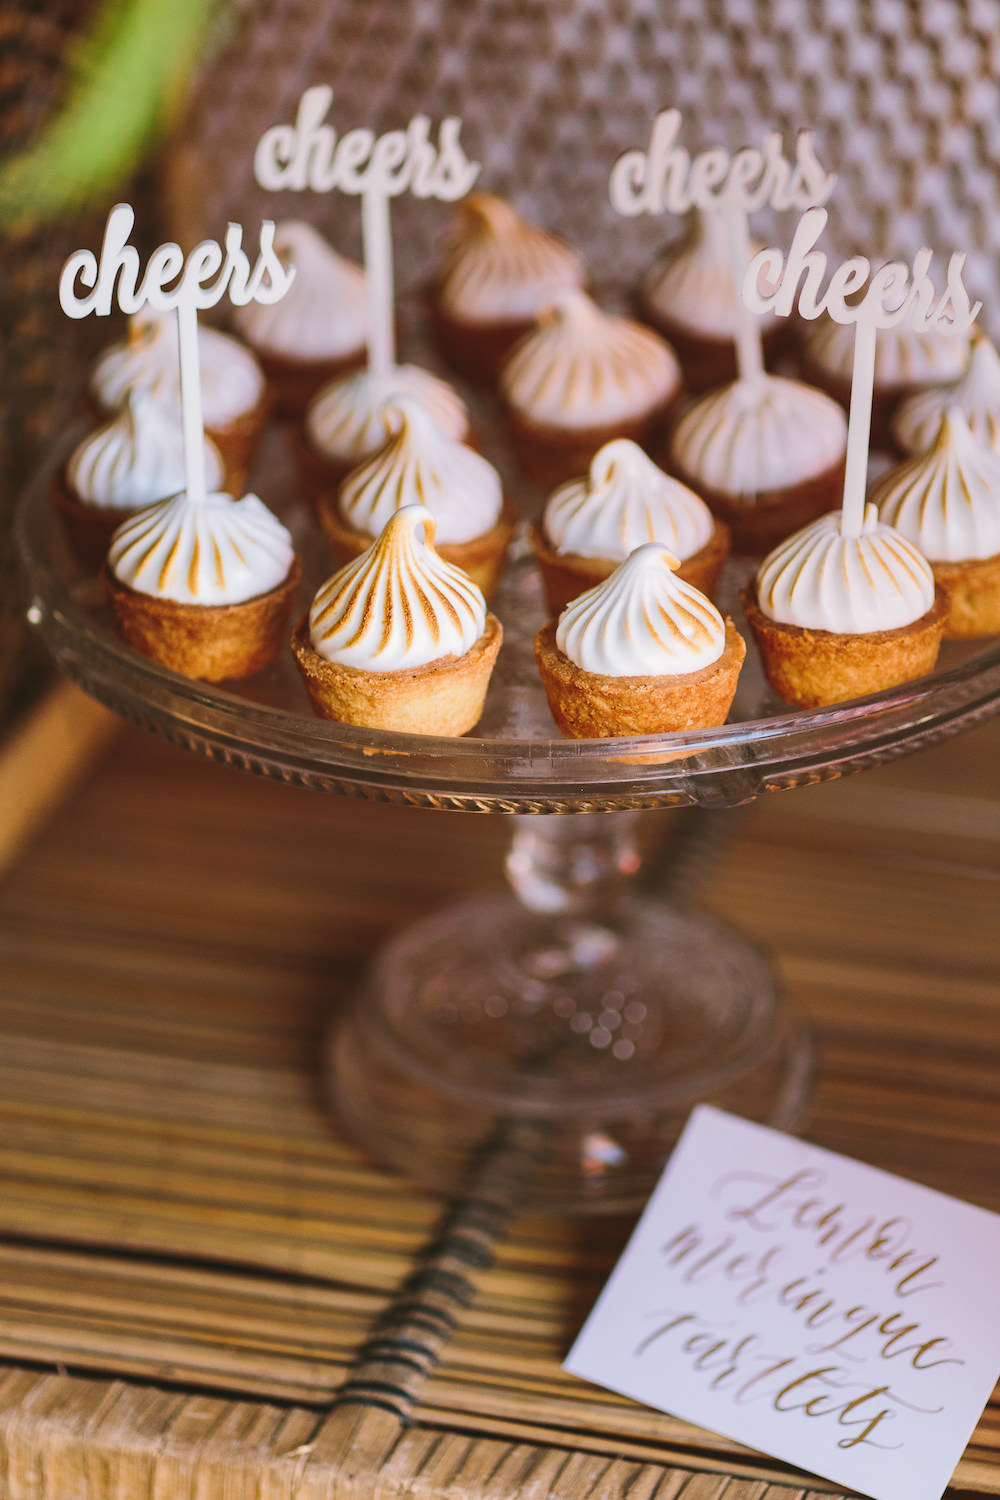
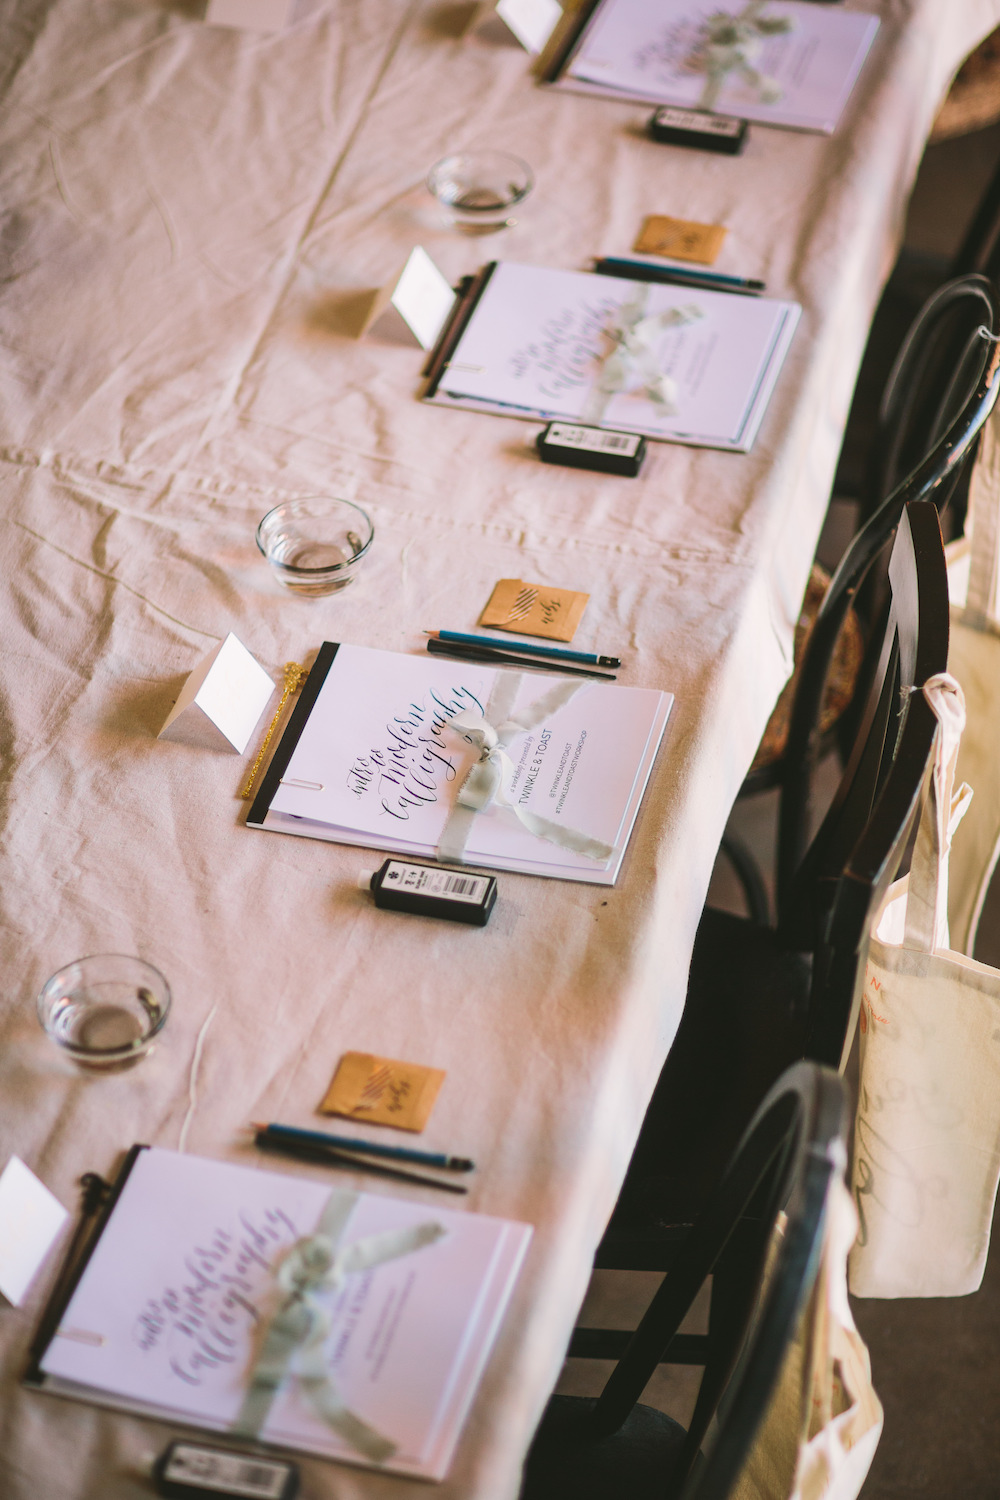
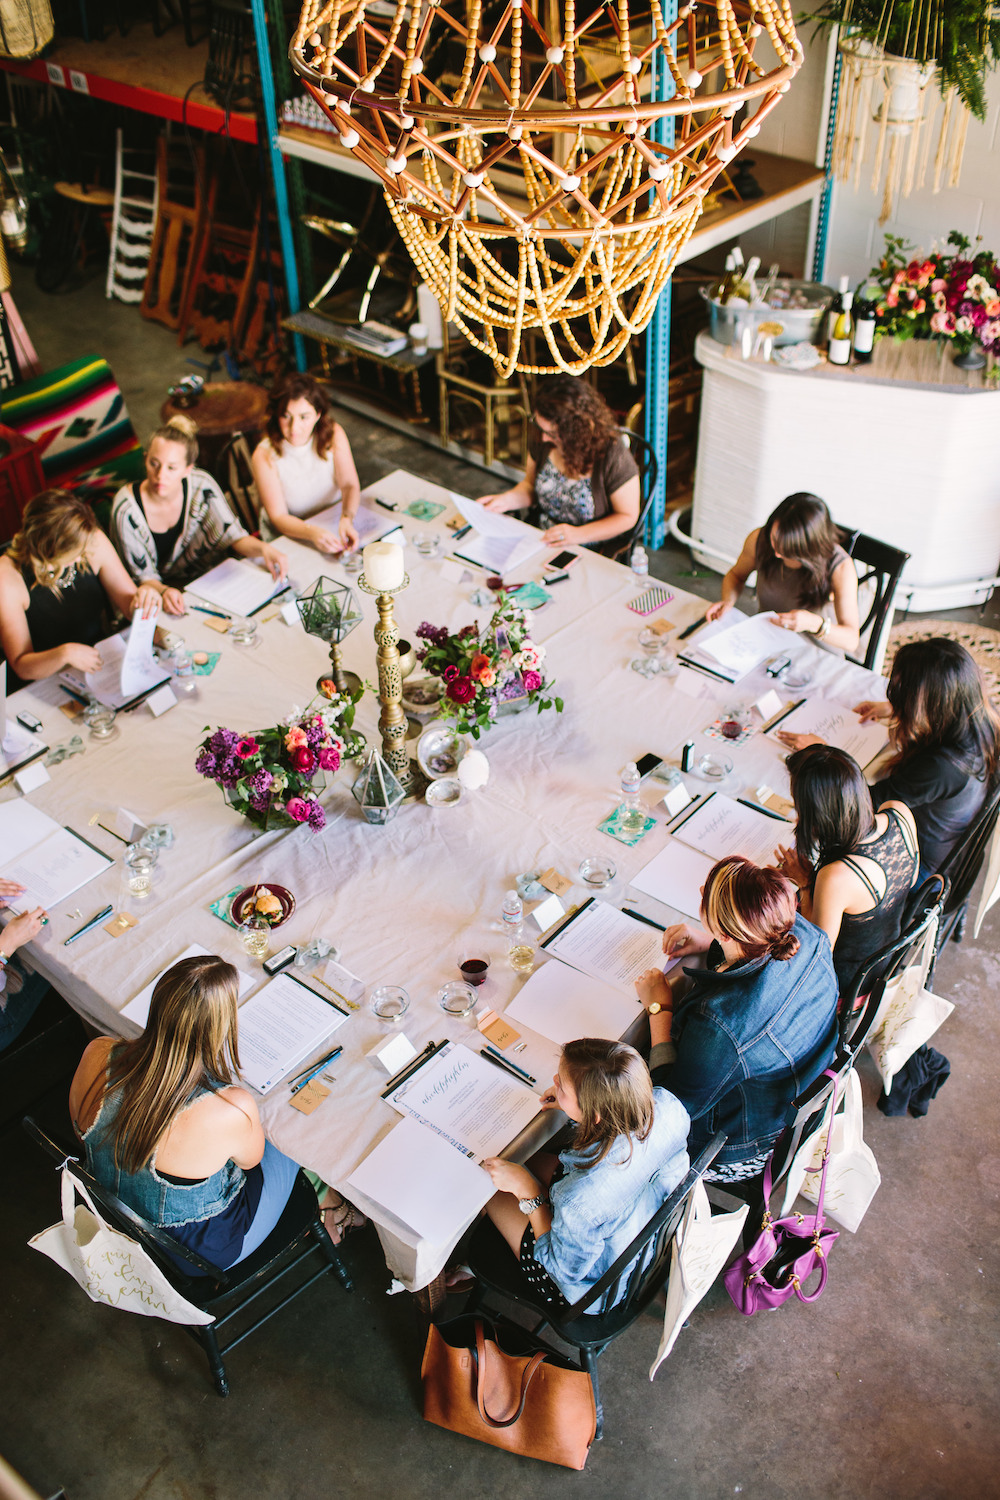
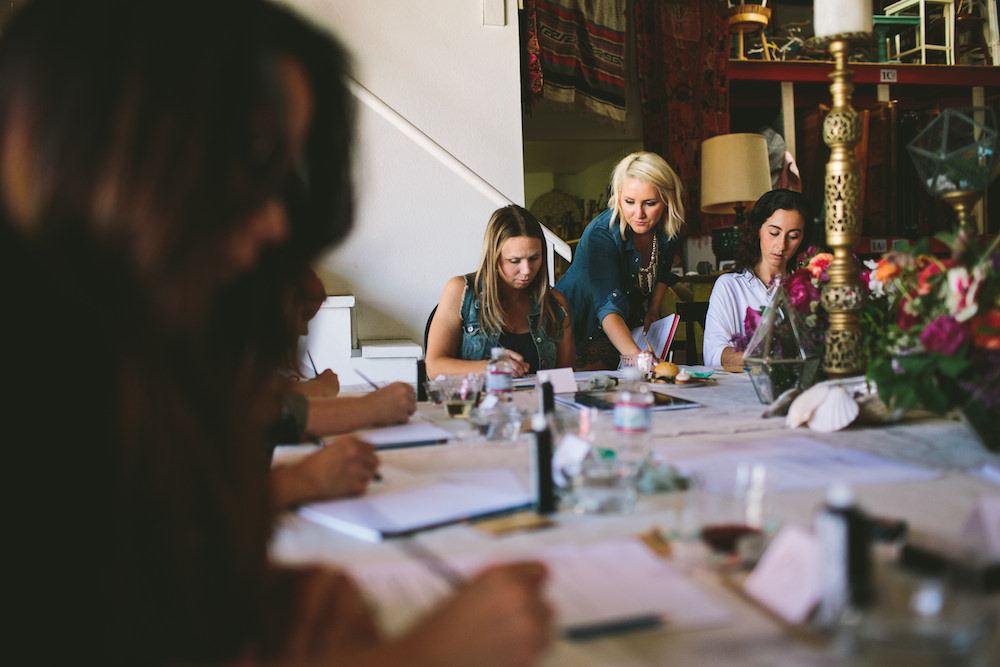
INTRO TO MODERN CALLIGRAPHY WITH TWINKLE & TOAST
We love workshops. Not only do you get to learn new skills and explore new creative outlets; but you also get to network and meet new people.

Photography by Let's Frolic Together
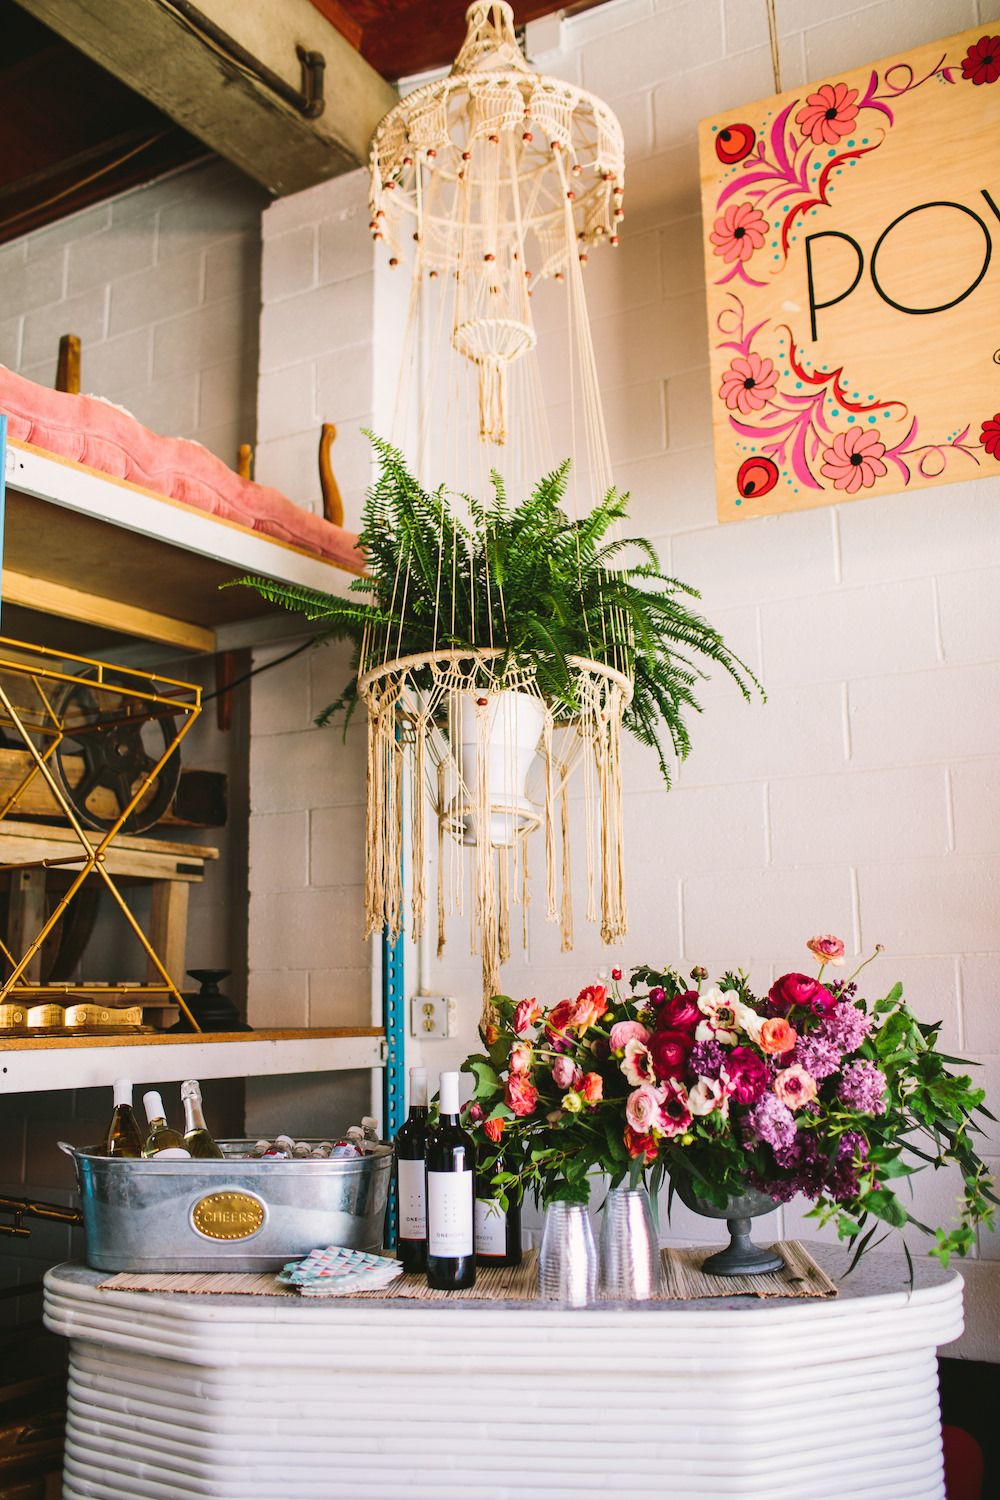
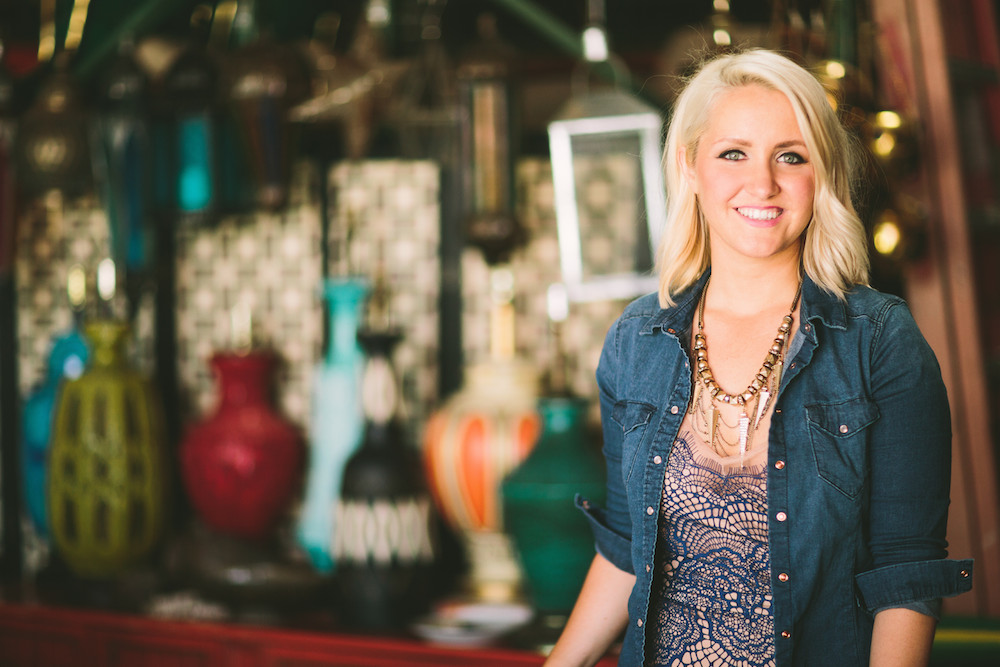
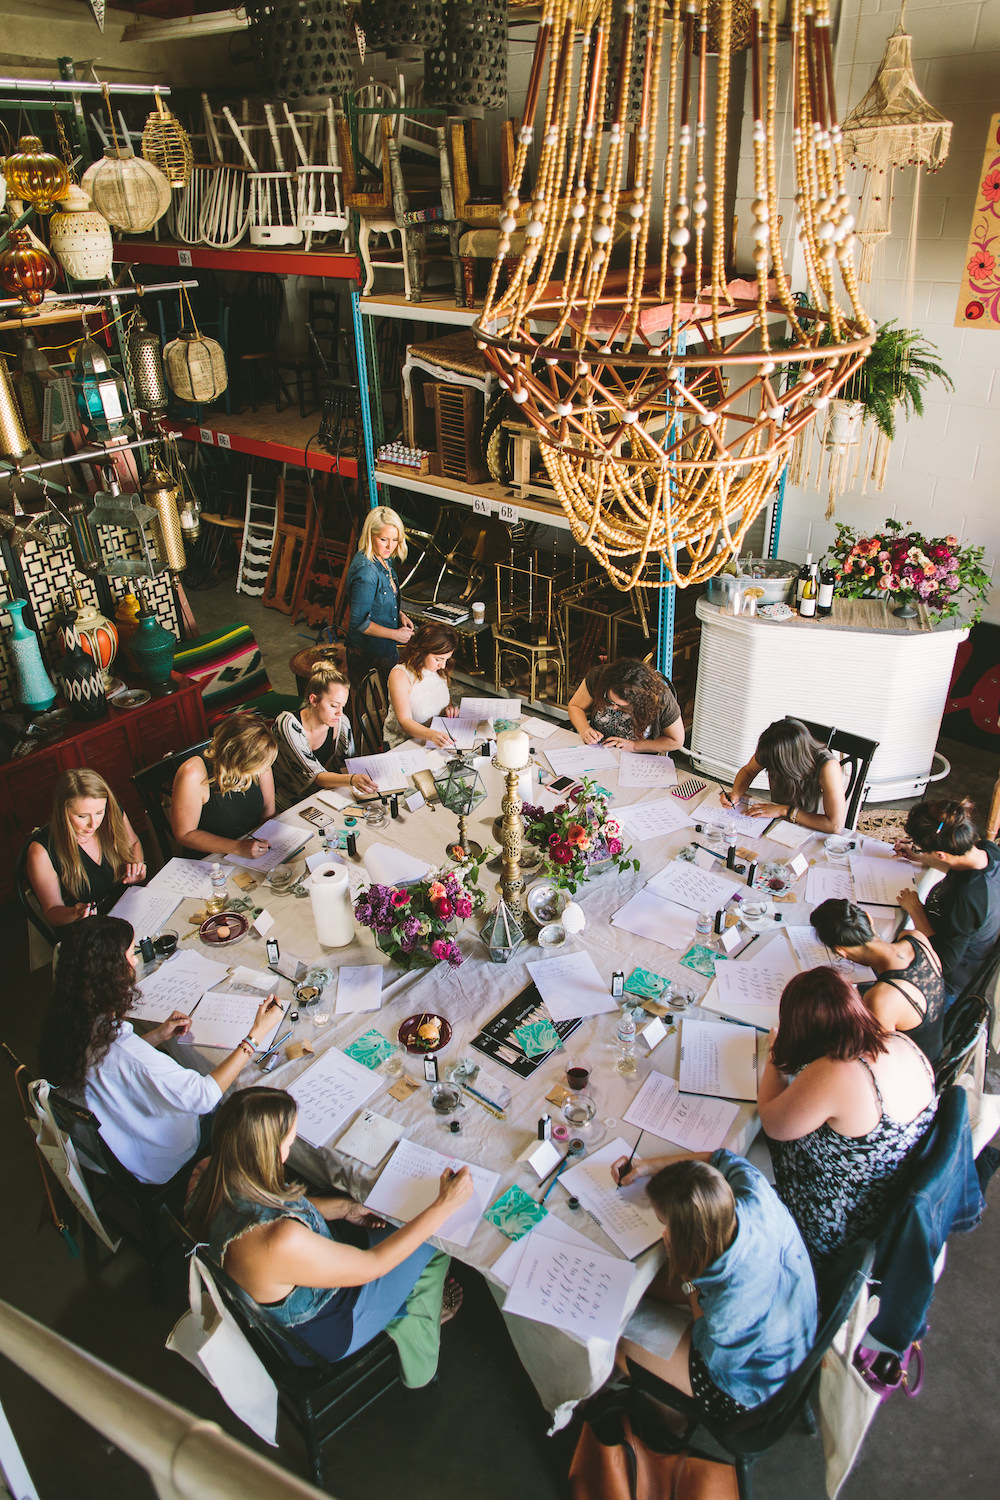
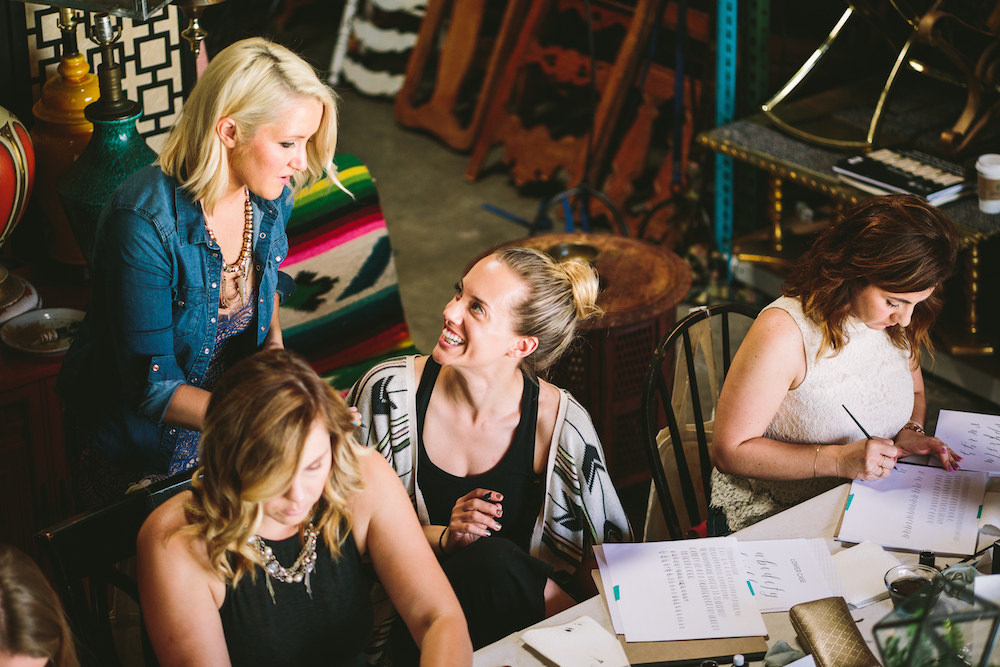
We love workshops. Not only do you get to learn new skills and explore new creative outlets; but you also get to network and meet new people. To us, being able to connect with like-minded individuals, while exploring something you are passionate about, is what this whole community is all about. So today, we are so excited to share with you this post with from Taryn Sutherland, owner of Twinkle & Toast , and a look at one of her Calligraphy workshops in San Diego, CA.
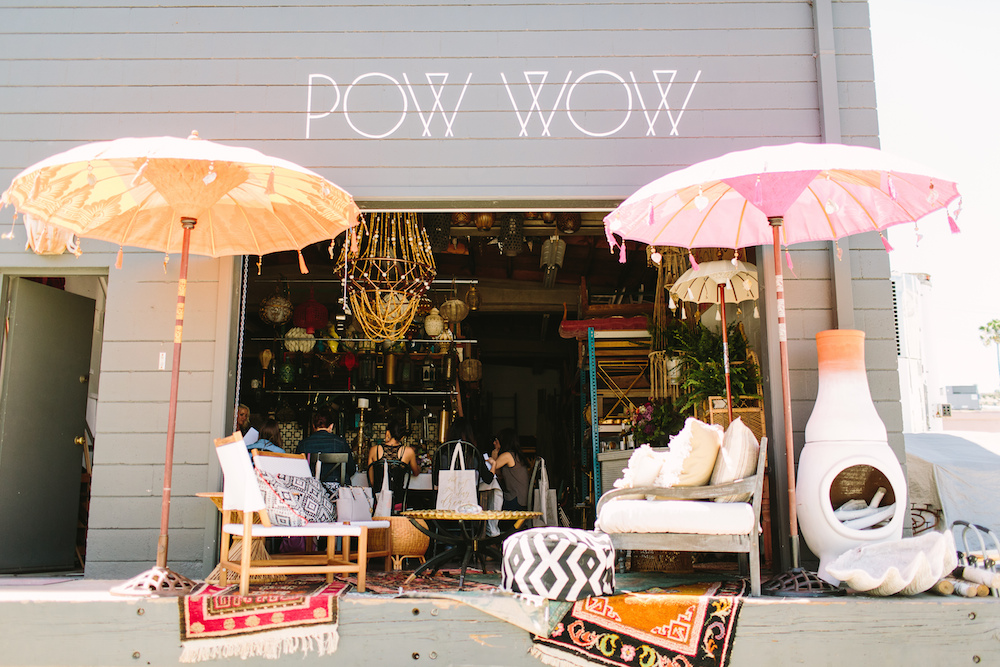
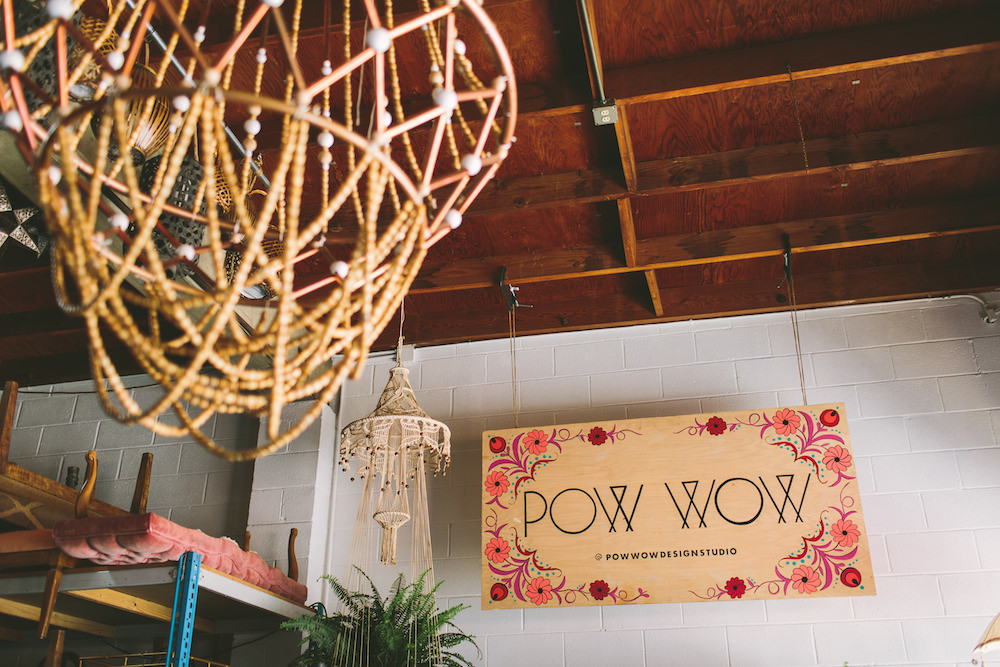
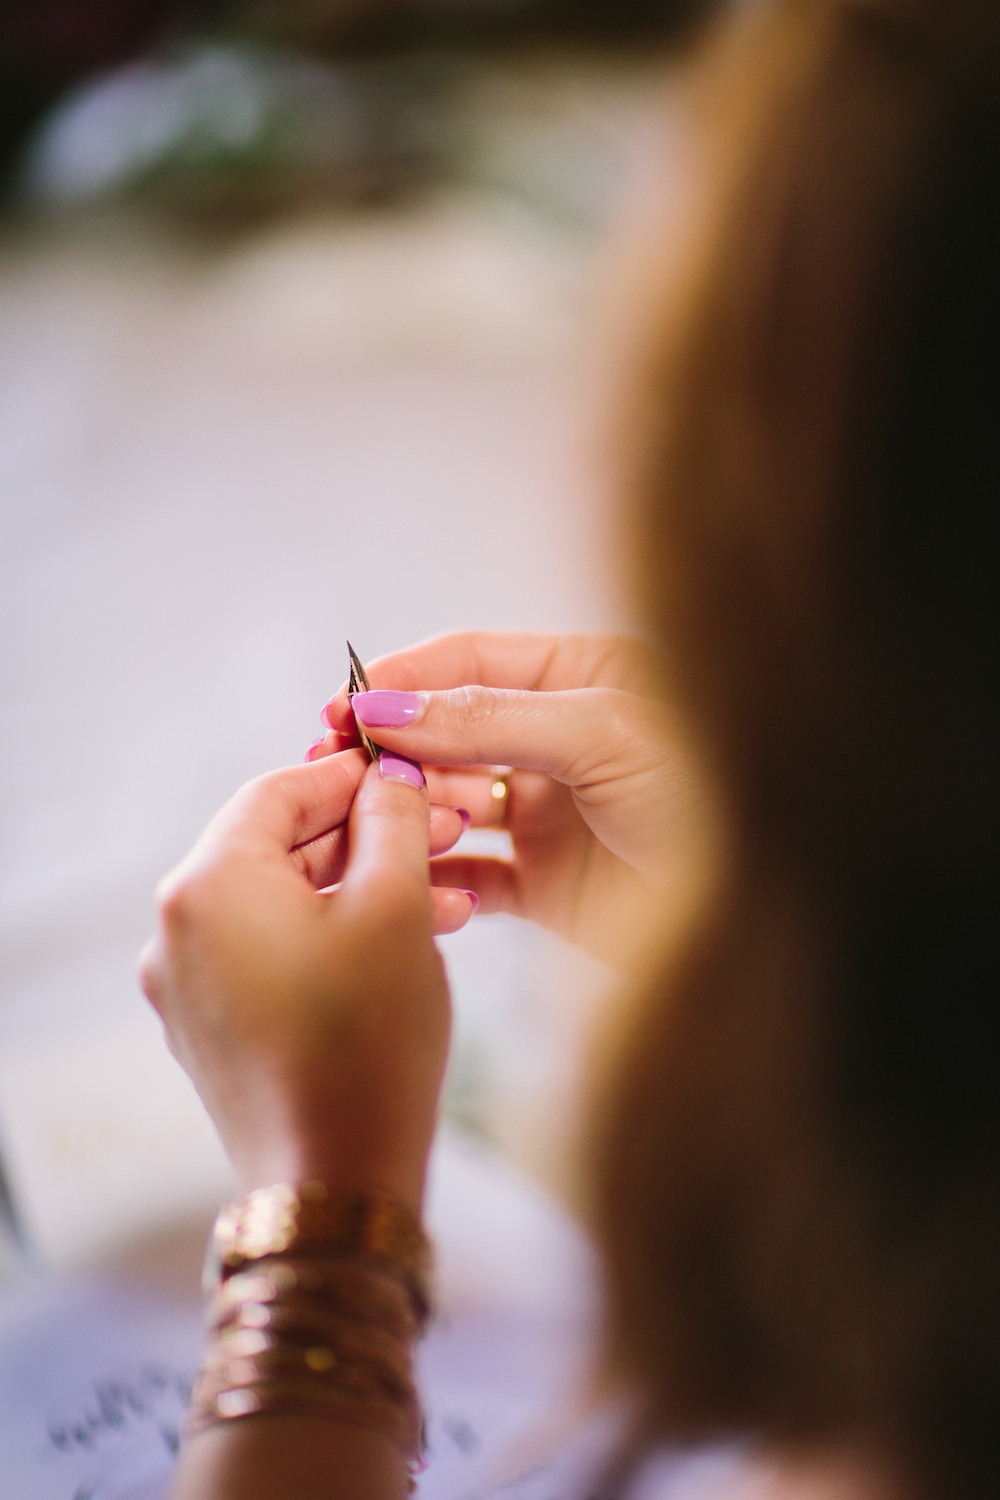
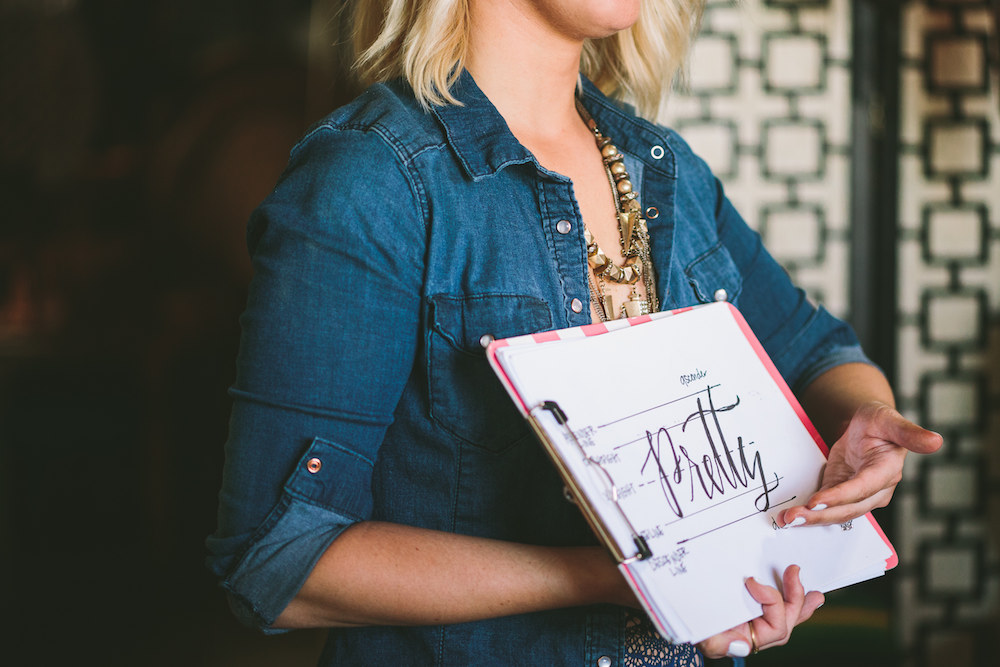
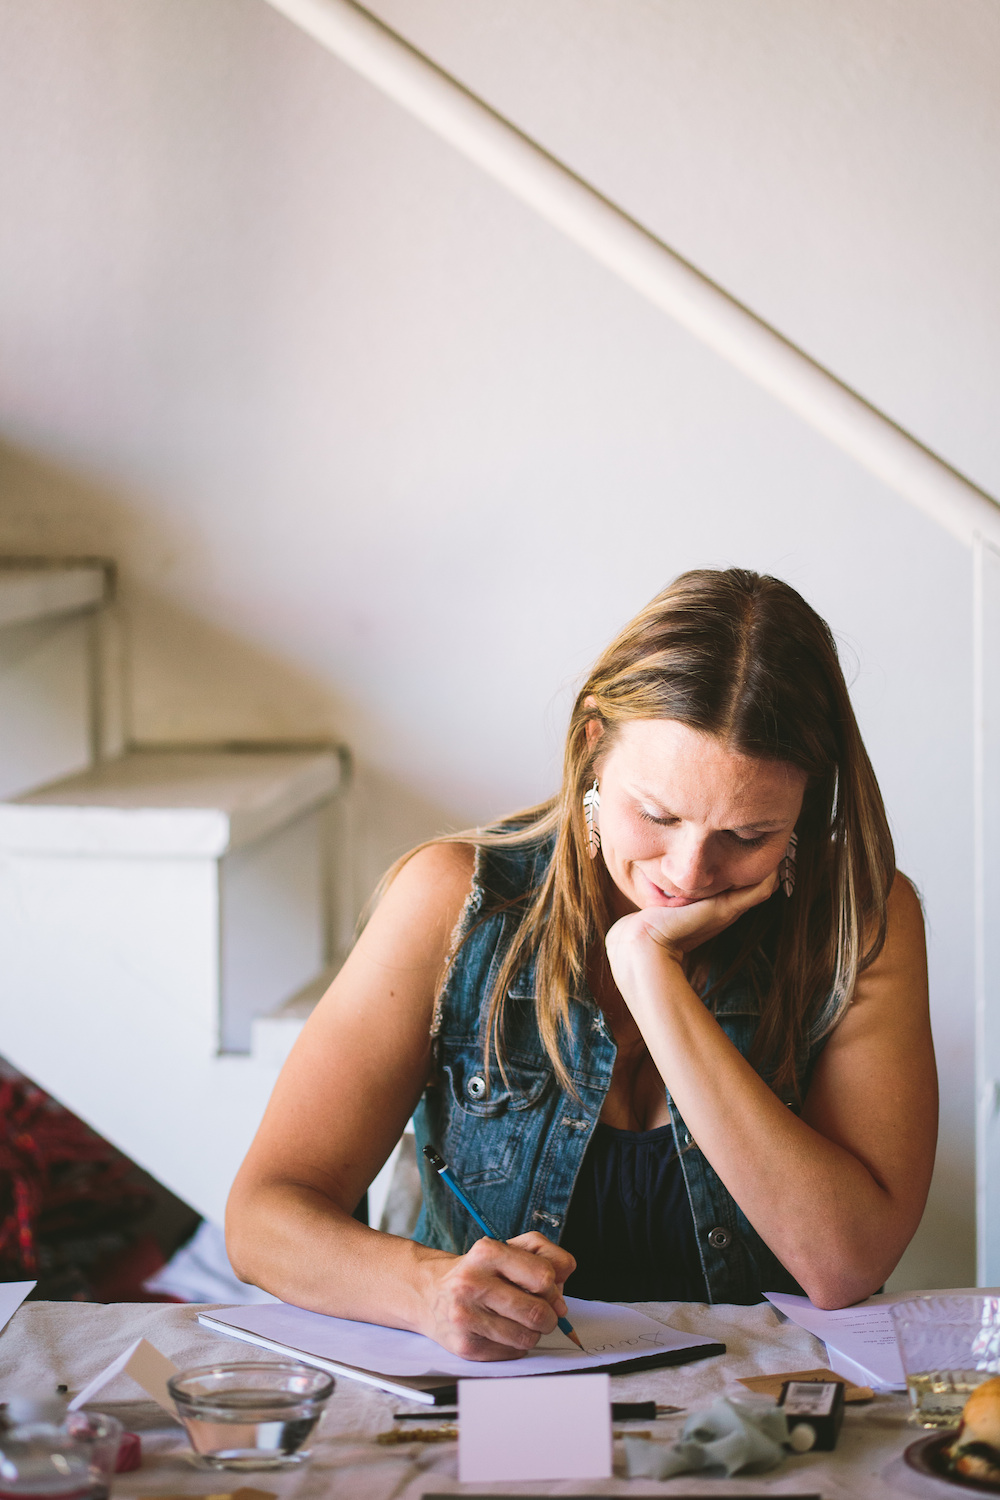
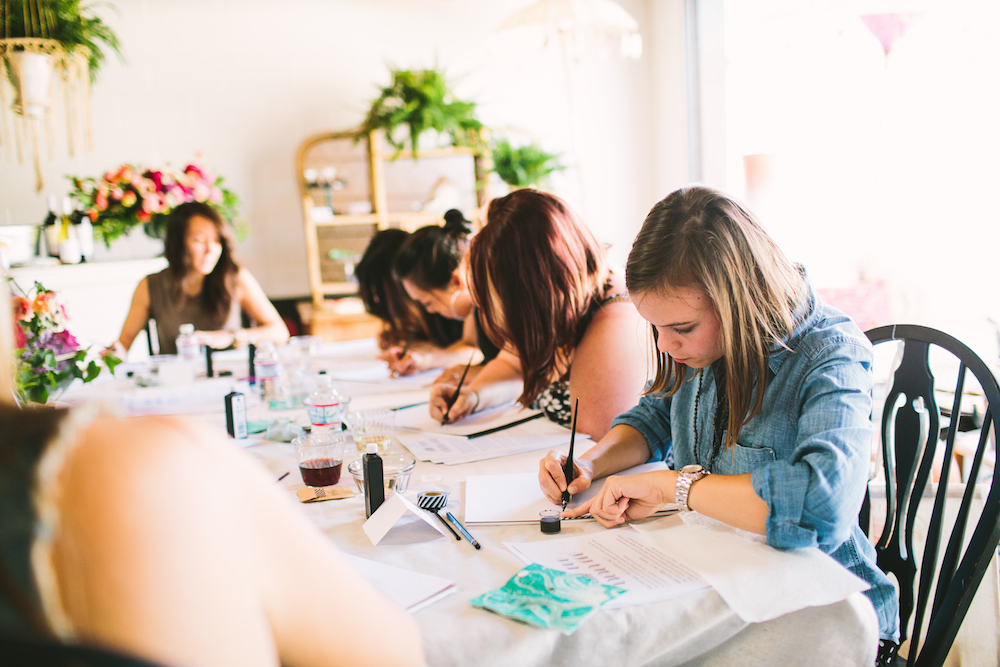
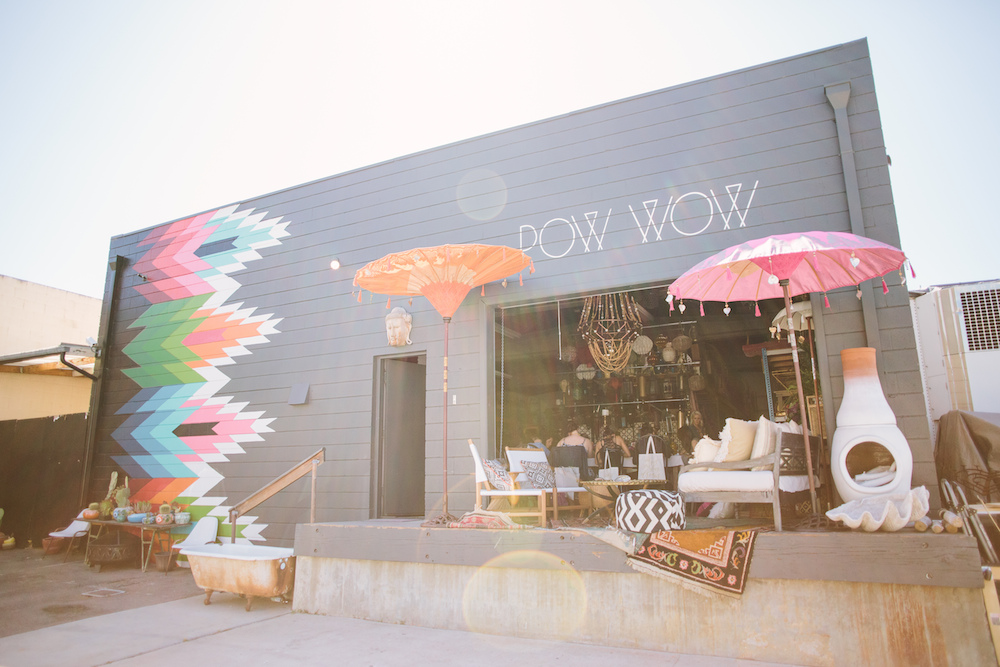
Last year I've started instructing introduction to modern calligraphy workshops and they've really taken off! Recently I teamed up with my friend Melissa at Pow Wow Design Studio who graciously hosted me for a fun Sunday afternoon. Jasmine from Let's Frolic Together kindly came on board to snap all the fun.
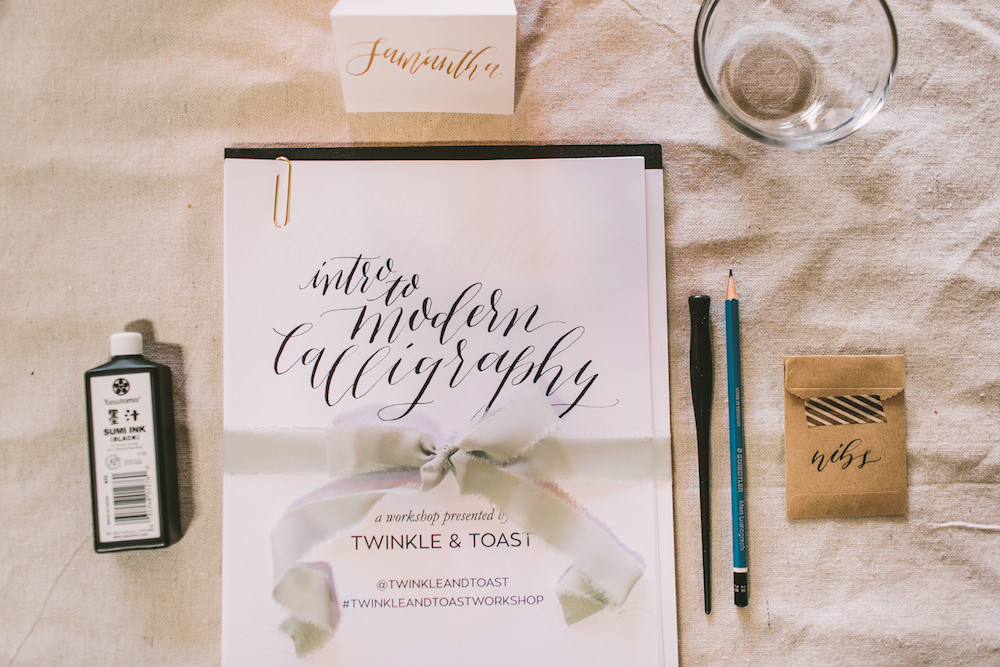
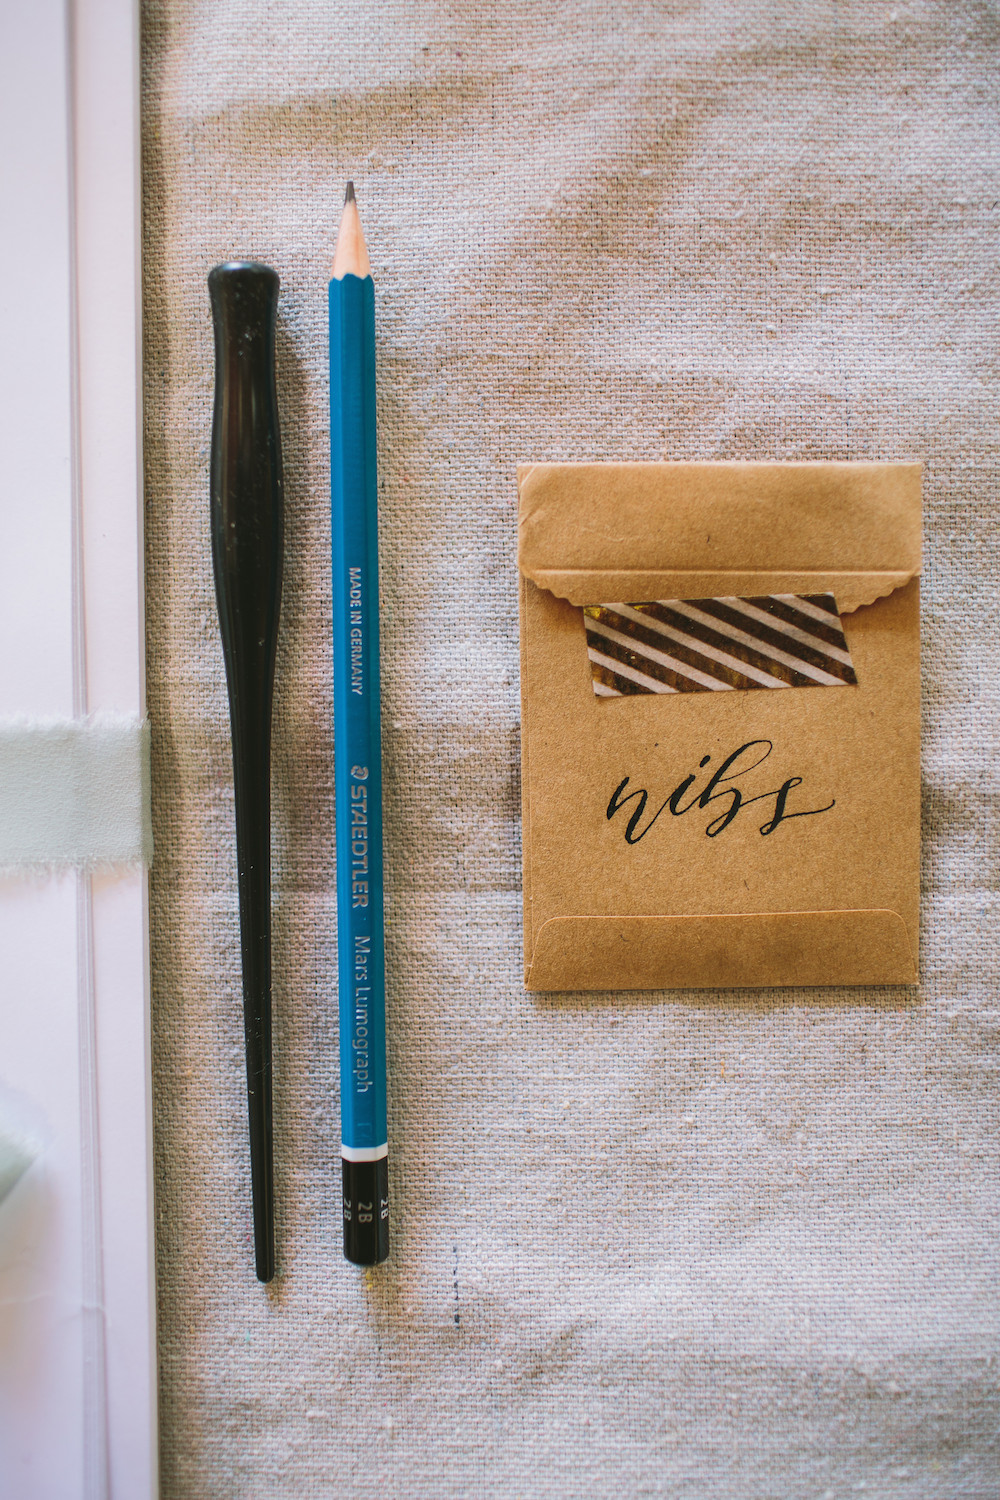
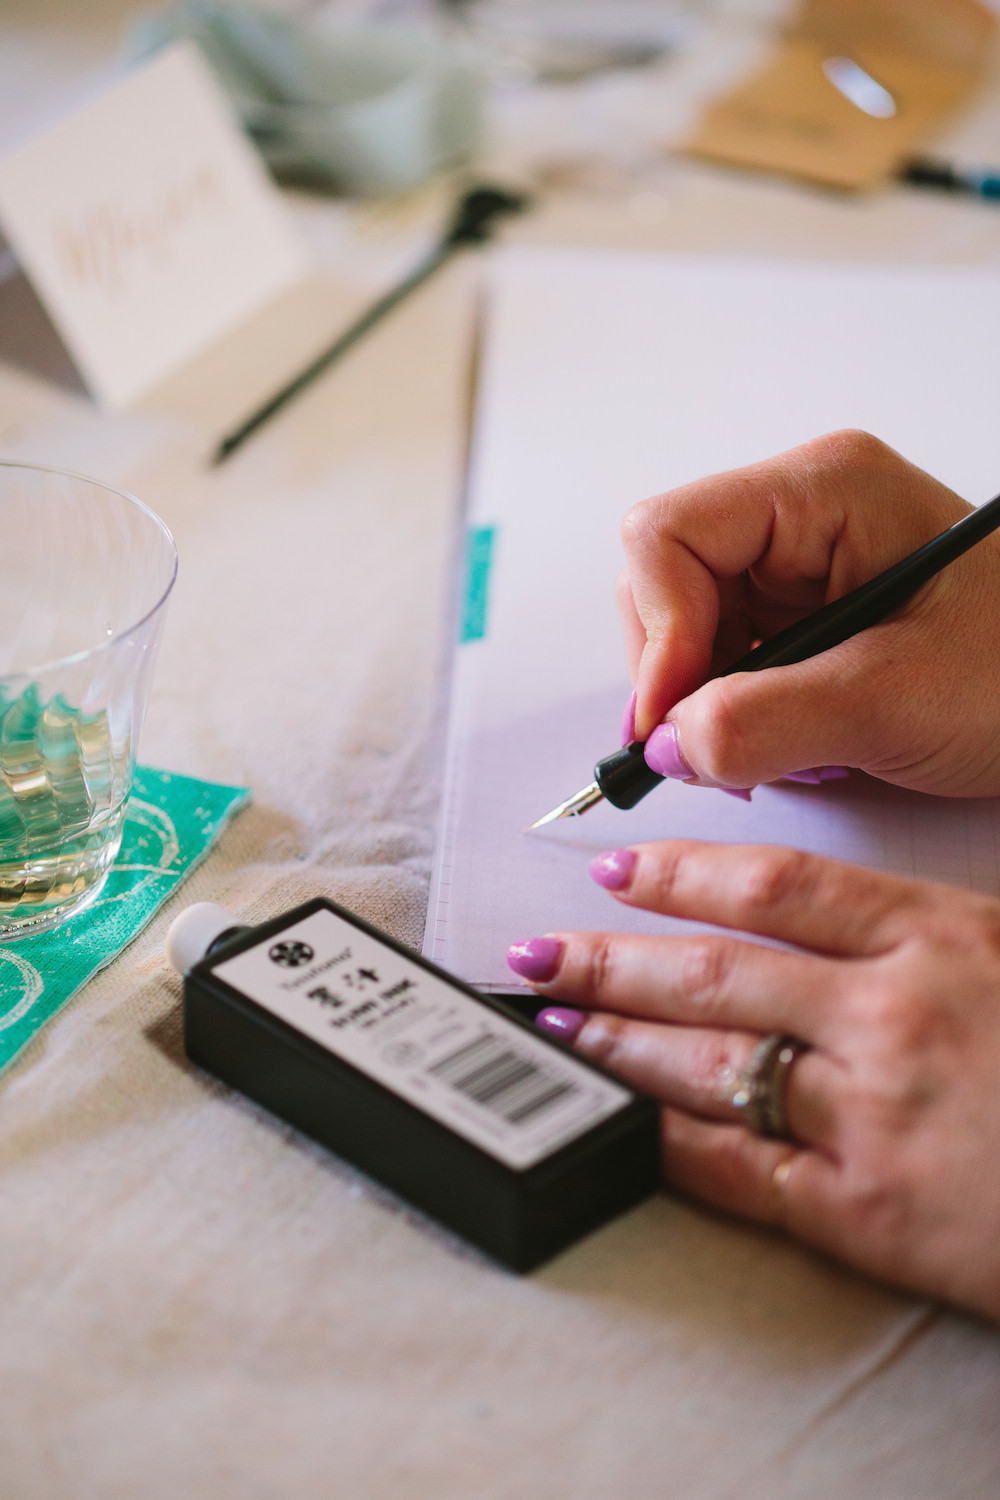
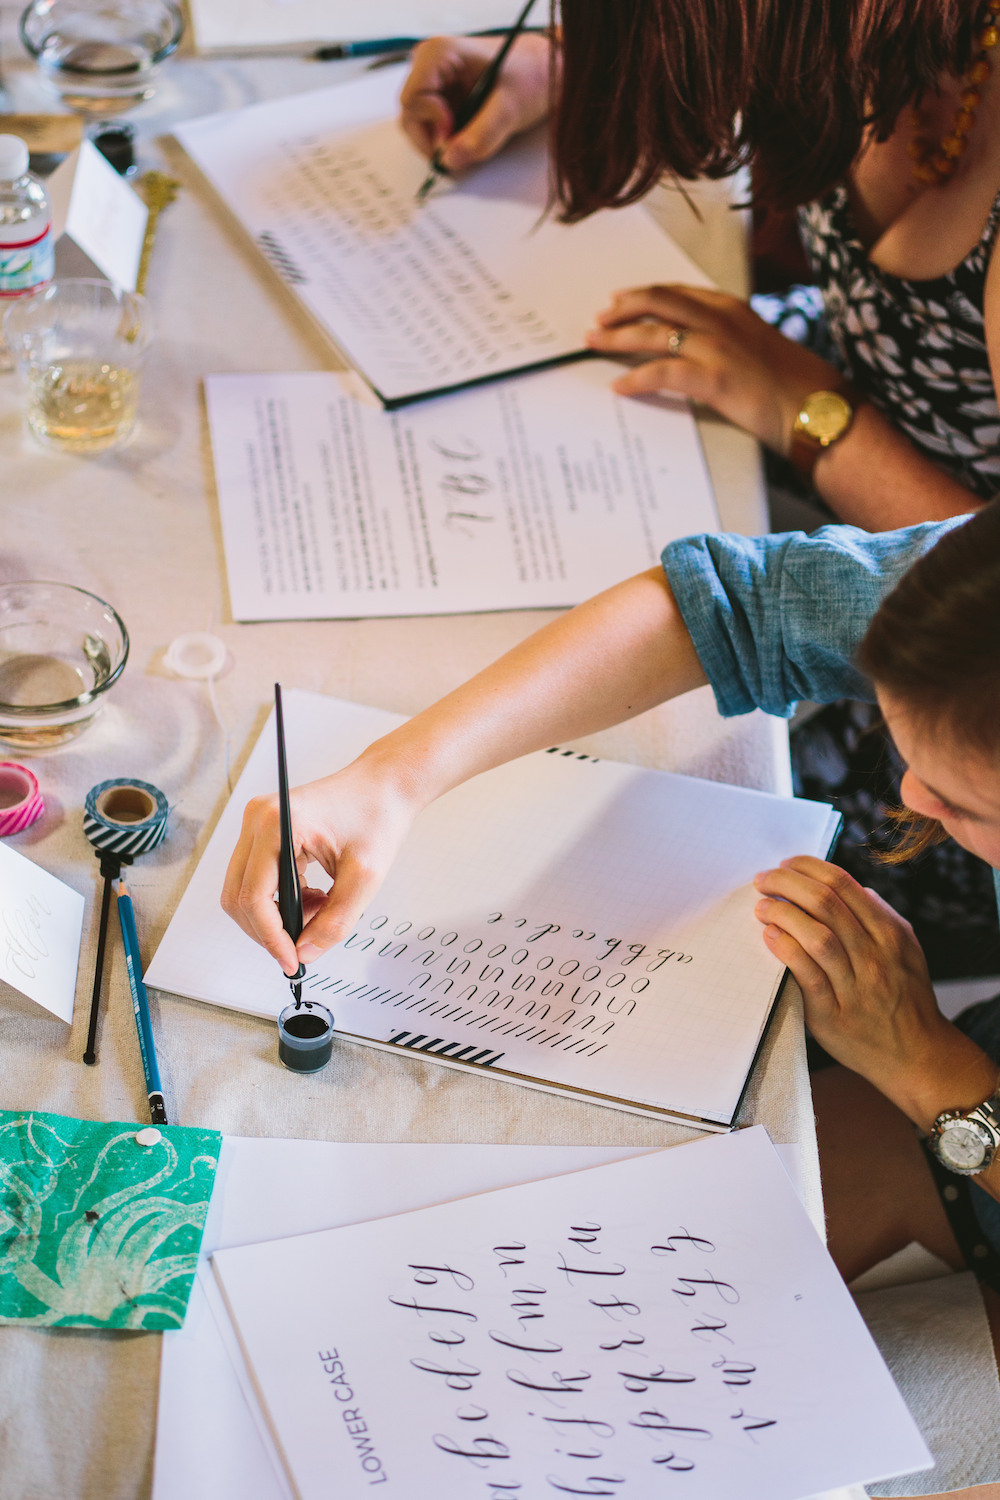
The workshops are three hours long and I include all materials: ink, nibs, paper, customized worksheets, and more. I keep them intimate, with no more than 12 attendees. I go into detail about the history, terminology and techniques of pointed pen calligraphy and allow for plenty of one-on-one time while practicing. Their supplies are theirs to take home in a tote bag from The Printed Palette (designed with my custom calligraphy, as a collaboration)
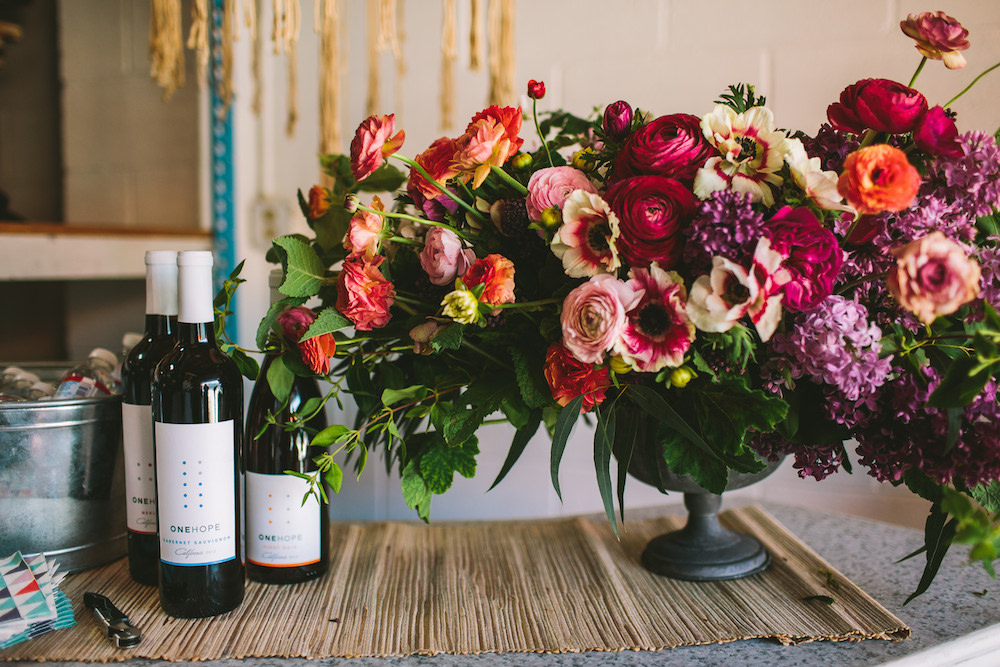
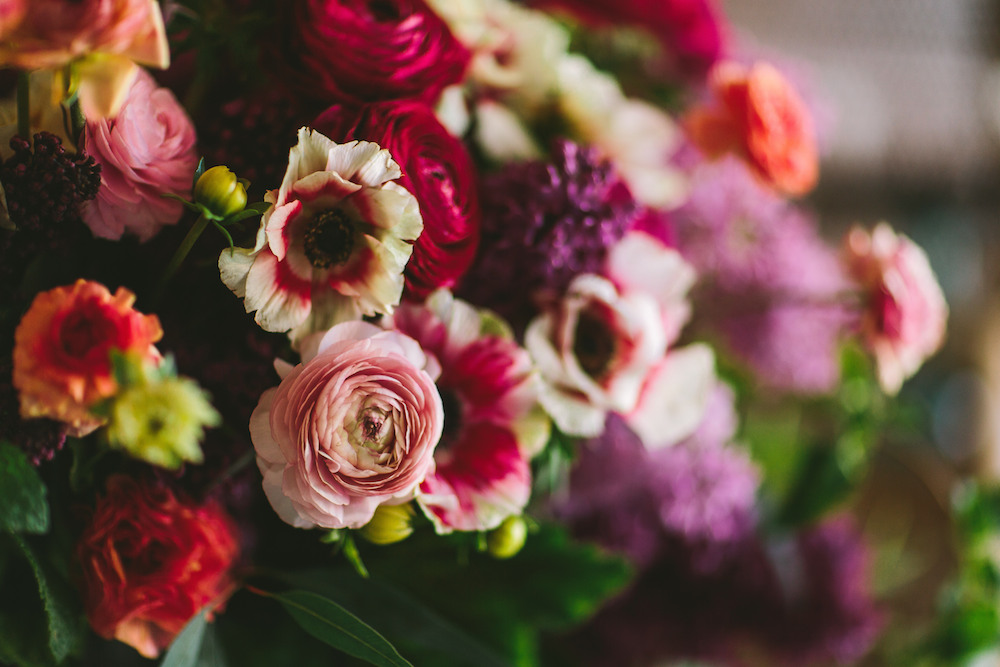
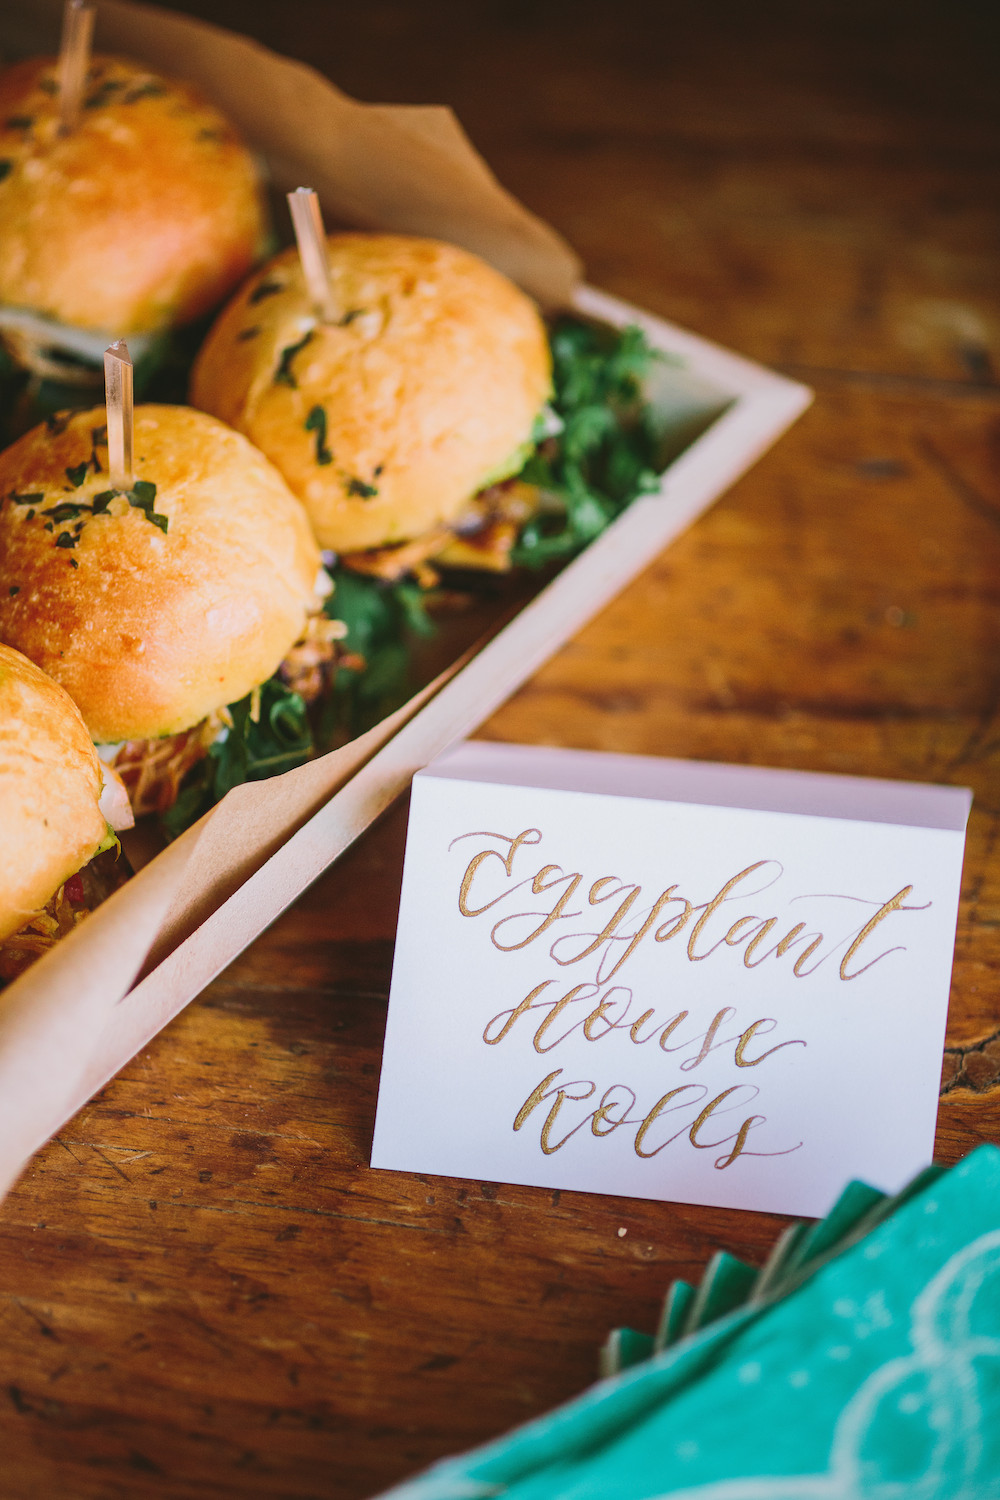
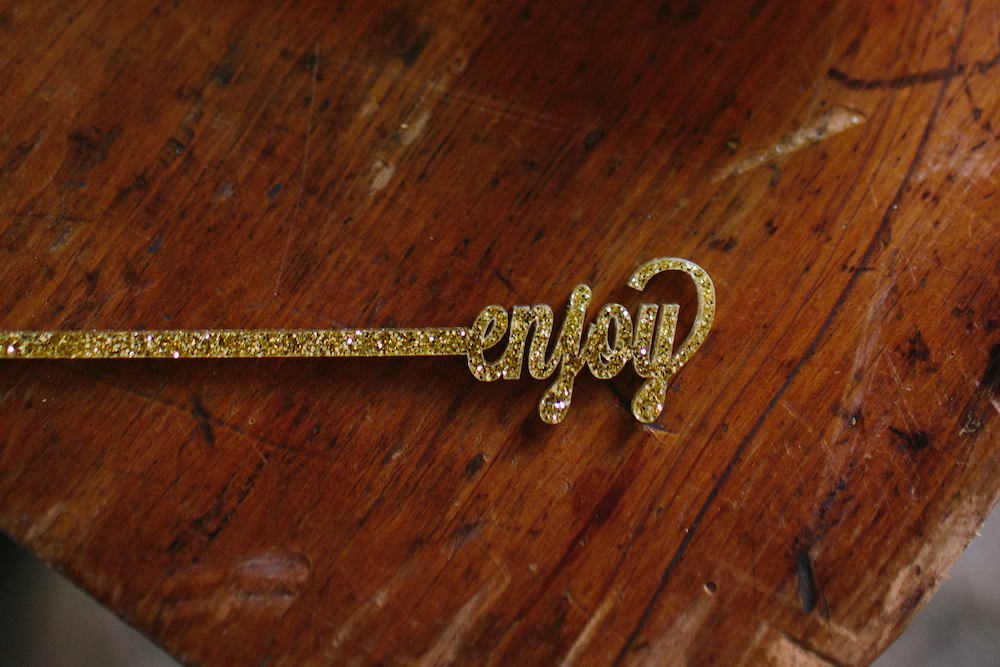
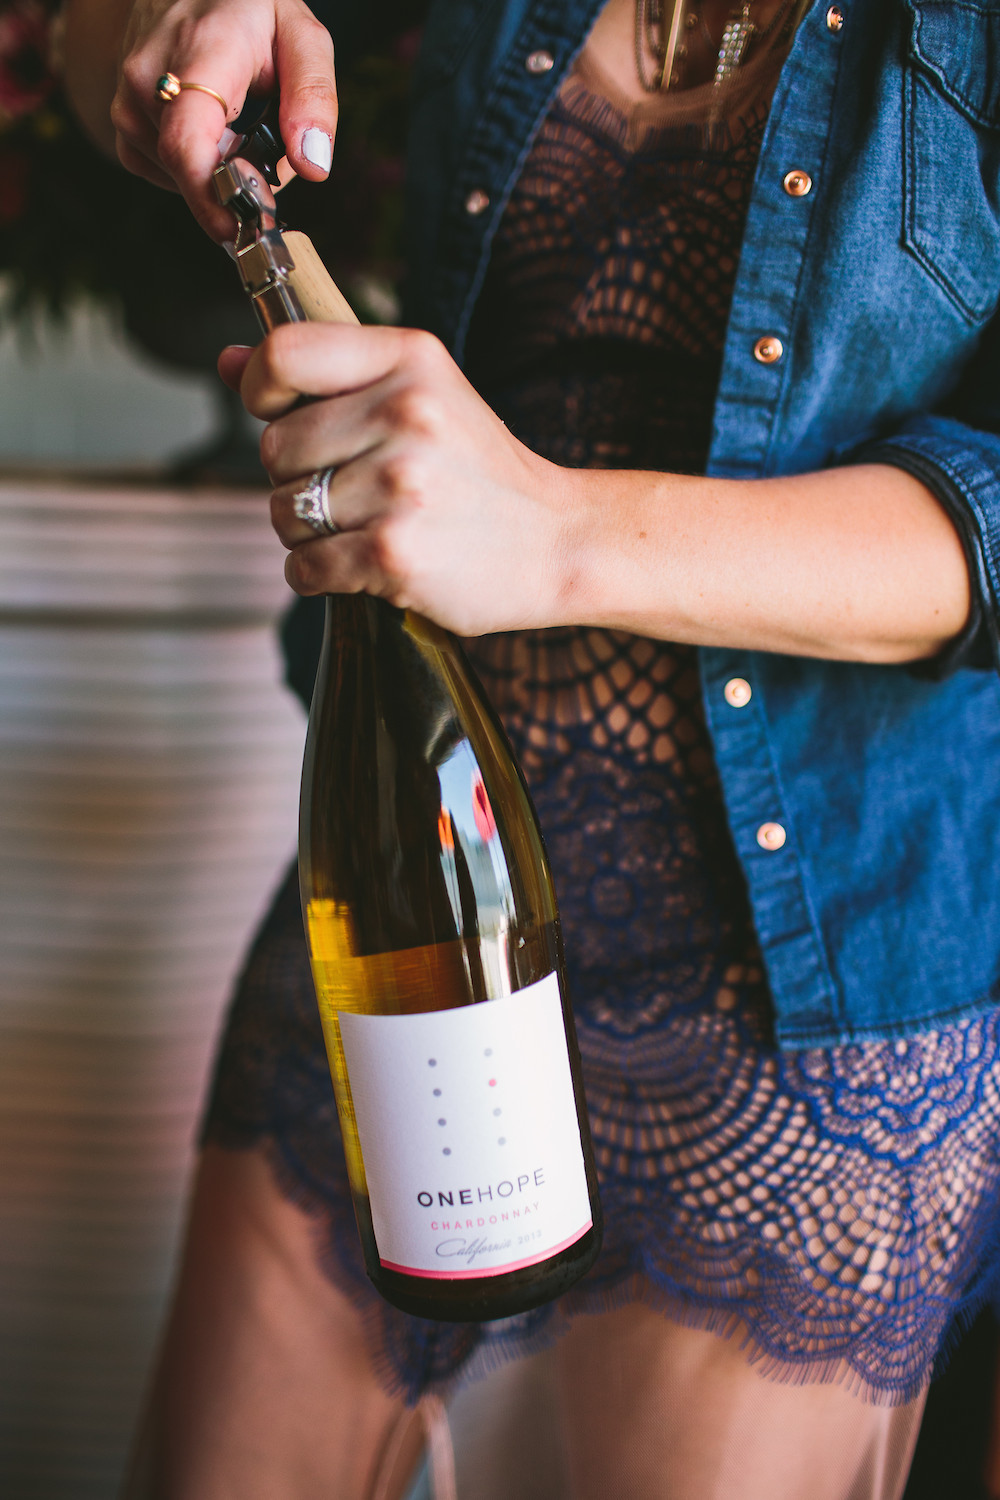
Not only do I like for them to learn a skill with great detail, but it's important that we all have a fun time while out! I brought in some delicious bites from Water's Catering, treats Sweet Lydia's (topped with cupcake toppers from The Roc Shop), and of course wine from One Hope Wine. My friend Sarah from L&S Design Co. knocked it out of the park with beautiful floral arrangements to compliment this rad space. It's been amazing to see a community come together (both the awesome attendees and the vendors) in a creative and positive learning environment. It's a space we can have fun, network and learn from one another and try something new.
Workshops are happening regularly in San Diego and beyond, and would love to extend and invitation to anyone interested to join in on the future fun. Those interested in attending a future workshop can sign up for email notifications on my website: http://www.twinkleandtoast.com/email-list
Vendors:
Calligraphy/Workshop: Twinkle & Toast - @twinkleandtoast
Venue/Rentals: Pow Wow Design Studio - @powwowdesignstudio
Photography: Let's Frolic Together - @letsfrolictogether
Florals: L&S Design Co. - @catalinaneal
Catering: Water's Catering - @waterscatering
Dessert: Sweet Lydia's - @sweetlydiasofsd
Wine: One Hope Wine - @onehopewine
Cupcake toppers/Drink Stirrers: The Roc Shop @the_rocshop
Ribbon: Bellame Ribbon - @bellameribbon
Tote Bag Collaboration: The Printed Palette - @theprintedpalette
Taryn's Dress: For Love and Lemons - @forloveandlemons


DIY: SPRING FLOWERS!
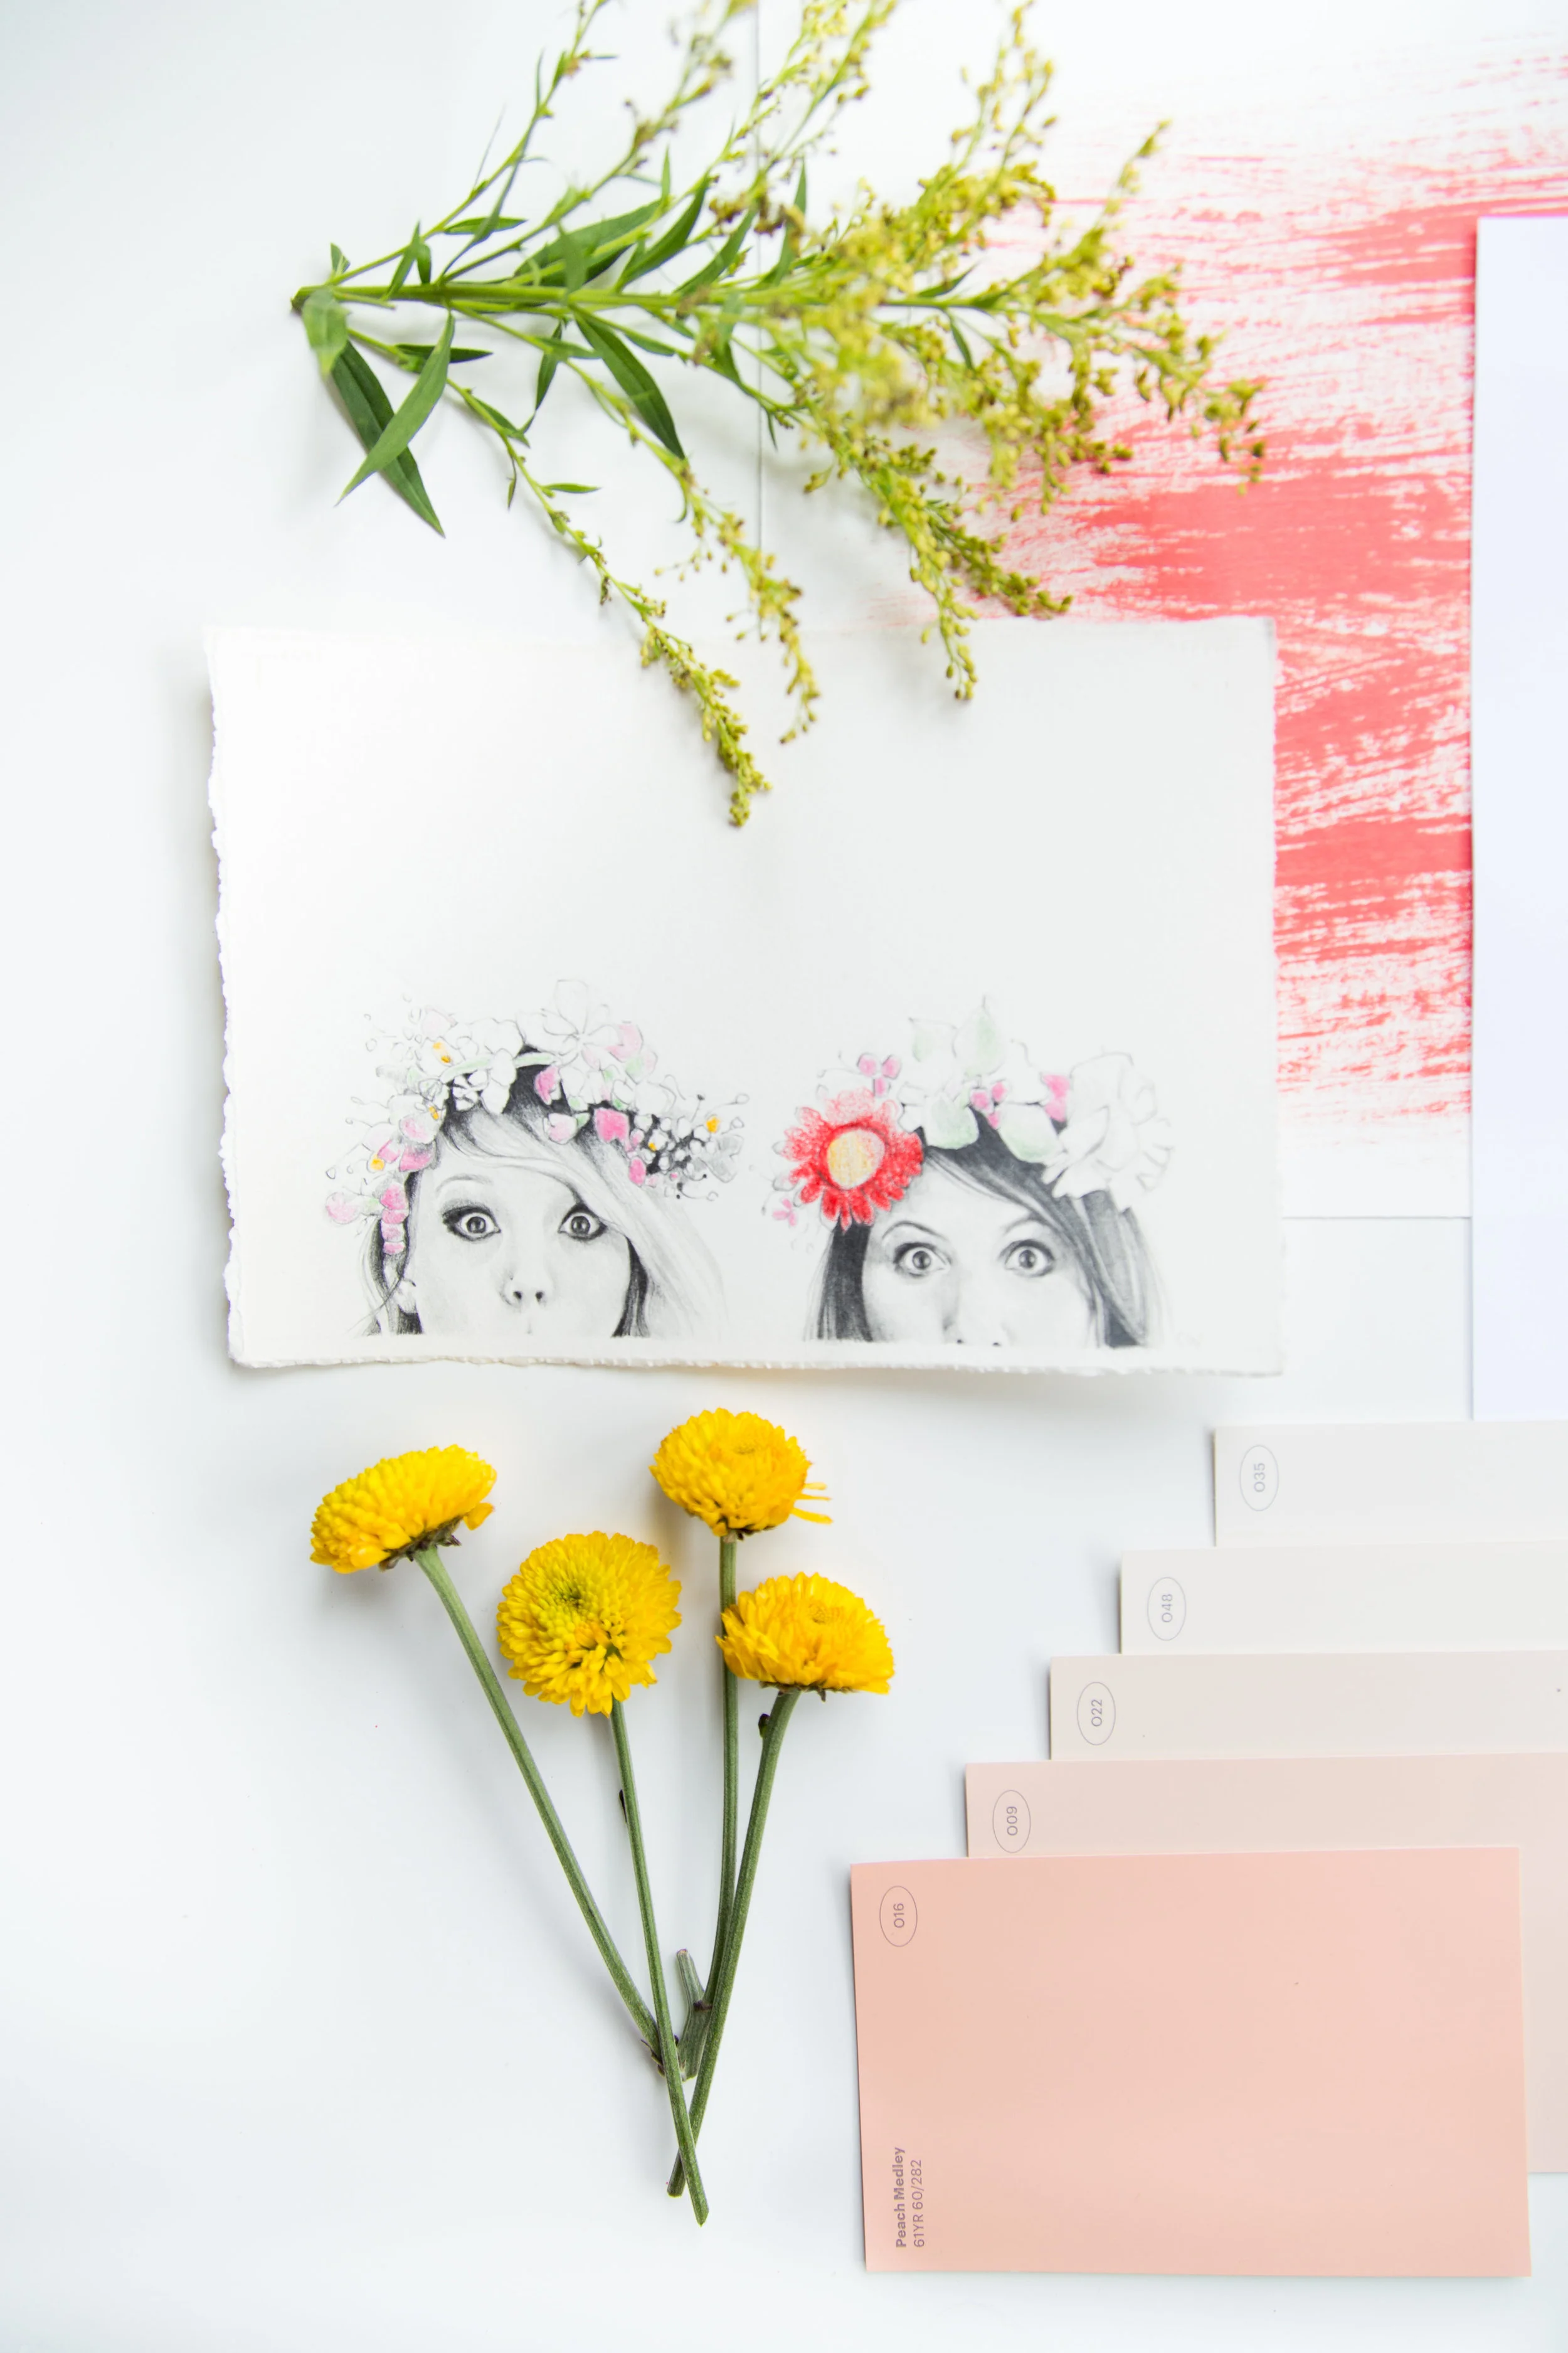
I am a firm believer in always having beautiful fresh cut flowers around your house. I like to have them on my desk, kitchen table, bathroom, etc. It's a cheap way to light up and decorate a room. Everyone loves fresh flowers and I have a few tippity tips for you gals on how to put together the perfect Spring bouquet.
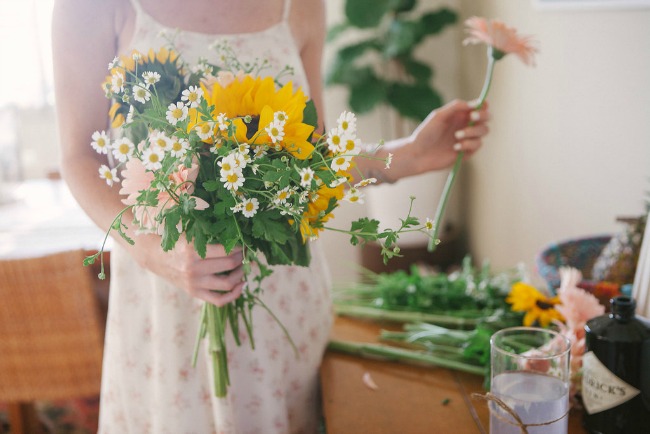
I am a firm believer in always having beautiful fresh cut flowers around your house. I like to have them on my desk, kitchen table, bathroom, etc. It's a cheap way to light up and decorate a room. Everyone loves fresh flowers and I have a few tippity tips for you gals on how to put together the perfect Spring bouquet.
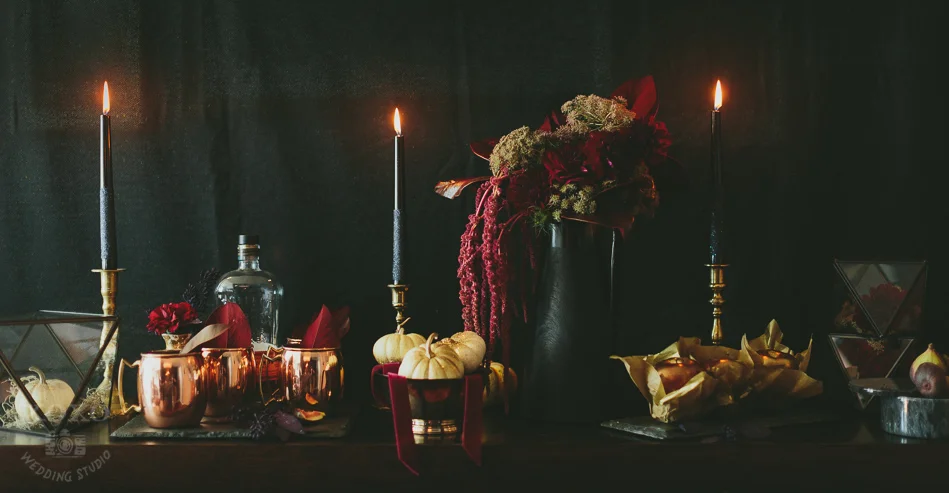
I like to use different sized and textured vases. As pictured, the Hendricks Gin bottle is perfect for an entry way or bedroom. It gives some personality and uniqueness to the vase. I have kind of become obsessed with finding unique vases, and if you're ever stuck on a gift idea, a fun vase is always a good way to go.

Ok lets get down to biz.
First off you need to find a good flower place that offers seasonal flowers with a variety. I go to a wholesale place (if any of you babes live in North County, San Diego you MUST hit up Franco's). Finding a wholesale flower shop is great because you can pick from an array of flowers and it's cheap cheap cheap. I bought these 3 beautiful bundles for $12. You can't beat it!

Find your fav flowers and be creative with a vase. I like to spread all the flowers out. One by one, cut each flower stem so all your flowers are even and fit into your vase nicely. Then just start putting them together in your hand. There is no right or wrong way to do this. I try and mix some of the smaller ones in between the bigger flowers and try not to have the same kind right next to each other. Once you have a nice looking bouquet in your hands, put them into your vase and enjoy!!! Most flowers like a cool place with natural sunlight.
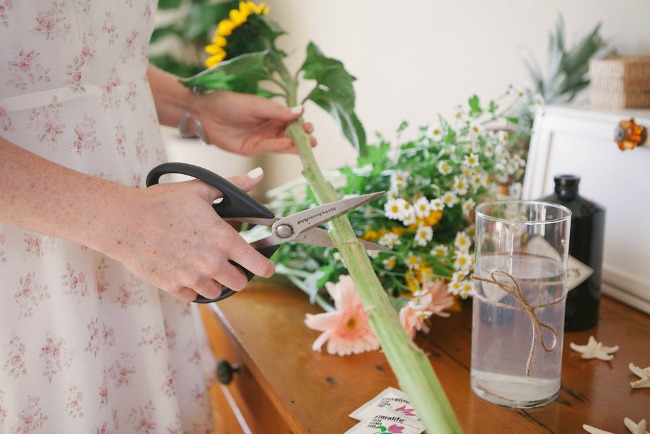

Oh and I almost forgot, flower food is a must! If you want your flowers to stay nice and pretty and live past a week, add flower food to your water. It's filled with nutrients for cut flowers and will increase the flowers vase life by 50%. Most florists will give you packets.


XO Melissa ♥


Photography by Ashley Williams

ABOUT THE AUTHOR

Melissa Heyde is the creator behind the beach inspired lifestyle blog, Mermaid Memos! She's a total beach girl, with a love and passion for health, travel, beauty and overall wellness. She grew up in beautiful San Diego, lived in Hawaii for a couple years and have always been drawn to the beach lifestyle. She believes that life is a balancing act so staying positive and grateful are her key motives for being the best version of herself, each and every day!


MOTHER'S DAY GIFT BOX
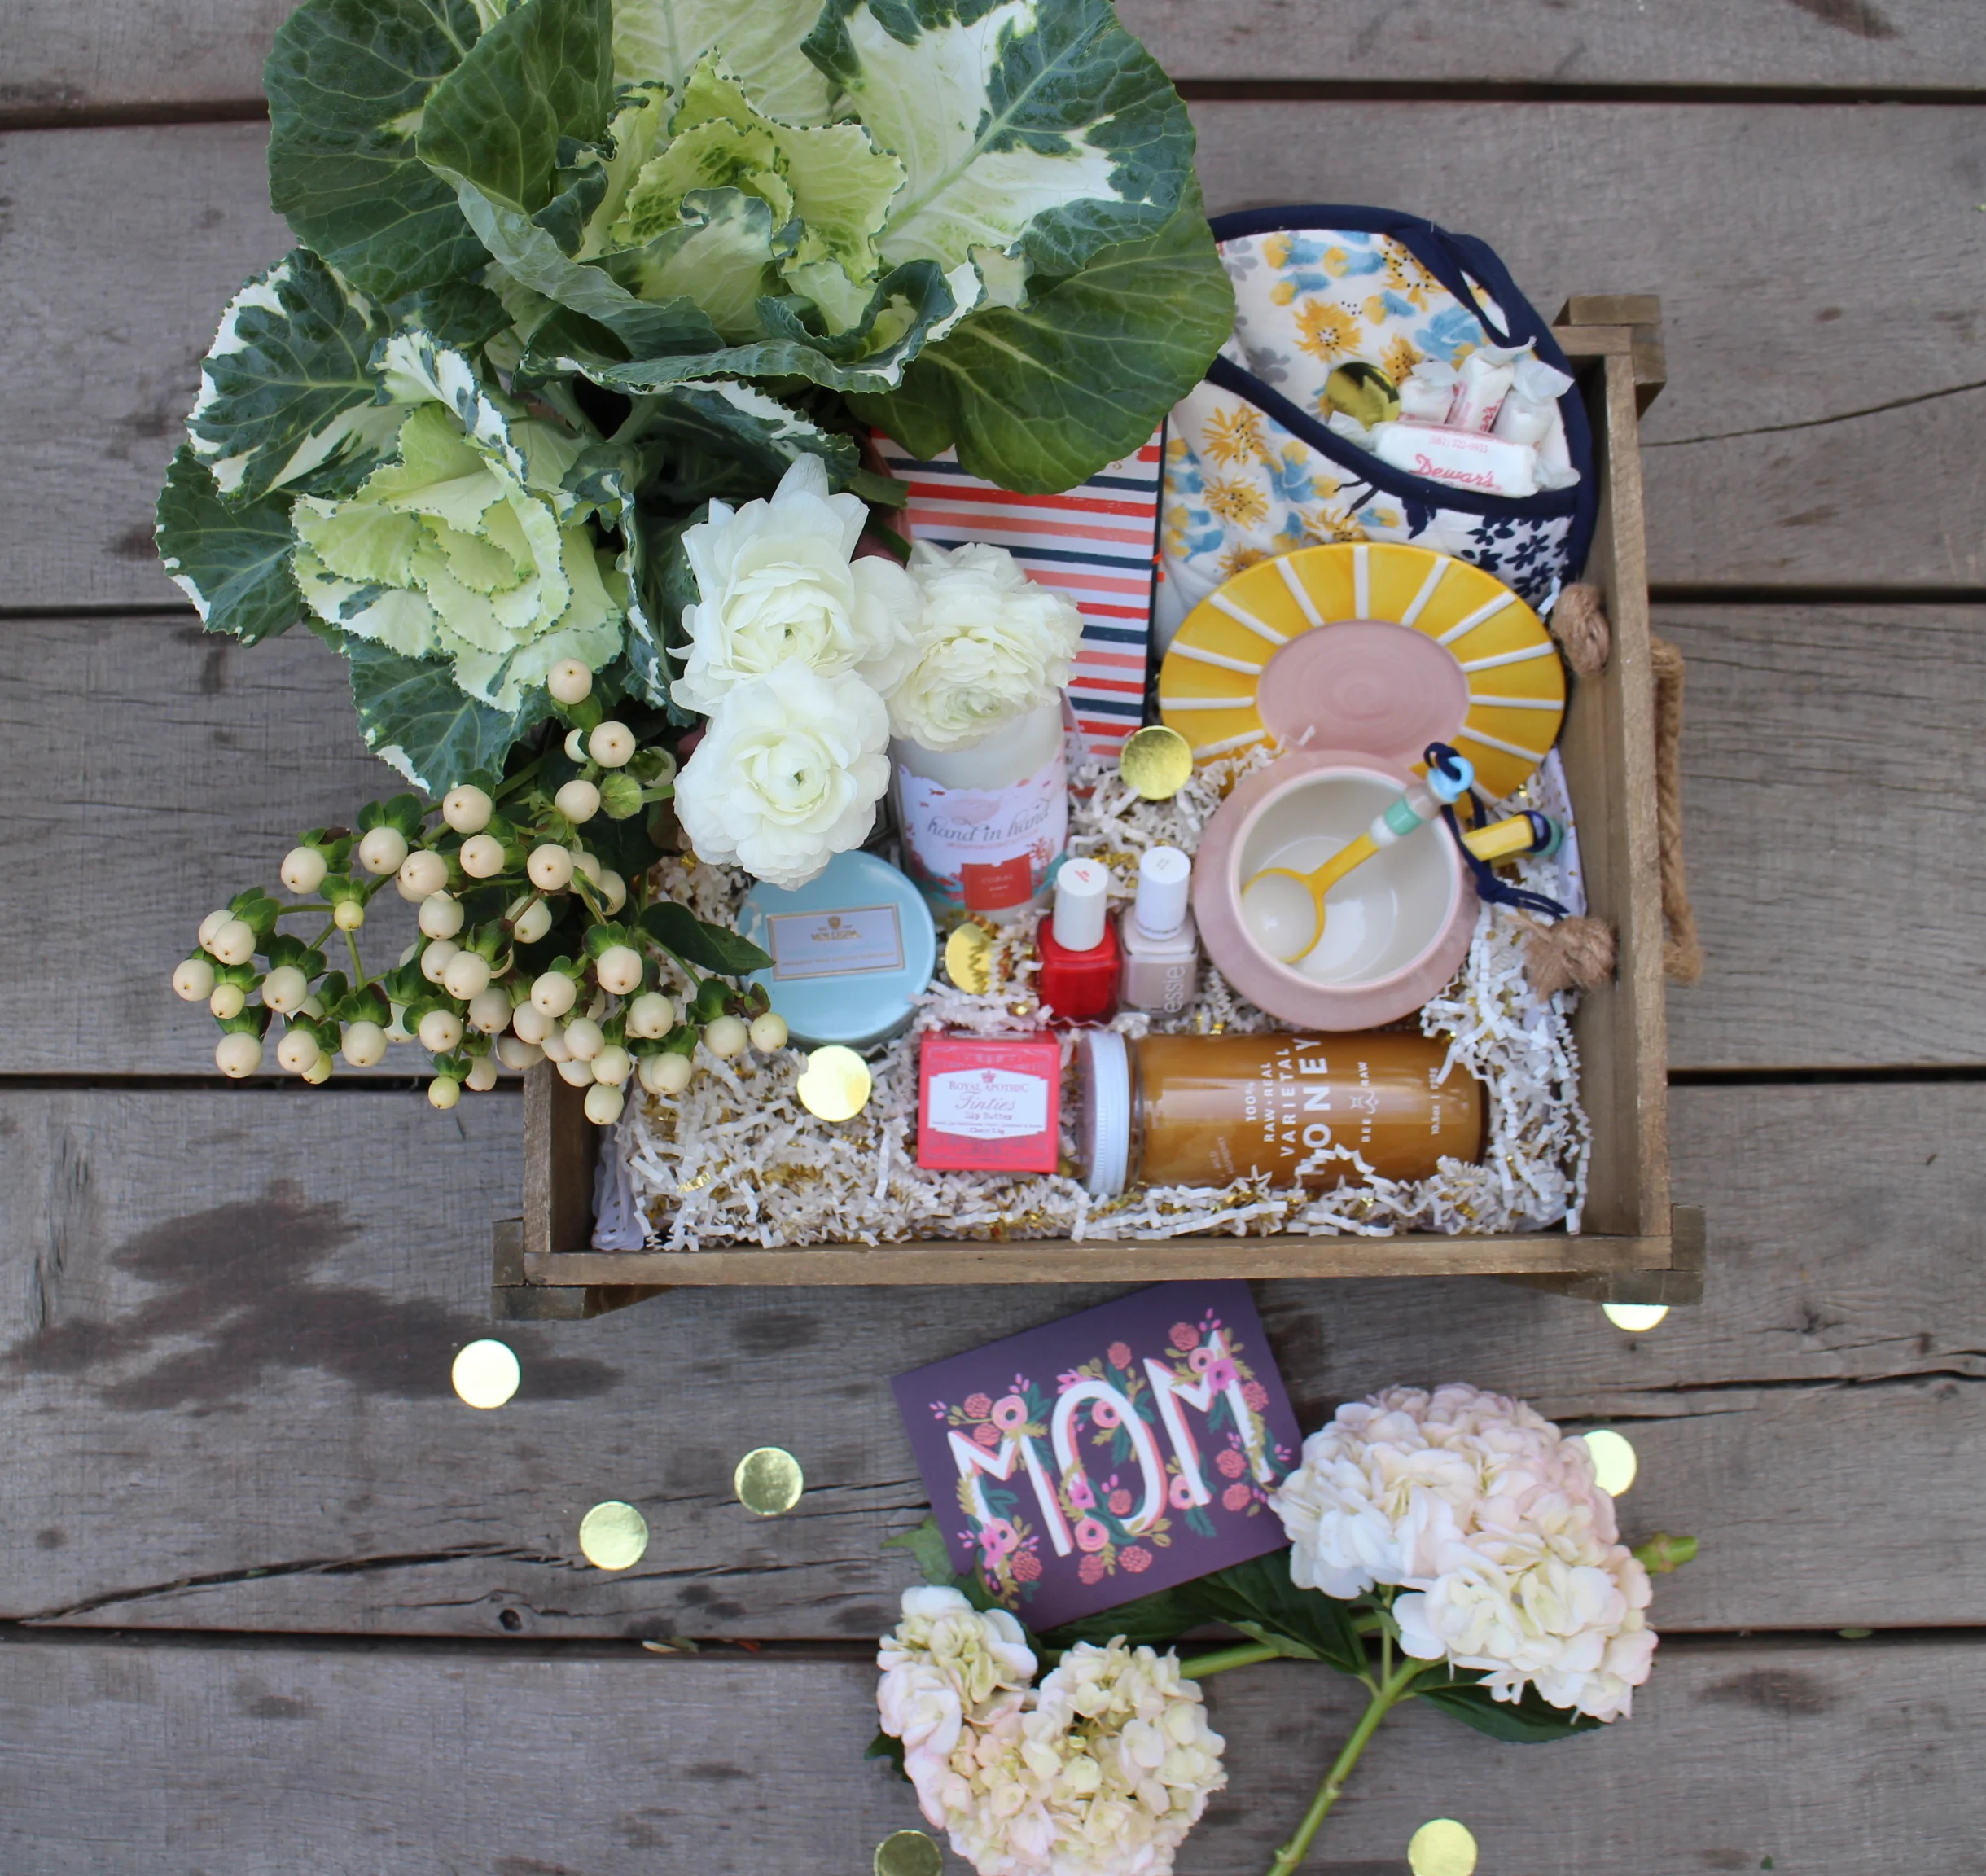
With Mother’s Day right around the corner, there’s no better time to let our fabulous moms know how much we appreciate them. A personalized gift box is a great way to thank them for all they have done!

With Mother’s Day right around the corner, there’s no better time to let our fabulous moms know how much we appreciate them. A personalized gift box is a great way to thank them for all they have done!
One of the best things about living in LA (besides the year-round sunshine, of course) is the many local artisanal shops and one-of-a-kind boutiques sprinkled around the city. Since our moms are oh-so special and deserve the very best, why not gift them with products that are as unique as they are!

To build your own special curated box
- Choose a wooden box or crate large enough to hold all your goodies. Nowadays, I’ve been able to find wooden crates at craft stores, garden supply stores and online shops.
- Think about what your Mom enjoys and start your shopping adventure!
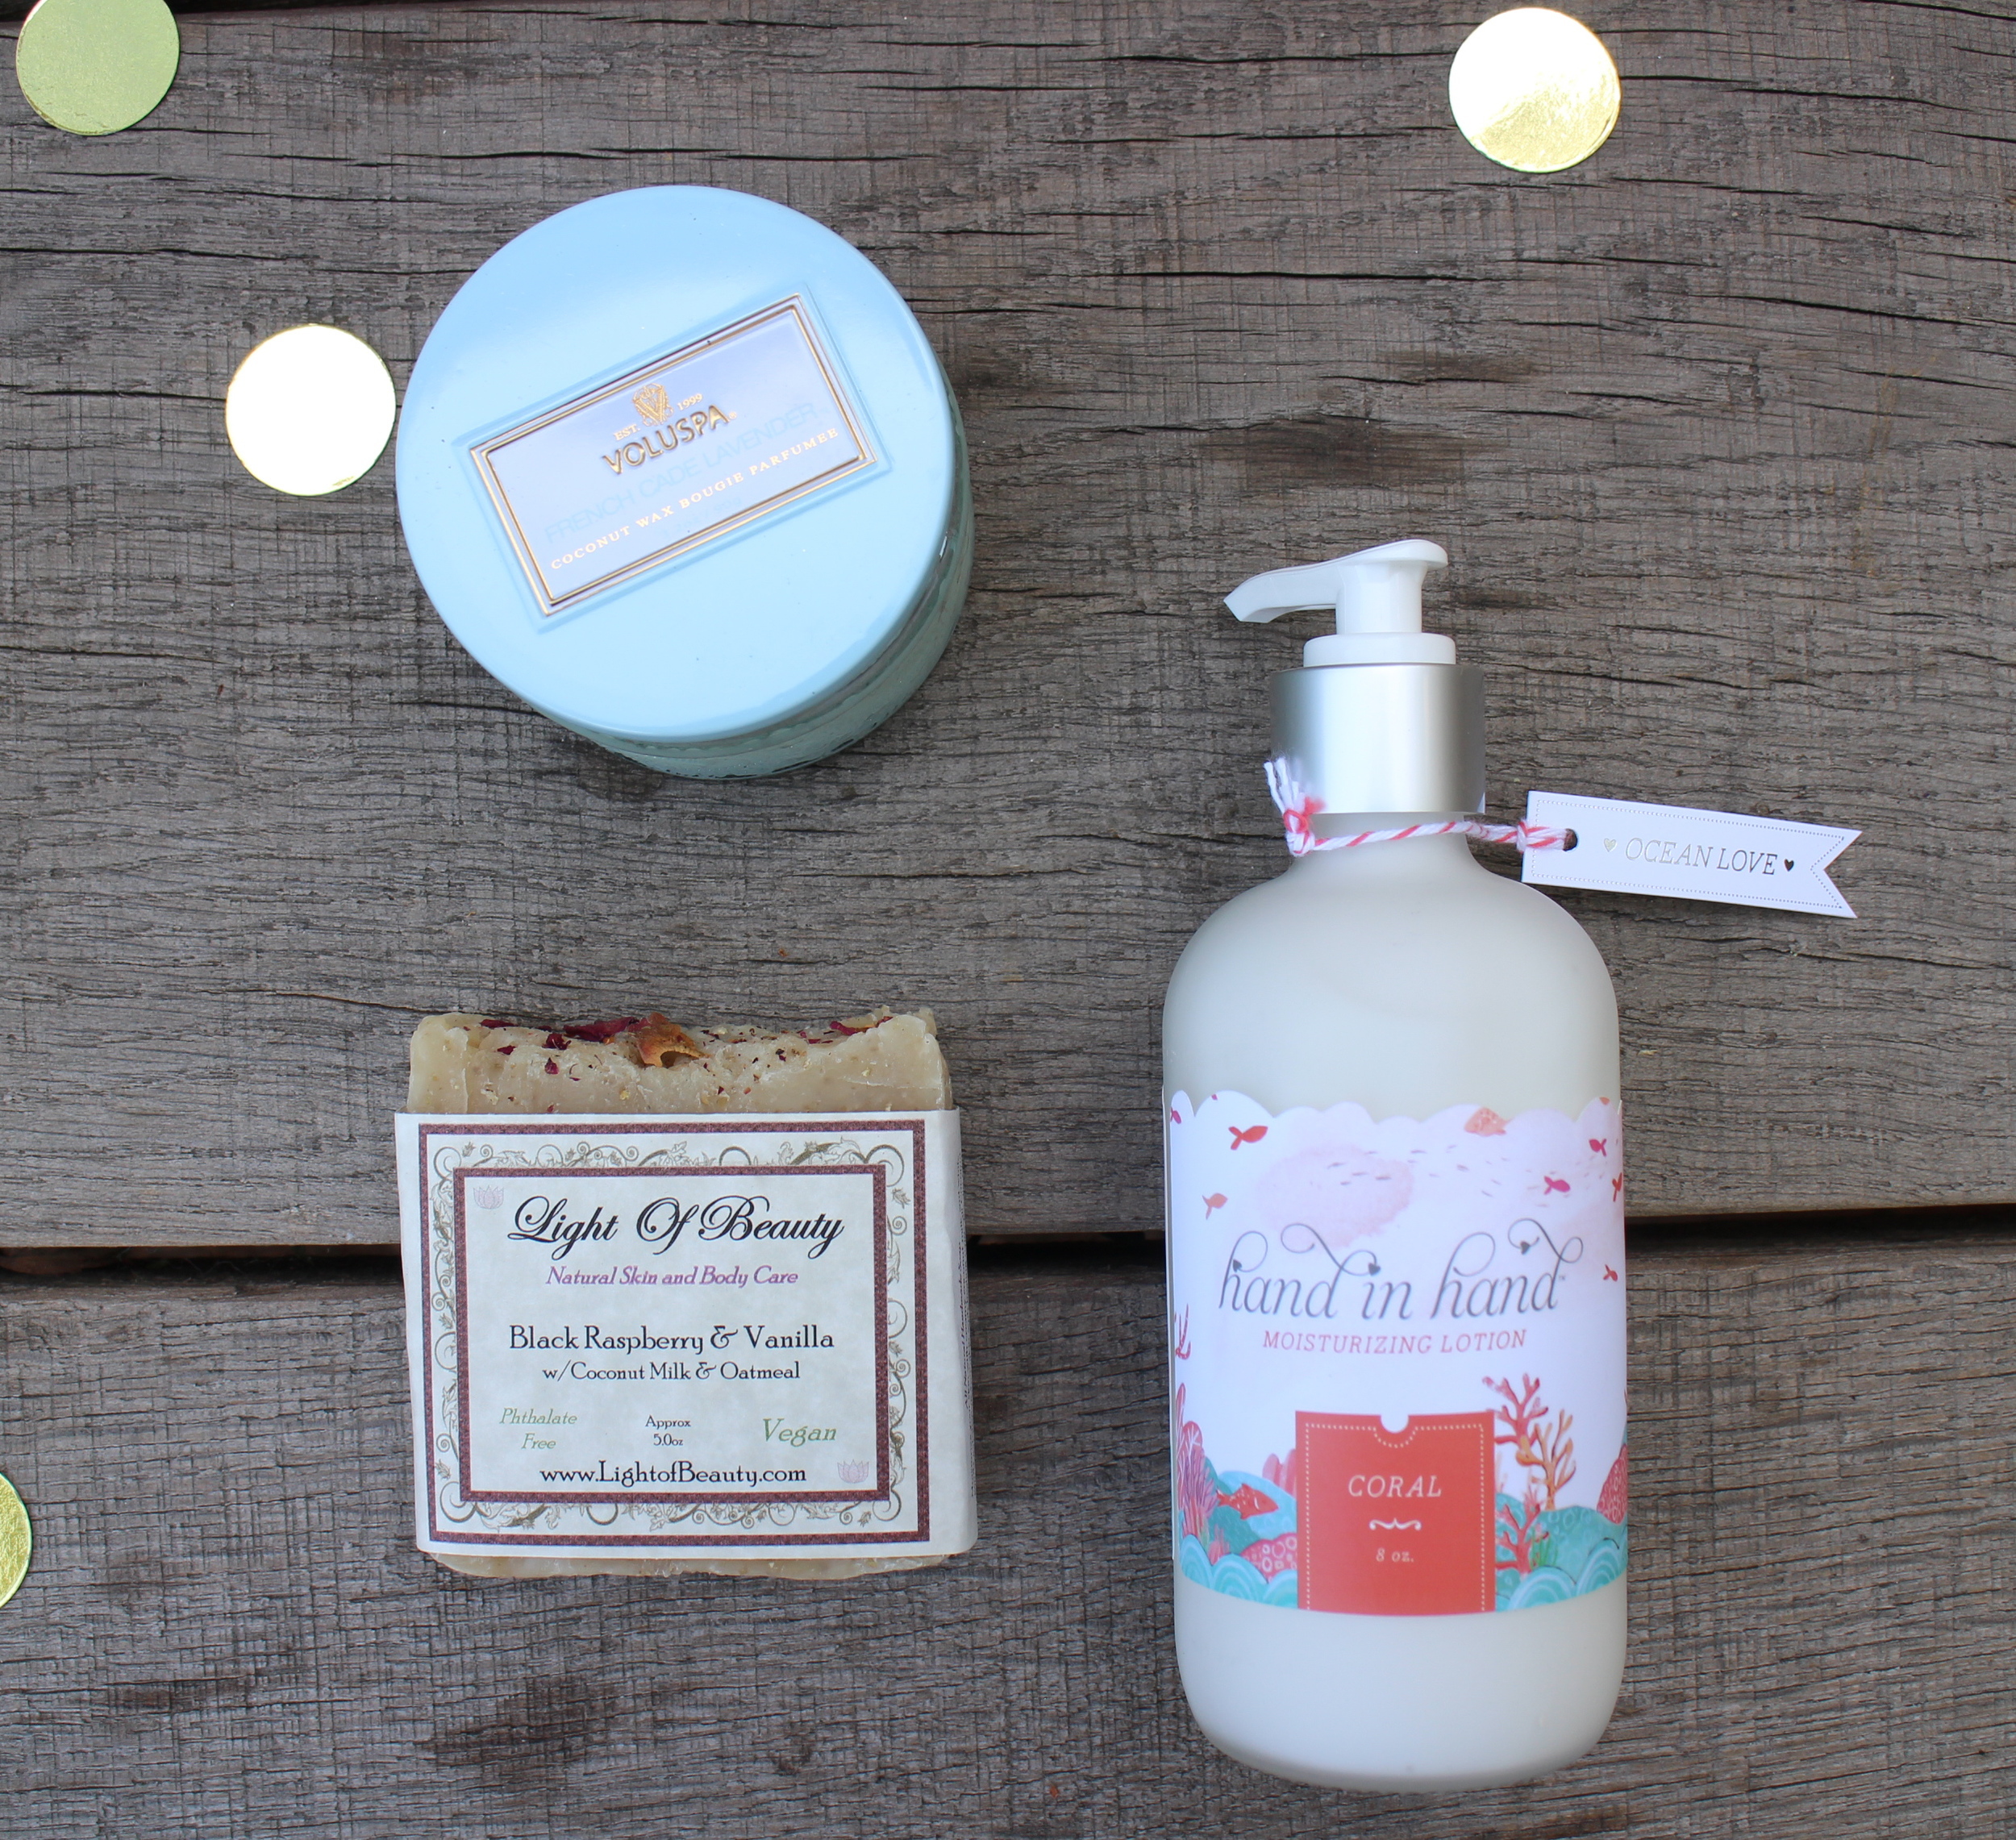
- Essie Polish
- Notepad { Pulp Cards & Paper, 456 S. La Brea Ave., Los Angeles, CA, 90036}
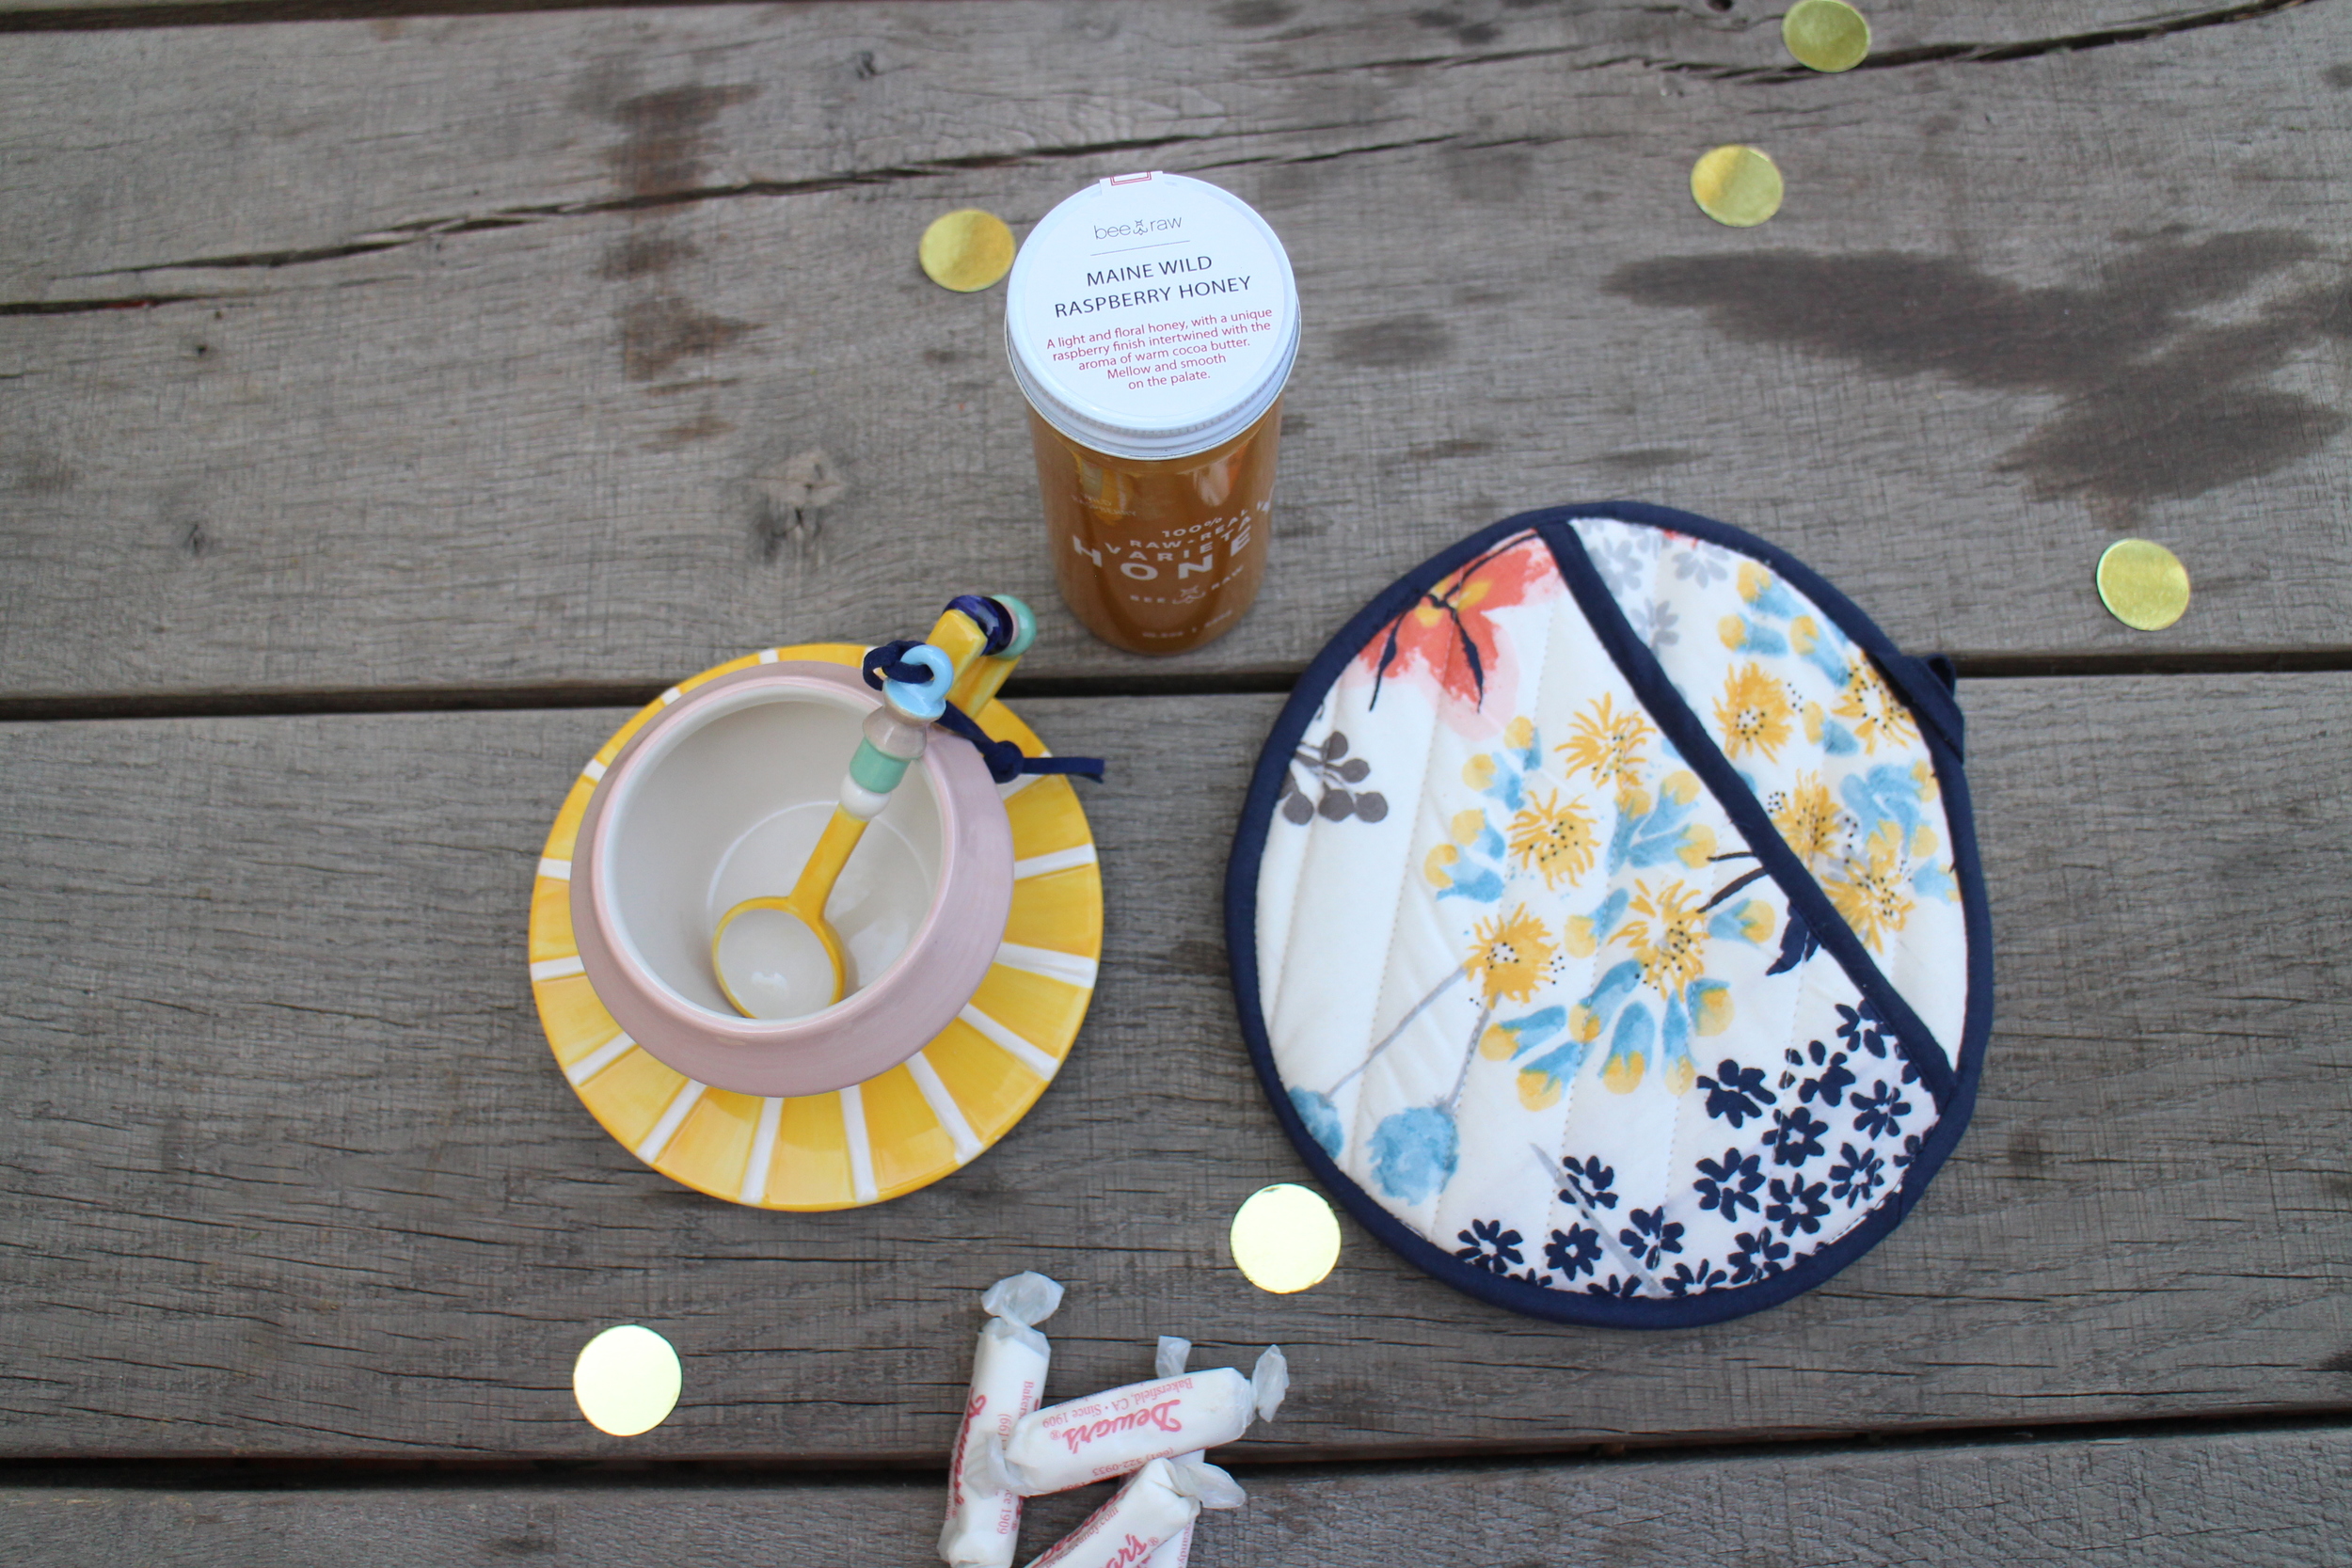
- Tea cup and saucer {like this one from Anthropologie}
- Hand in Hand Lotion
- Light of Beauty Natural Vegan Soap { Urban Radish, 660 Mateo St., Los Angeles, CA, 90021}
- Voluspa Candle {Clover 2756 Rowena Ave. Los Angeles, CA 90039}
- Royal Apothic Lip Tint
- Raw Honey
- Kitchen Pot Holder { Yolk, 1626 Silver Lake Blvd., Los Angeles, CA, 90026}
- Dewars Taffy
- Add some fun with raffia or tissue paper in your mom’s favorite color
- Finish off your gift box with some fresh blooms from your local flower market.


Everything inside my gift box is still available at local shops or online if you need a little inspiration for your own gift box. But I definitely encourage you to get out there, explore LA and create your very own custom box that says “I LOVE YOU MOM!”

ABOUT THE AUTHOR

Courtney Chan has been an educator for over a decade, inspiring her students to think creatively and dream big! And she makes sure to incorporate her own advice into everything she does - from planning special events in the classroom to joyous celebrations for her close family and friends. She enjoys crafting, DIY projects and creating themed events from start to finish.Courtney has a penchant for all things that shine and you'll never see her leave home without her signature sparkle, glitter or gold. Her blog "Sparkles For All" combines her passion for planning special events with her motto to always shine bright like a diamond!


DIY: De-Stress Lavender Bath Soak
This time of year can be crazy for a lot of us! With cold/allergy season still around, deadlines to be met, summer planning, whatever it may be, sometimes you need a freaking break to relax and de-stress. Especially for you Coachella heads!
We meet again!
This time of year can be crazy for a lot of us! With cold/allergy season still around, deadlines to be met, summer planning, whatever it may be, sometimes you need a freaking break to relax and de-stress. Especially for you Coachella heads!
I can get really stressed out at the drop of a dime, so it’s so important for me to have rituals that calm my nerves and make me feel at ease after a long day.
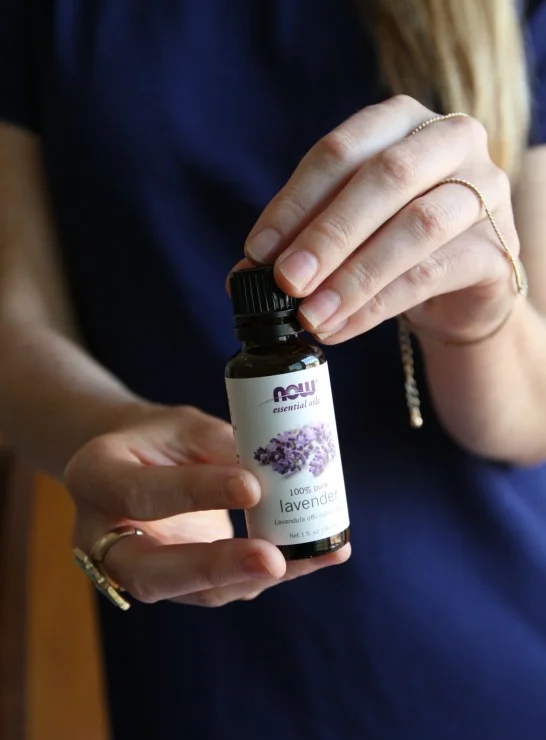
Oils have become my thing. And lavender oil in particular. Lavender is ultra calming and soothing and relaxes fatigued muscles.
Another great way to de-stress is take a hot long bath with this amazingly wonderful lavender bath soak.
Something about taking a hot bath, with candles and just zoning out, relaxes my whole body before bed. Try it, you will become addicted.
Some health benefits of lavender…
♦ Reduces anxiety and emotional stress
♦Heals burns and wounds
♦Improves sleep
♦Restores skin complexion and reduces acne
♦Slows aging with powerful antioxidants
♦Improves eczema and psoriasis
♦Alleviates headaches
And if all those wonderful benefits are not enough, it smells amazing, and will leave your skin smelling like a fresh flower field for goodness sake!
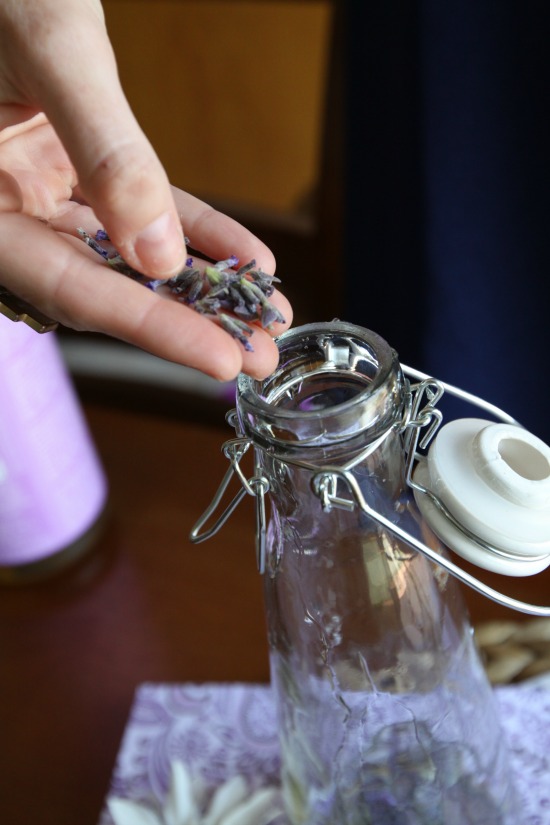
As you may know, I’m super into holistic remedies and making my own serums and scrubs with natural ingredients. It comes to no surprise that I whipped up this lavender bath soak after a stressed filled week. It’s easy, all natural, and would be an awesome Mothers Day gift. Adding dried lavender really makes you feel like your at the spa. (Warning: you may have to raid your neighbors lavender plant, jump fences, etc. to find fresh lavender, oops!)

But in all realness lavender is hard to come by, so if you find a flourishing plant, become best friends with the owner!
Mermaid Guide to making the most fragrant, relaxing lavender soak:

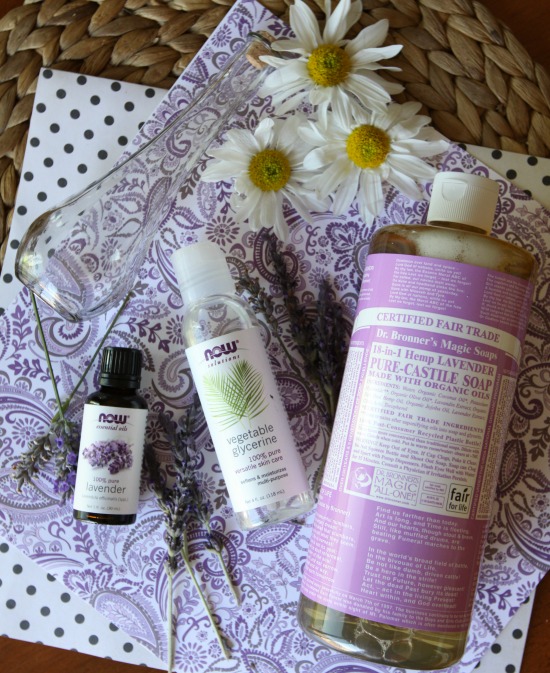
- 1 cup lavender castile soap→ you could also use unscented, but the more lavender the better in my books. Castile soap works wonders, it’s so pure and gentle on your skin
- ½ cup Vegetable Glycerin- I use this stuff all the time for beauty rituals
- 15-20 drops of pure lavender essential oil
- A sprinkle of fresh dried lavender
Note: You can find Castile Soap and Pure Vegetable Glycerin at most health food stores. I purchased mine from Sprouts! You could also add any essential oils of your choosing. Lemon mint bath soak would be a great alternative for a boost of energy. Play around with it!
-Just pour everything into a glass bottle (Michaels has nice bottles with lids or corks so you can store or gift it)

Hope all you babes enjoy! Take some time for yourself and have a makeshift spa day! Ahhhh Happy Relaxing!
XO
Melissa ♥

ABOUT THE AUTHOR

Melissa Heyde is the creator behind the beach inspired lifestyle blog, Mermaid Memos! She's a total beach girl, with a love and passion for health, travel, beauty and overall wellness. She grew up in beautiful San Diego, lived in Hawaii for a couple years and have always been drawn to the beach lifestyle. She believes that life is a balancing act so staying positive and grateful are her key motives for being the best version of herself, each and every day!


NORTHWOOD: HANDCRAFTED WITH LOVE
We think it's so special when we find artisans who use their hands to create beautiful and unique items. Add the fact that they are creating sustainable fashions that are eco-friendly and of course we have to share with you!
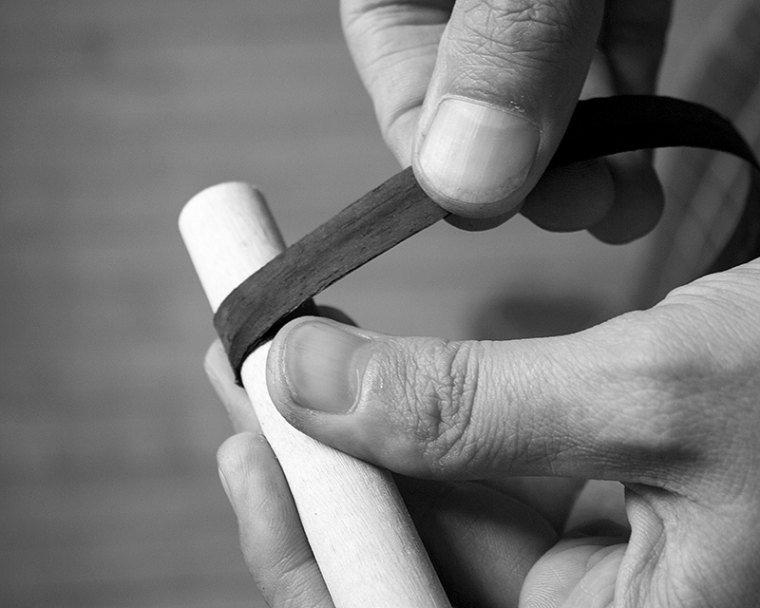
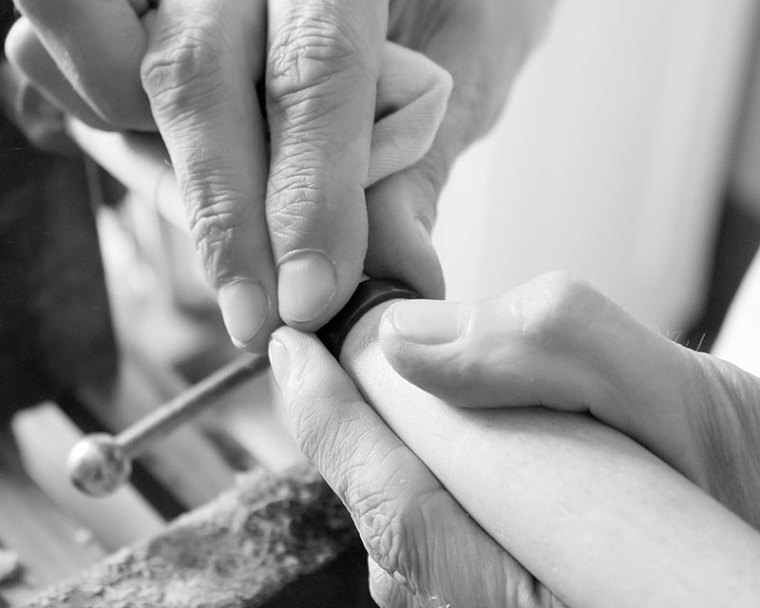
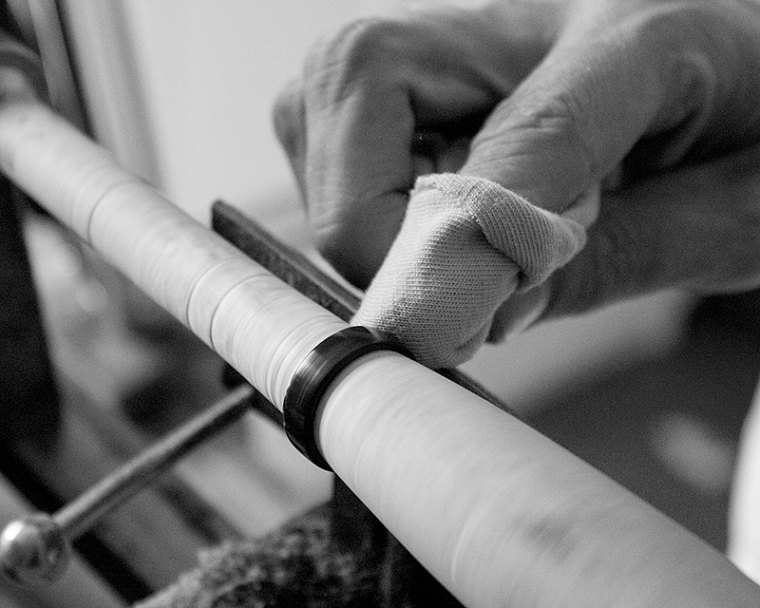
We think it's so special when we find artisans who use their hands to create beautiful and unique items. Add the fact that they are creating sustainable fashions that are eco-friendly and of course we have to share with you! We chatted with Elizabeth & Allen of Northwood Bentwood Rings to share a little bit more about their rings, their process and how they are different.
Tell us about your company and how you got started?
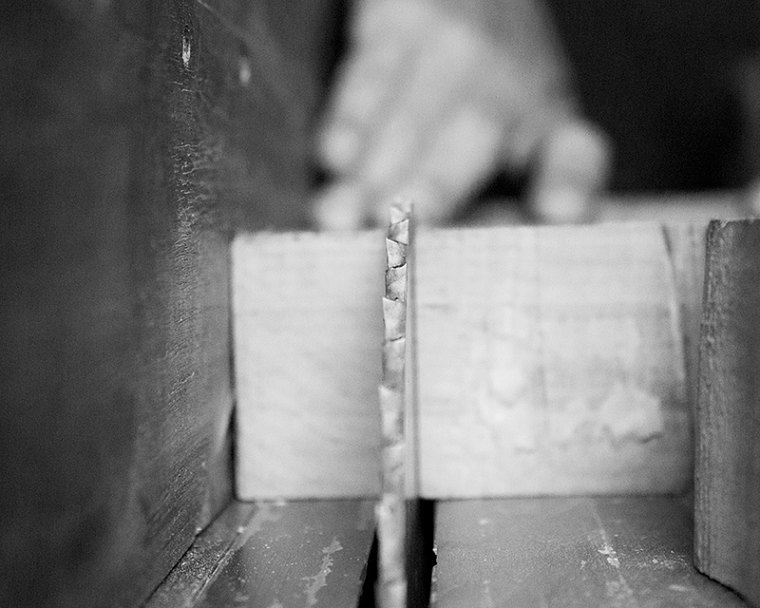
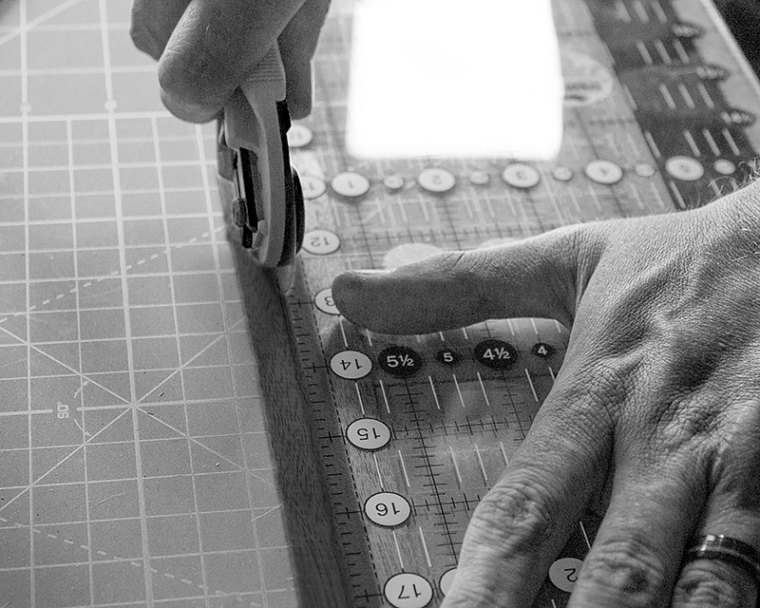
Northwood Bentwood Rings makes wooden rings from the bentwood technique. We are focused on using only eco-friendly and sustainable sources for our products, from the wood itself to the precious metals, and stone inlays that we use. Most recently we have branched out to include a mix of reclaimed gold or silver bands along with a wooden outer wrap.
We began in 2012, when my husband Allan presented me with my first wooden ring. We had been married 3 years and I hadn’t been able to wear a wedding band due to an allergy to gold. Having grown up on a farm called ‘Lot of Oaks’ the oak tree had always held a very special meaning for me. It was from Oak that my first ring was created, and I was in love with the uniqueness of my ring immediately. Allan, being the craftsman he is, didn’t stop there. He was in pursuit of the best wooden ring he could make, so I soon found myself with a whole lot of wooden wedding rings to choose from!
At the time we had been running a weekend coffee cart with freshly roasted coffee, another of our passions. Customers began coming for the rings as much as they did for the coffee and we saw a way to fill a need. We had heard so many stories of people not being able, or not wanting, to wear traditional jewelry, and we decided to close up the coffee cart and begin our adventure in serving this new crowd of people looking for something different.
What makes your company unique?
While wooden rings and the process of bentwood are unique in themselves, I think the most unique thing about our company is not what we do, but why we do it. We want to create a difference in our customers’ lives, our employees’ lives, and in our own. We have always strived to create not just the most beautiful rings, but also a community of artists and people with the same values. We believe that we can work together to create something different: A new way of living sustainably and showing our love for each other, and the environment, in a natural way.
That the jewelry trade that has been built on the backs of slave laborers and atrocious practices is becoming more and more well known, and I believe that it is up to us to stop the demand for these products. We believe there is a better way, and we know there are many others like us who believe in a future where these practices are stopped and where we know about how our products have come to be. We believe in transparency and in protecting the beautiful world, and its people, with safe, friendly practices.
We’re doing our best by creating the most beautiful product we can with friendly materials, and by providing a more unique and one-of-a-kind alternative that lovers and friends can use to express their feelings for their loved ones.
Who has inspired you in your life and why?
Allan and I have both had a lot of people throughout our lives that have inspired us, not least of which have been our customers and our employees, but to give a more straightforward answer:
For Allan, it has been the master craftsmen of the past. People like the metalsmiths who would spend days creating a simple weathervane that would be used on top of a barn roof, making sure every detail was perfect, and every curve was just as it should be even though it wouldn’t be viewed except from below. Their pride in their work was unwavering and always drove them to be at their best.
For myself, it was my grandfather. The man who built and cared for the farm that inspired our beginning. Before I was in school with my siblings I would spend the day with my grandfather while my mother went off to work. He was an inventor with a large workshop full of tools and I spent my days with him in that world of tools and tinkering. He would hand me my own blocks of wood, some nails and a hammer, and as a child I’d put together whatever came to me and let my imagination run wild. When we were done, we’d often walk through the acres of oak trees collecting acorns and leaves, and it was with him that I discovered my love for crafting and nature.
Where do you see your company heading in the future?
Right now we’re focused on bringing together and marrying the beauty of precious metals and wood in an equally sustainable way. We hear from a lot of our customers that while one partner would love a wooden band, the other leans more towards traditional jewelry and we believe we can make a bigger change by incorporating a sustainable alternative that would speak to them both. We understand that gold and silver jewelry has been a large part of the tradition of marriage in recent times, and we feel that we can work to source reclaimed materials to make this possible.
We are also working to bring together artists as employees, people with their own unique ideas and creative spirits who can help to bring our customers visions to life in their own way.


GALENTINES DAYS: Gifting your Fav Gal Pals
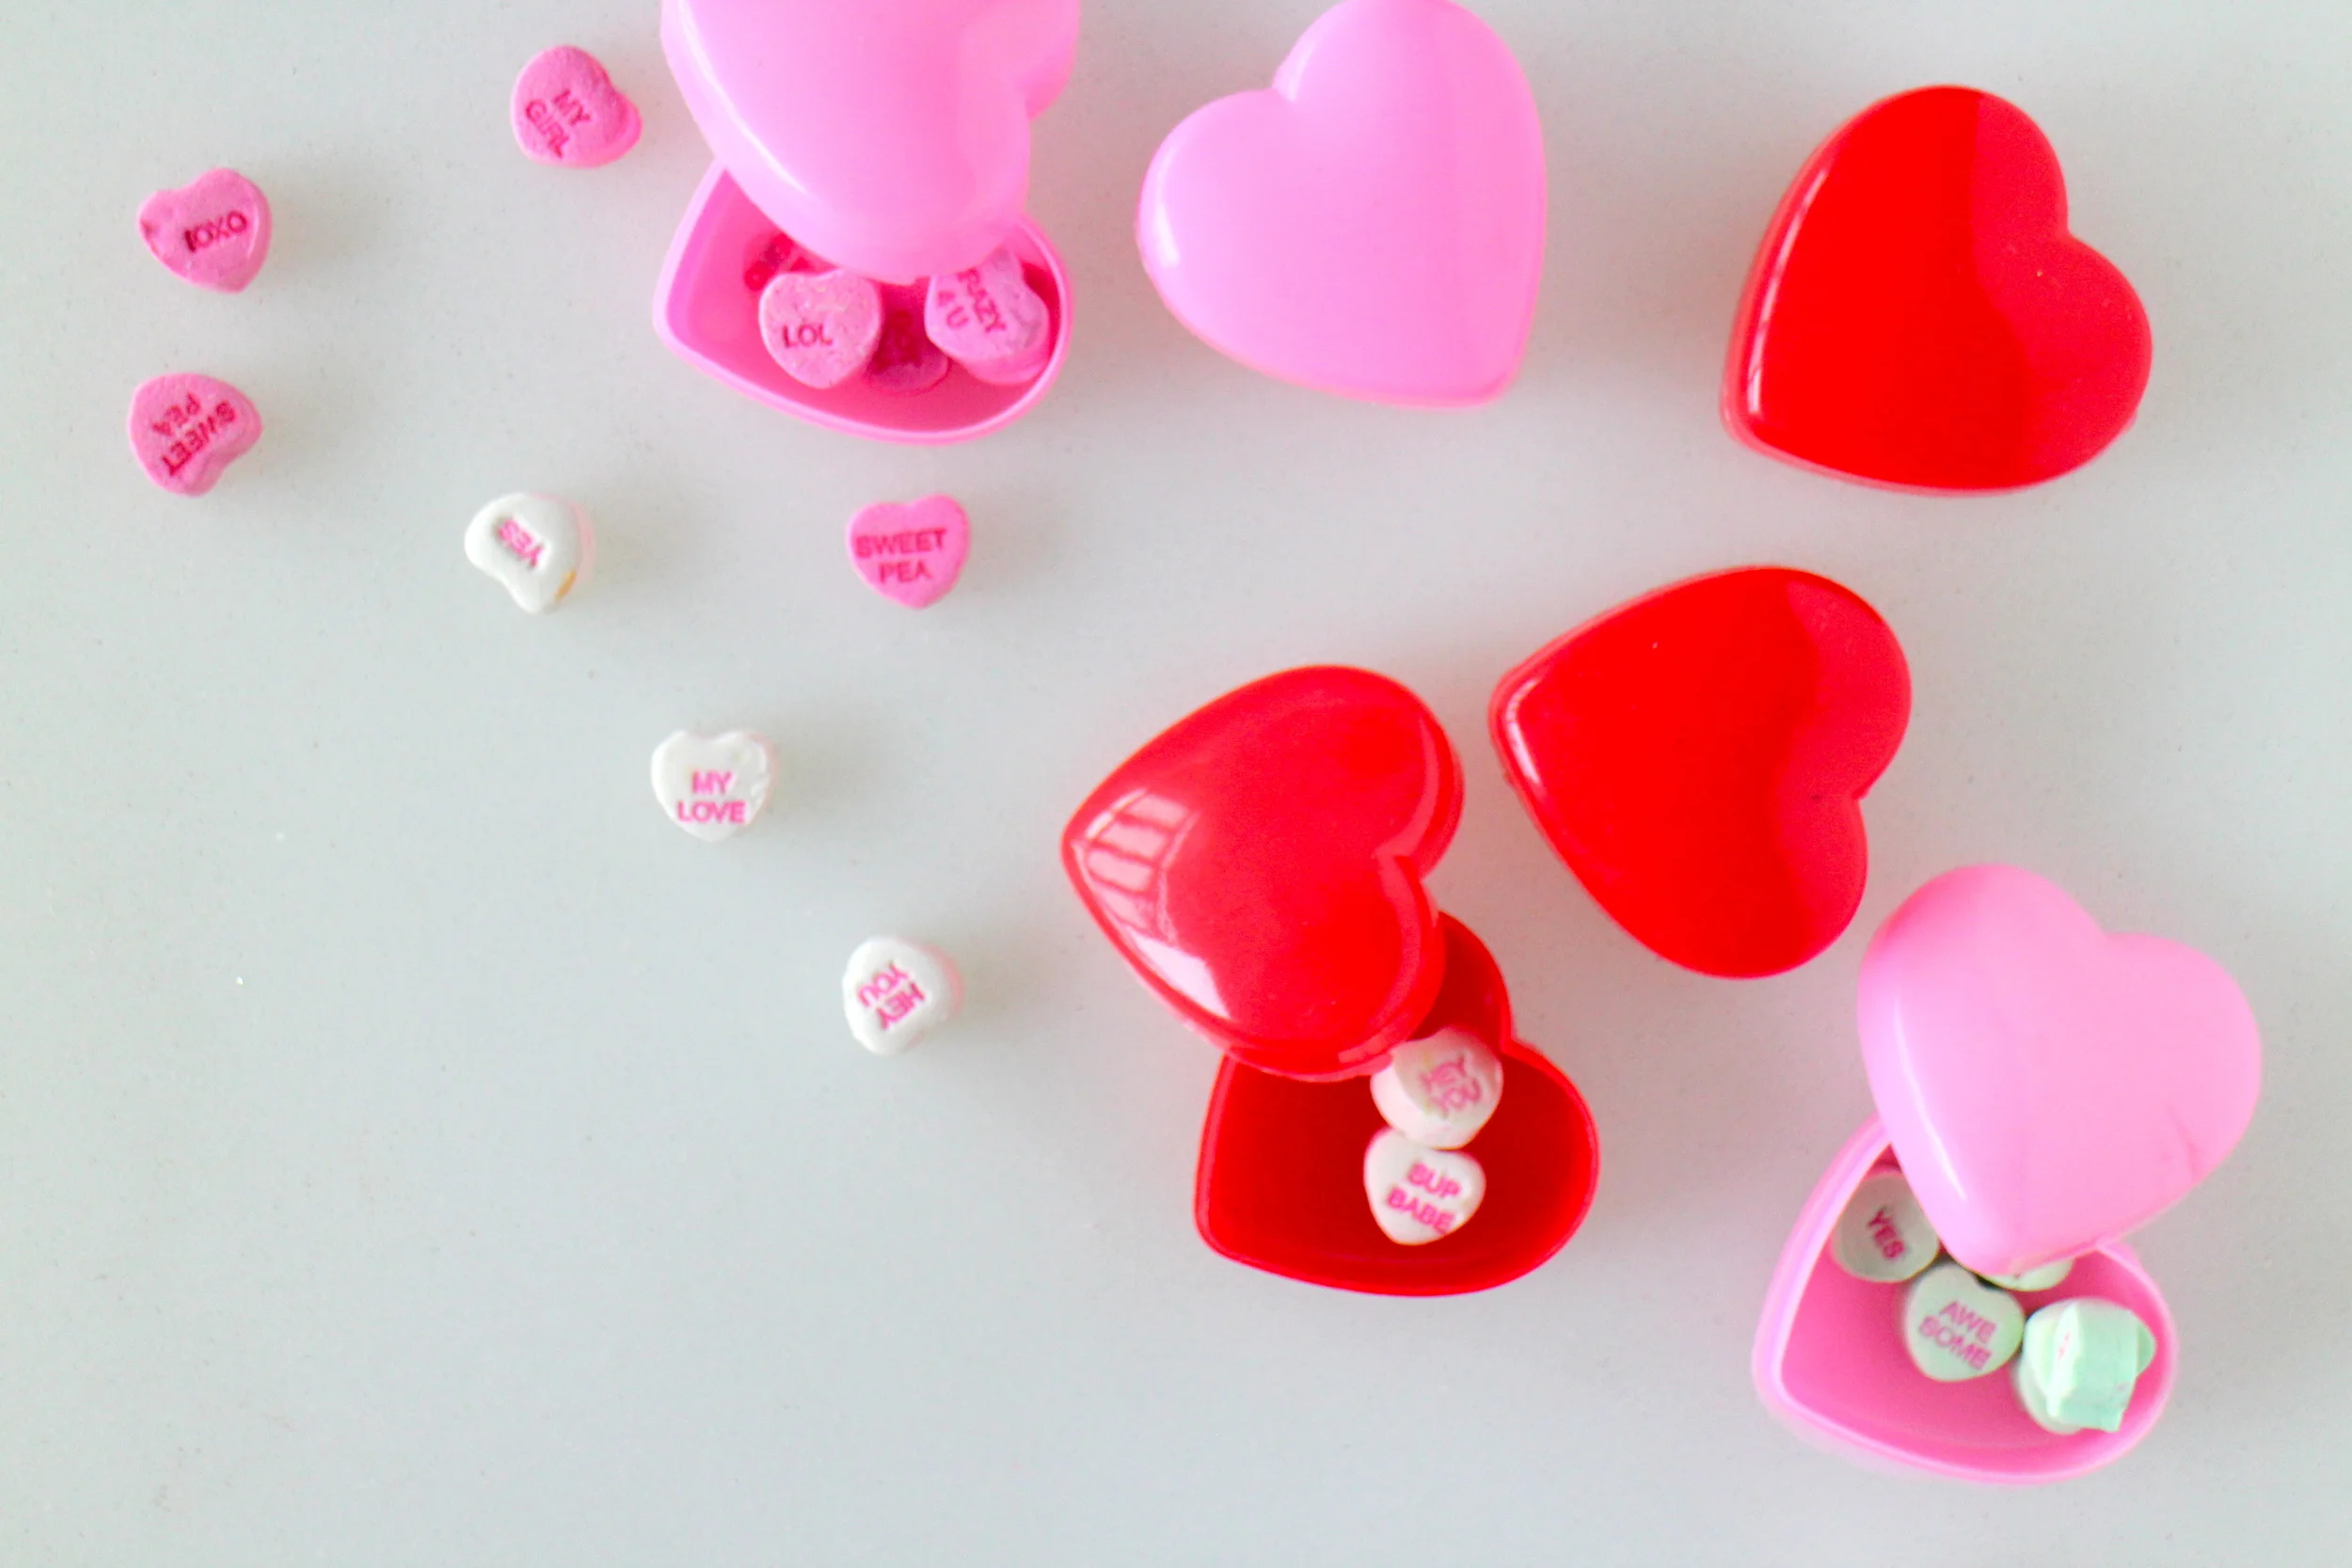
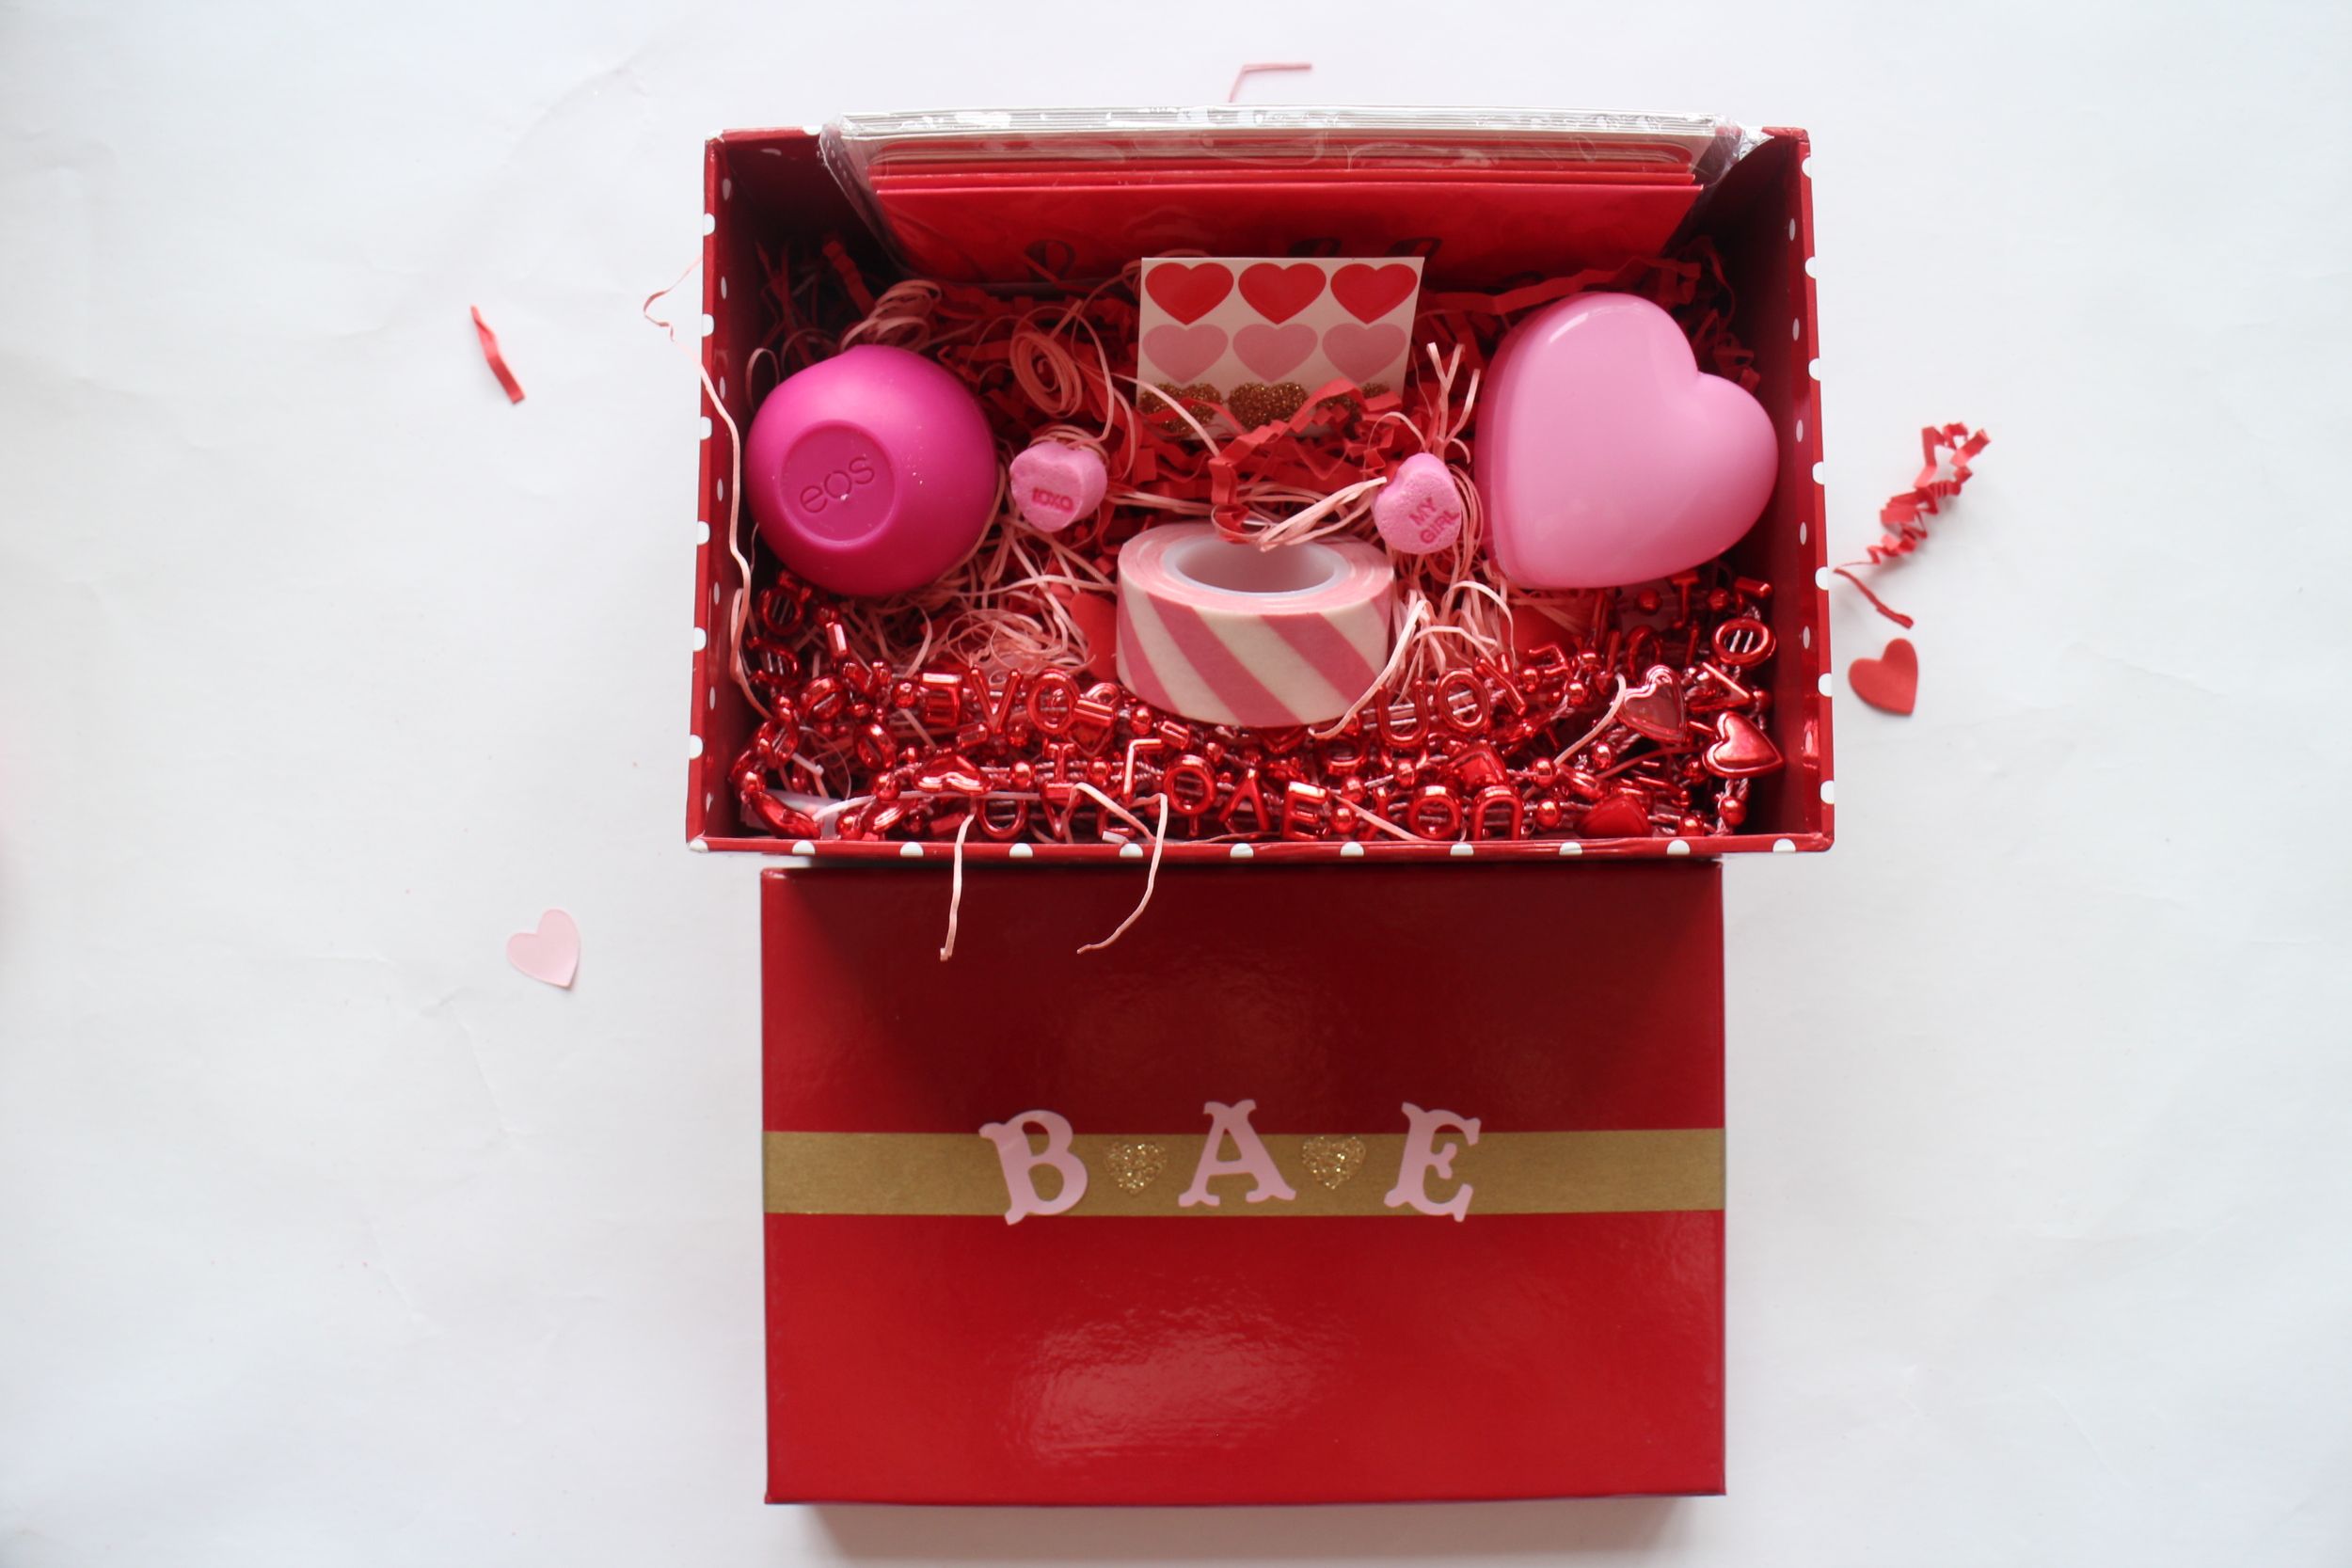
Who doesn’t love receiving a box full of…LOVE?!! It’s the sweetest way to let your girlfriends know that you’re thinking about them during the non-stop Valentine’s Day LOVEfest

Tis the official season of LOVE, February is upon us. And like a good girlfriend you can't stop thinking about the gal pals in your life who are spending the holiday, shall we say, single. But you love them, doesn't that count! So let's talk about some ideas to shower your Gal Pals with love this GALentines Day!
Who doesn’t love receiving a box full of…LOVE?!! It’s the sweetest way to let your girlfriends know that you’re thinking about them during the non-stop Valentine’s Day LOVEfest. It’s simple, easy, and takes only 10 minutes to put together! All of the goodies were purchased from Target and if you shop early enough, you’ll still be able to find these treats in the $1-$3 section!
How to create your box full of love:
1. Choose a box
2. Pick some goodies
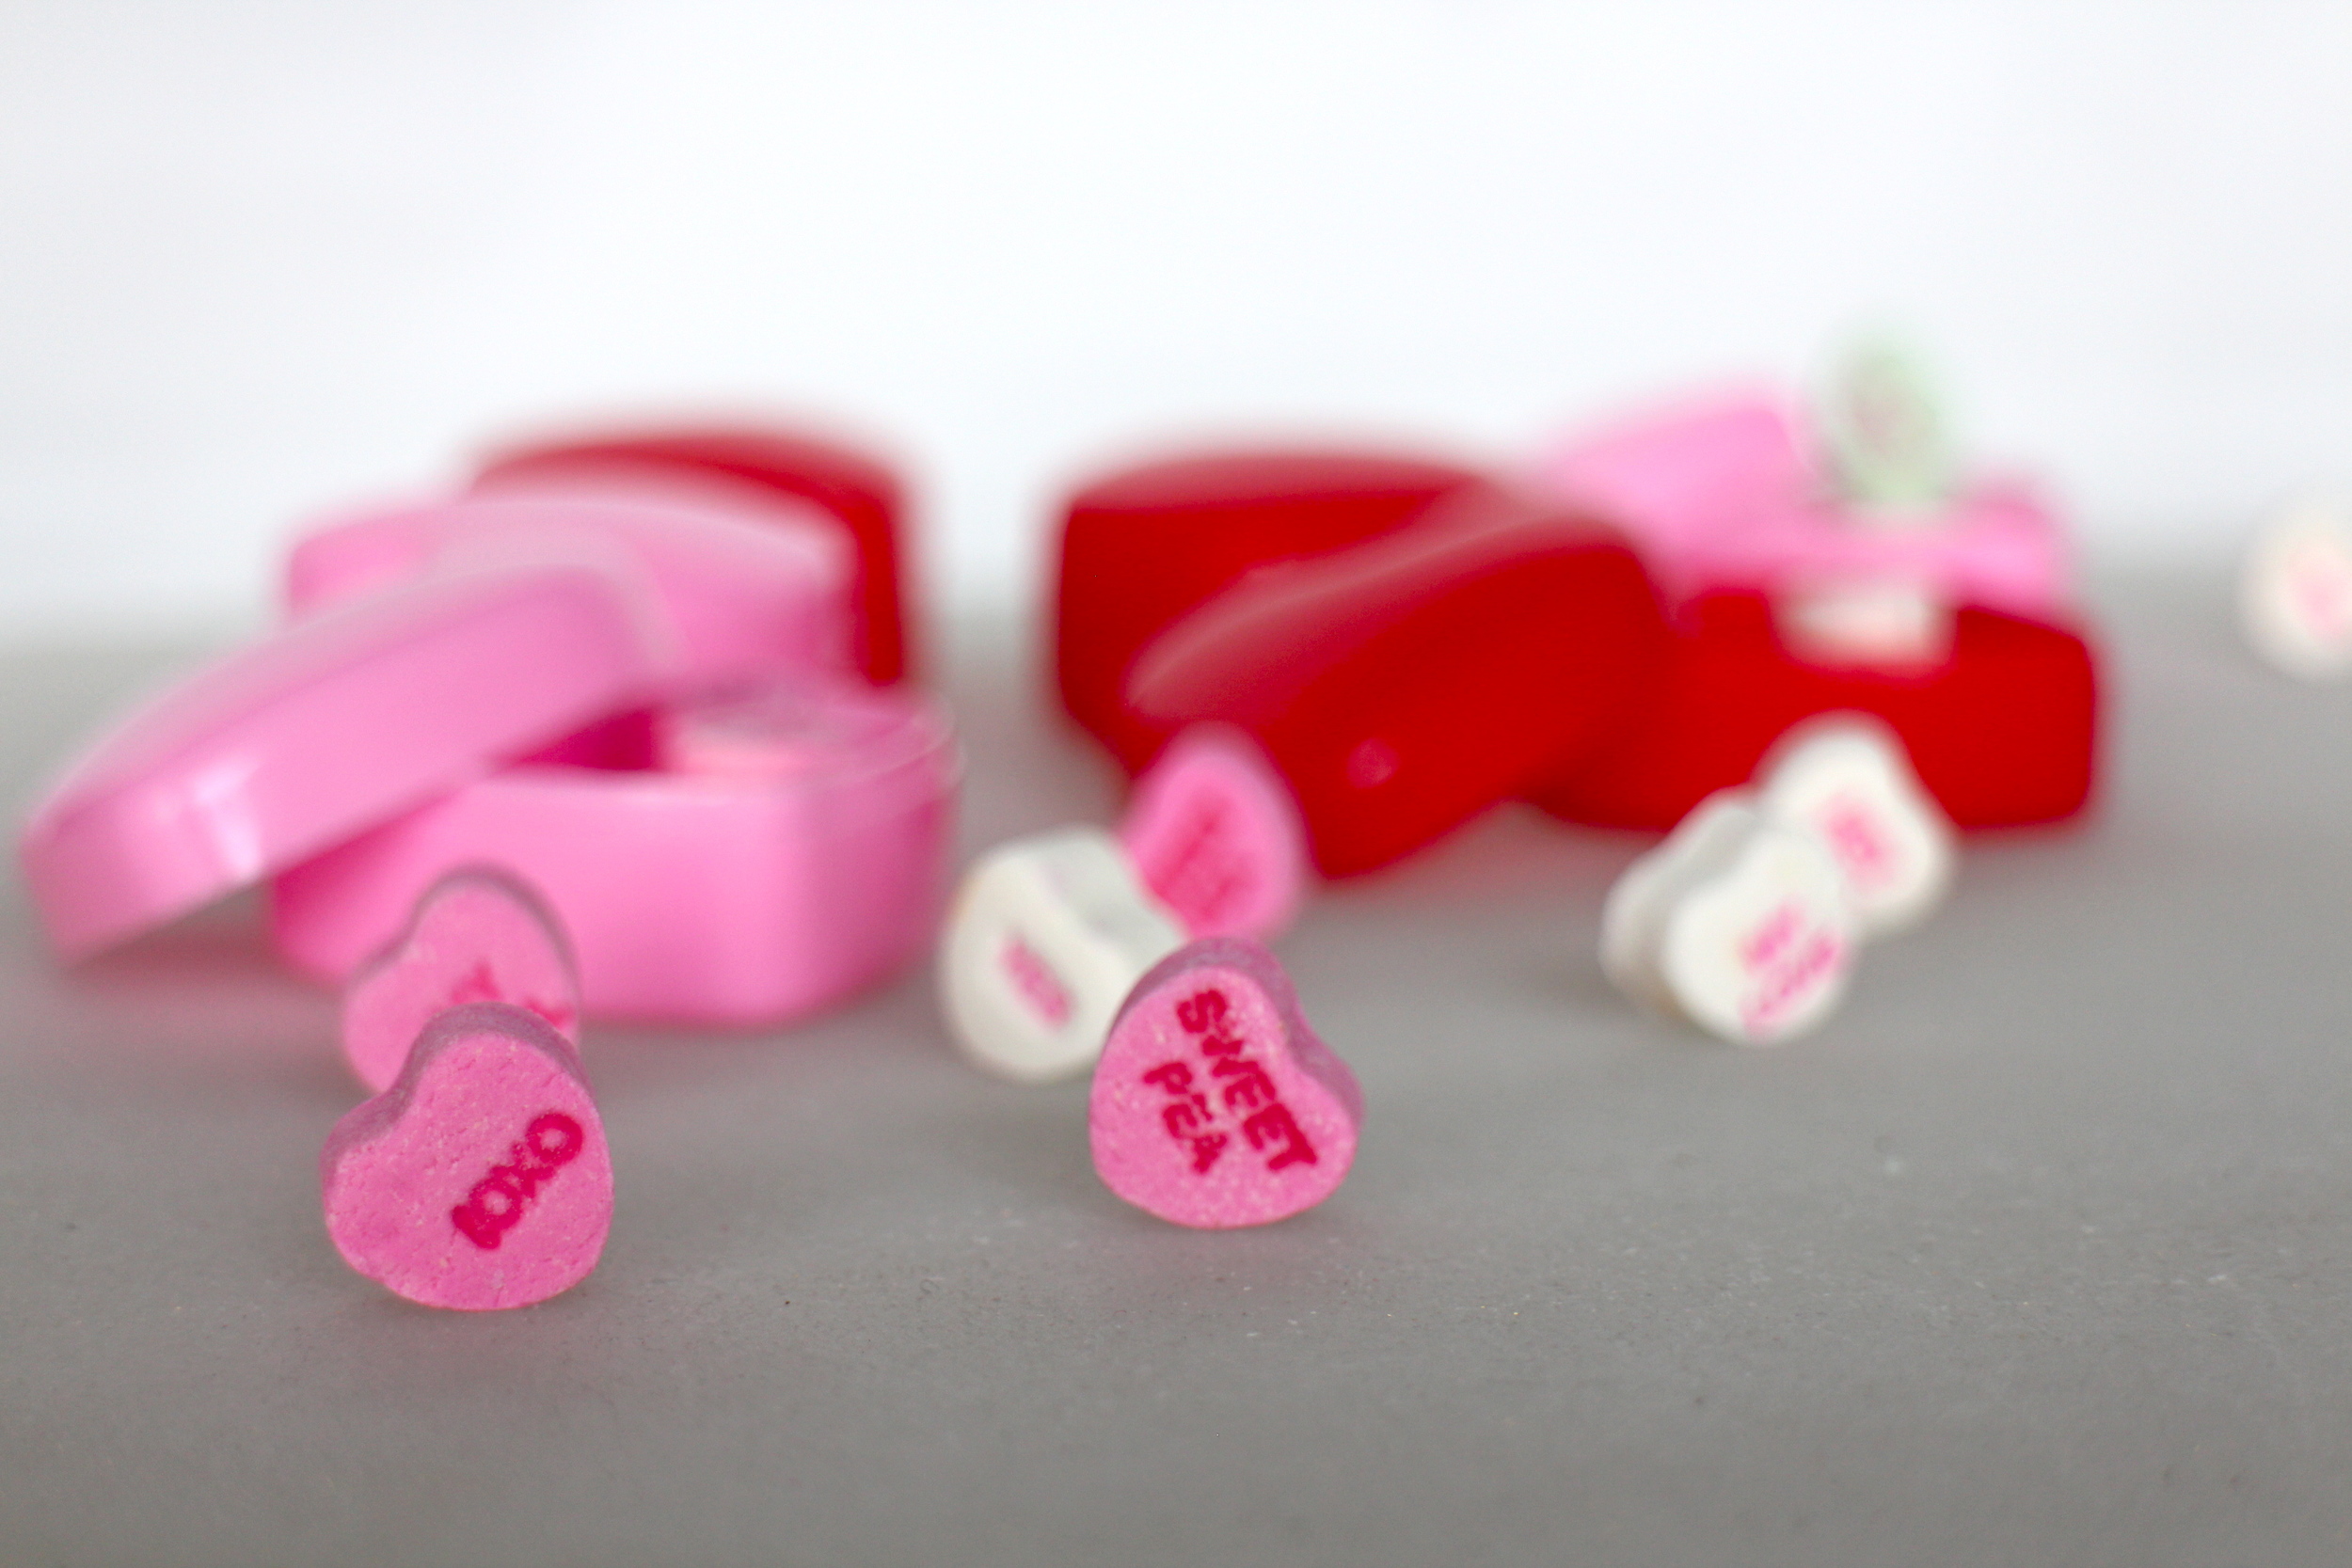
Pink Lip Balm
Pink and Red Tic-Tacs
Heart Stickers (sold on one sheet but you can cut to fit your box)
“I Love You” Necklaces
Heart Plastic Containers
Conversation Heart Candies
Note Cards
Washi Tape
3. Add some raffia or tissue paper to fill the box
4. Decorate the lid with washi tape and add alphabet stickers to customize your box
Boxes of Love are a cute and simple way to spread the love to your dearest girlfriends. They’ll be tickled pink that you’re thinking of them!


ABOUT THE AUTHOR

Courtney Chan has been an educator for over a decade, inspiring her students to think creatively and dream big! And she makes sure to incorporate her own advice into everything she does - from planning special events in the classroom to joyous celebrations for her close family and friends. She enjoys crafting, DIY projects and creating themed events from start to finish.Courtney has a penchant for all things that shine and you'll never see her leave home without her signature sparkle, glitter or gold. Her blog "Sparkles For All" combines her passion for planning special events with her motto to always shine bright like a diamond!

INSPIRED BY THIS: RING IT INTO THE NEW YEAR
Today we are discussing how to take those left over party elements and refresh them for a great New Year's Party. After all, you put all that work into your holiday arrangements, why not let them take center stage as long as possible?!

Photography: Jose Villa
We are thrilled to hang out with Inspired By This the entire month of December as our Guest Editor. We have already found ourselves learning some amazing tips and can’t wait to be inspired the whole month! They'll be guiding us through holiday planning and sharing lifestyle tips... be prepared to be inspired!
HAPPY NEW YEAR
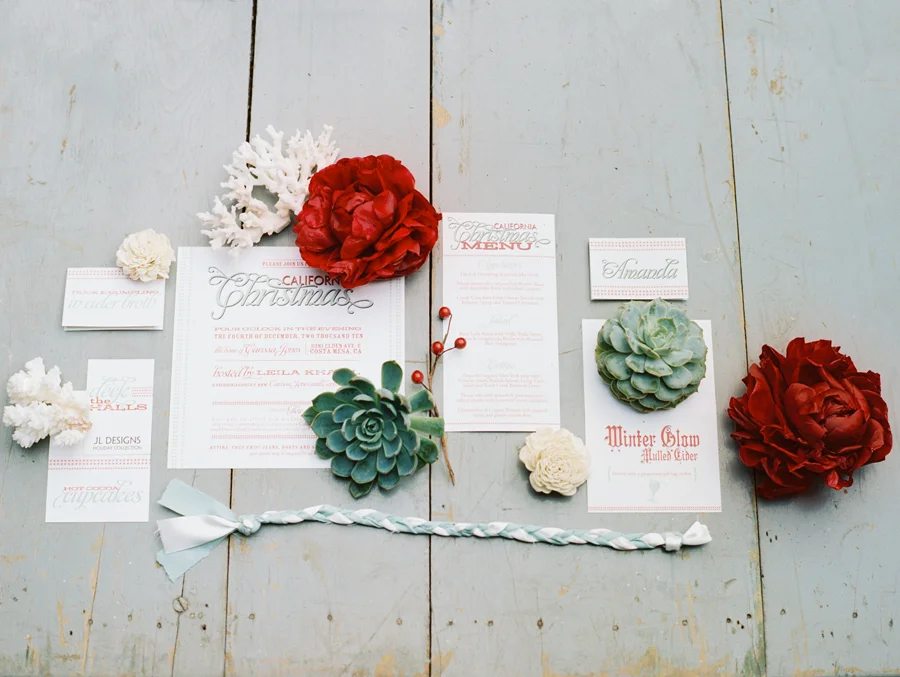
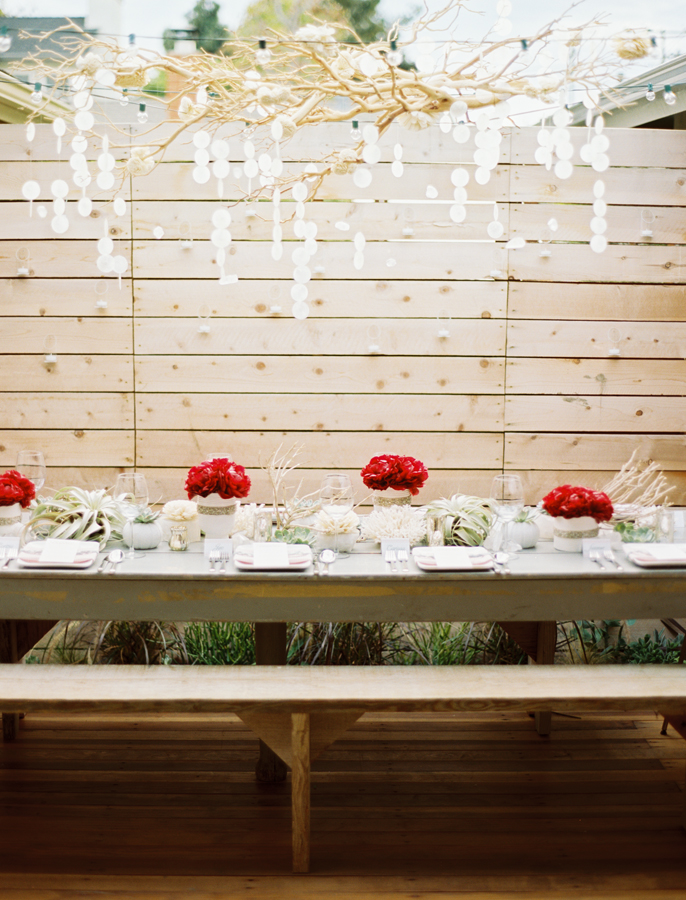
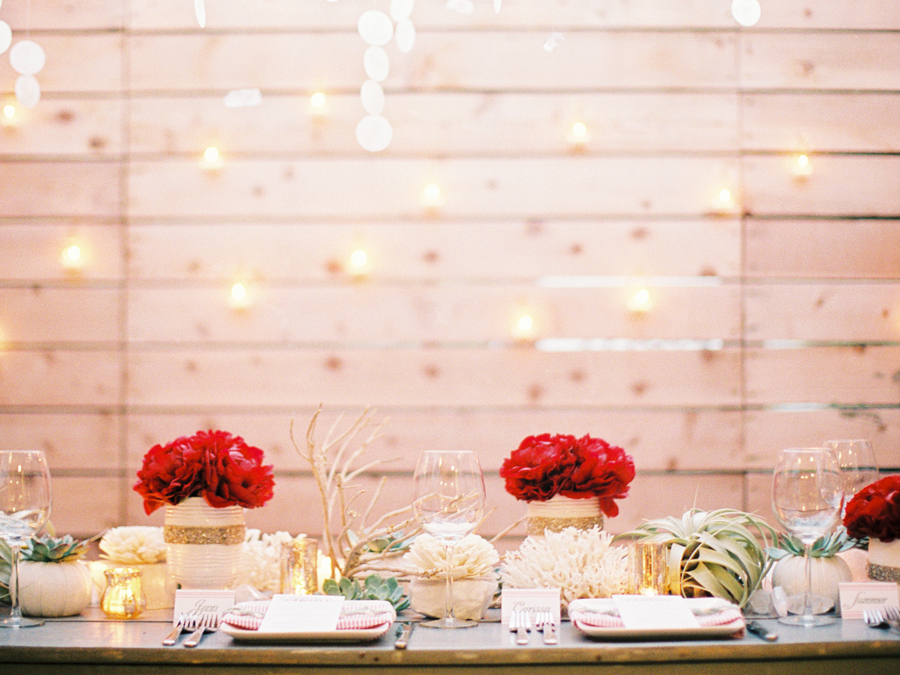
Today we are discussing how to take those left over party elements and refresh them for a great New Year's Party. After all, you put all that work into your holiday arrangements, why not let them take center stage as long as possible?! Last week was all about party accessories and this week we are going to talk about how you can take those accessories and reuse them for future parties. With the New Year right around the corner, this is the perfect time to take all of our Christmas party decor and find a way to bring it to use in your New Year's shindig!
BEFORE

Styling: JL Designs + The Venue Report

Photography: Leo Patrone
AFTER

Styling: The Venue Report + Inspired By This
Florals: JL Designs
Photography: Jose Villa
From the California Christmas ideas we shared last week, you can take elements such as the succulents and florals and reuse them for your January festivities. With a little gold spray paint, the succulents are completely transformed. You can use white vases from your previous event to create the centerpieces fro the table settings. Just add some simple white florals from your local Trader Joes... Just like that our Christmas party decor was transformed into New Years wedding decor and fashion accessories! It's that simple!
Party planning is a great way to bring family and friends together. You get to create with a few elements in your home and reuse decor you have purchased for multiple events. So don't let holiday hosting weigh you down. We hope we have been able to inspire you with different ways to throw your own holiday and New Year's party without breaking the bank!
HEAD OVER TO INSPIRED BY THIS FOR MORE DAILY INSPIRATION!

INSPIRED BY THIS: PARTY ACCESSORIES
Last week on the we talked about the main components of a party and gave you a peek at how we included those ideas in our holiday party! This week, we wanted to give you some party accessory ideas, including some of our favorite DIY's.

We are thrilled to hang out with Inspired By This the entire month of December as our Guest Editor. We have already found ourselves learning some amazing tips and can’t wait to be inspired the whole month! They'll be guiding us through holiday planning and sharing lifestyle tips... be prepared to be inspired!
Last week on the we talked about the main components of a party and gave you a peek at how we included those ideas in our holiday party! This week, we wanted to give you some party accessory ideas, including some of our favorite DIY's.
DETAILS
The tablescape is typically the focal event of a party - the centerpieces will be your main decor, your guests will be wining and dining at the table and conversation will flow. So this is where the details will matter most! For our party, we put a personalized namecard at each setting, and added a fun braided detail. The braids were easy to DIY ourselves with strips of fabric, and really tied the place settings together. You can pick up materials for this at your local craft store. Don't be afraid to get creative! Fabric, string or twine are great options.

FAVORS
The other key to a great party is a memorable favor for your guest to take home. It's their final impression of the night, and we want it to be a good one! For our event, we made a favor that doubled as event decor - ornament cookies. The cookies hung from a tree during the party bringing in some holiday cheer. At the end of the night, the guests received a goodie bag and got to pick a cookie from the tree to take home. This is a simple DIY that just requires cookie dough, cookie cutters and frosting. When making the cookies be sure to leave a hole at the top for the string to hang from the tree. From there, the design is up to you! Choose frosting and edible accents in the color scheme and theme of your event.


ENTERTAIN
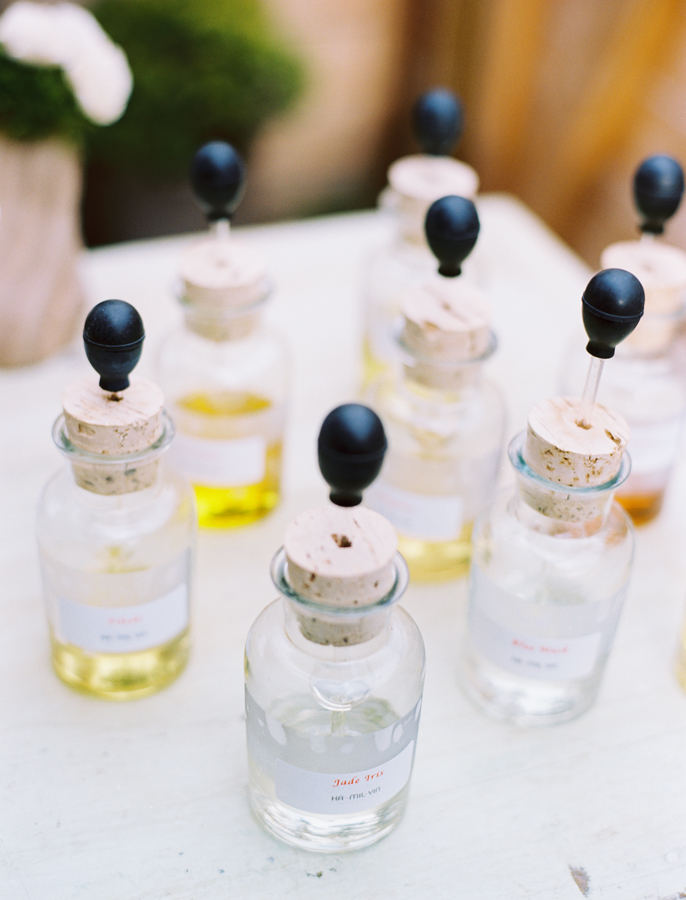
Lastly, be sure your guests have a little entertainment! It can be a group activity like cookie decorating station, a photo booth or event offer plain wreaths to decorate. For our event we set up a scent station where guests were able to make their own perfumes or body scrubs to take home. We included fun holiday scents like pine, peppermint and nutmeg!

Party accessories are the elements tie your party together and add a little pizzazz! The details will be what makes your night memorable. So whether you're DIY'ing or not, be sure to add personalized and cute accents that your guests will be talking about all night. We hope our Christmas party décor and DIY brought some inspiration to your upcoming parties!
HEAD OVER TO INSPIRED BY THIS FOR MORE DAILY INSPIRATION!


INSPIRED BY THIS: PARTY PLANNING BASICS
We are thrilled to hang out with Inspired By This the entire month of December as our Guest Editor. We have already found ourselves learning some amazing tips and can’t wait to be inspired the whole month!
We are thrilled to hang out with Inspired By This the entire month of December as our Guest Editor. We have already found ourselves learning some amazing tips and can’t wait to be inspired the whole month! They'll be guiding us through holiday planning and sharing lifestyle tips... be prepared to be inspired!
It is that time of year again..The holidays! With the holiday's come the parties, and I am so excited to share my party planning advice with you! Whether you are going to a party or throwing it, it is so good to know party planning basics! I am going to show you the basic anatomy of a party with all of its major components, as well as how to achieve high end decor on a budget! After this you will be ready to tackle any party that comes your way!
Any party, whether it be a bridal or baby shower, a birthday party, dinner party, or even a holiday party, all have the same basic elements! The major components to any party include:
Create the Setting
This is your time to create the overall ambiance of your party, and where decor and details are very important. The mood of your event can be altered by changing the lighting of the room and having candles mixed within the decor. This is also a great time to consider making your guests feel special by adding little personalized details to your party such as a name card above their place setting, a personalized menu, or even a favor that the guests get to take home with them (look out for our favor DIY next week!) It is important to choose decor that not only corresponds with the theme of your event, but is also esthetically pleasing to your guests!
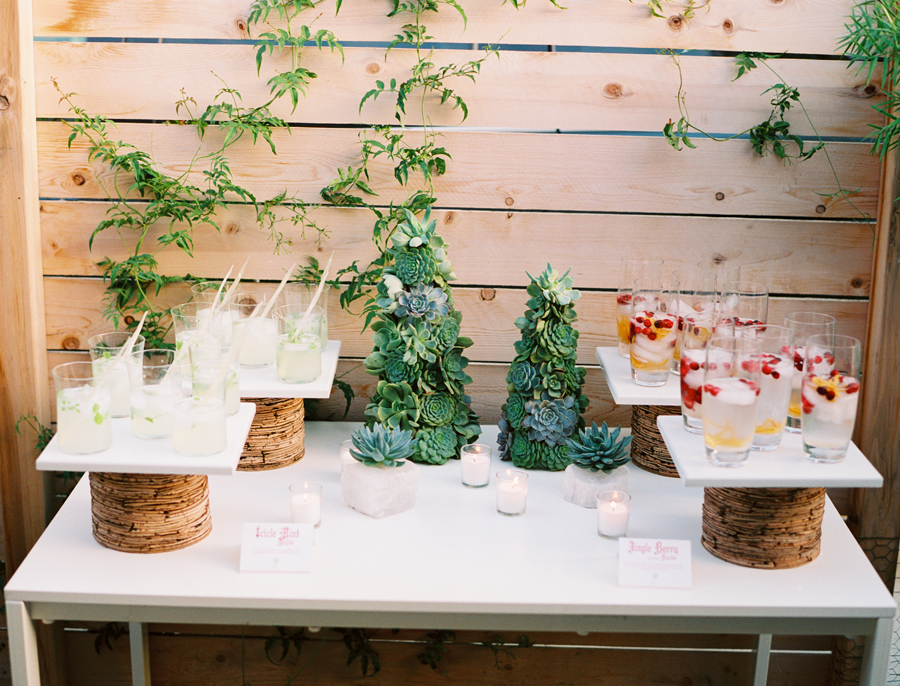
Food and Drink
This is another great time to personalize your event for your guests! it is important to be mindful of your guests likes and dislikes or any aversions they may have to different foods when planning your menu! Make sure to not only choose items that will appeal to the majority of the group, but also try to plan the menu to fist the theme or time of year your event takes place! For our Christmas party, we chose to plan a menu full of winter salads, comfort food, and an array of winter themed desserts to correspond with the time of year and occasion!


The Tablescape
The table is a very important element because that is where the guest will be entertained! Don't be afraid to pull from items you already have from home, or even collect some decor from places such as Target, Home Goods, or T.J. Max! It is important to step out of the box when setting your decor and tablescape so your items can be reused for any future events you may host! For our event we went with a more modern Christmas theme in order to include unexpected elements such as the wood to tie in our soft florals and more desert-like plants.
We wanted to keep our arrangements low so our guests could see one another and converse over dinner, but also create some depth to our table. For floral centerpieces, we find it is best to start with a neutral base and add pops of color! As you can see from our Christmas party we had neutral white florals in combination with pops of bright red flowers and a hint of mint from the succulents. For our table settings we placed a menu on top of our plate and napkin and tied it down with braided fabric (We are sharing this DIY next week)! We then added name cards above each individual place setting - adding a personal touch! Lastly, food presentation is very important. It is such a great touch to have pretty platters and risers to serve the food, drinks, and desserts to keep the look of the party appealing!

I hope this inspired you to throw a party of your own! With the party basics I gave you, you now have some ideas on how to have a great party with amazing decor, but on a smaller budget!
HEAD OVER TO INSPIRED BY THIS FOR MORE DAILY INSPIRATION!

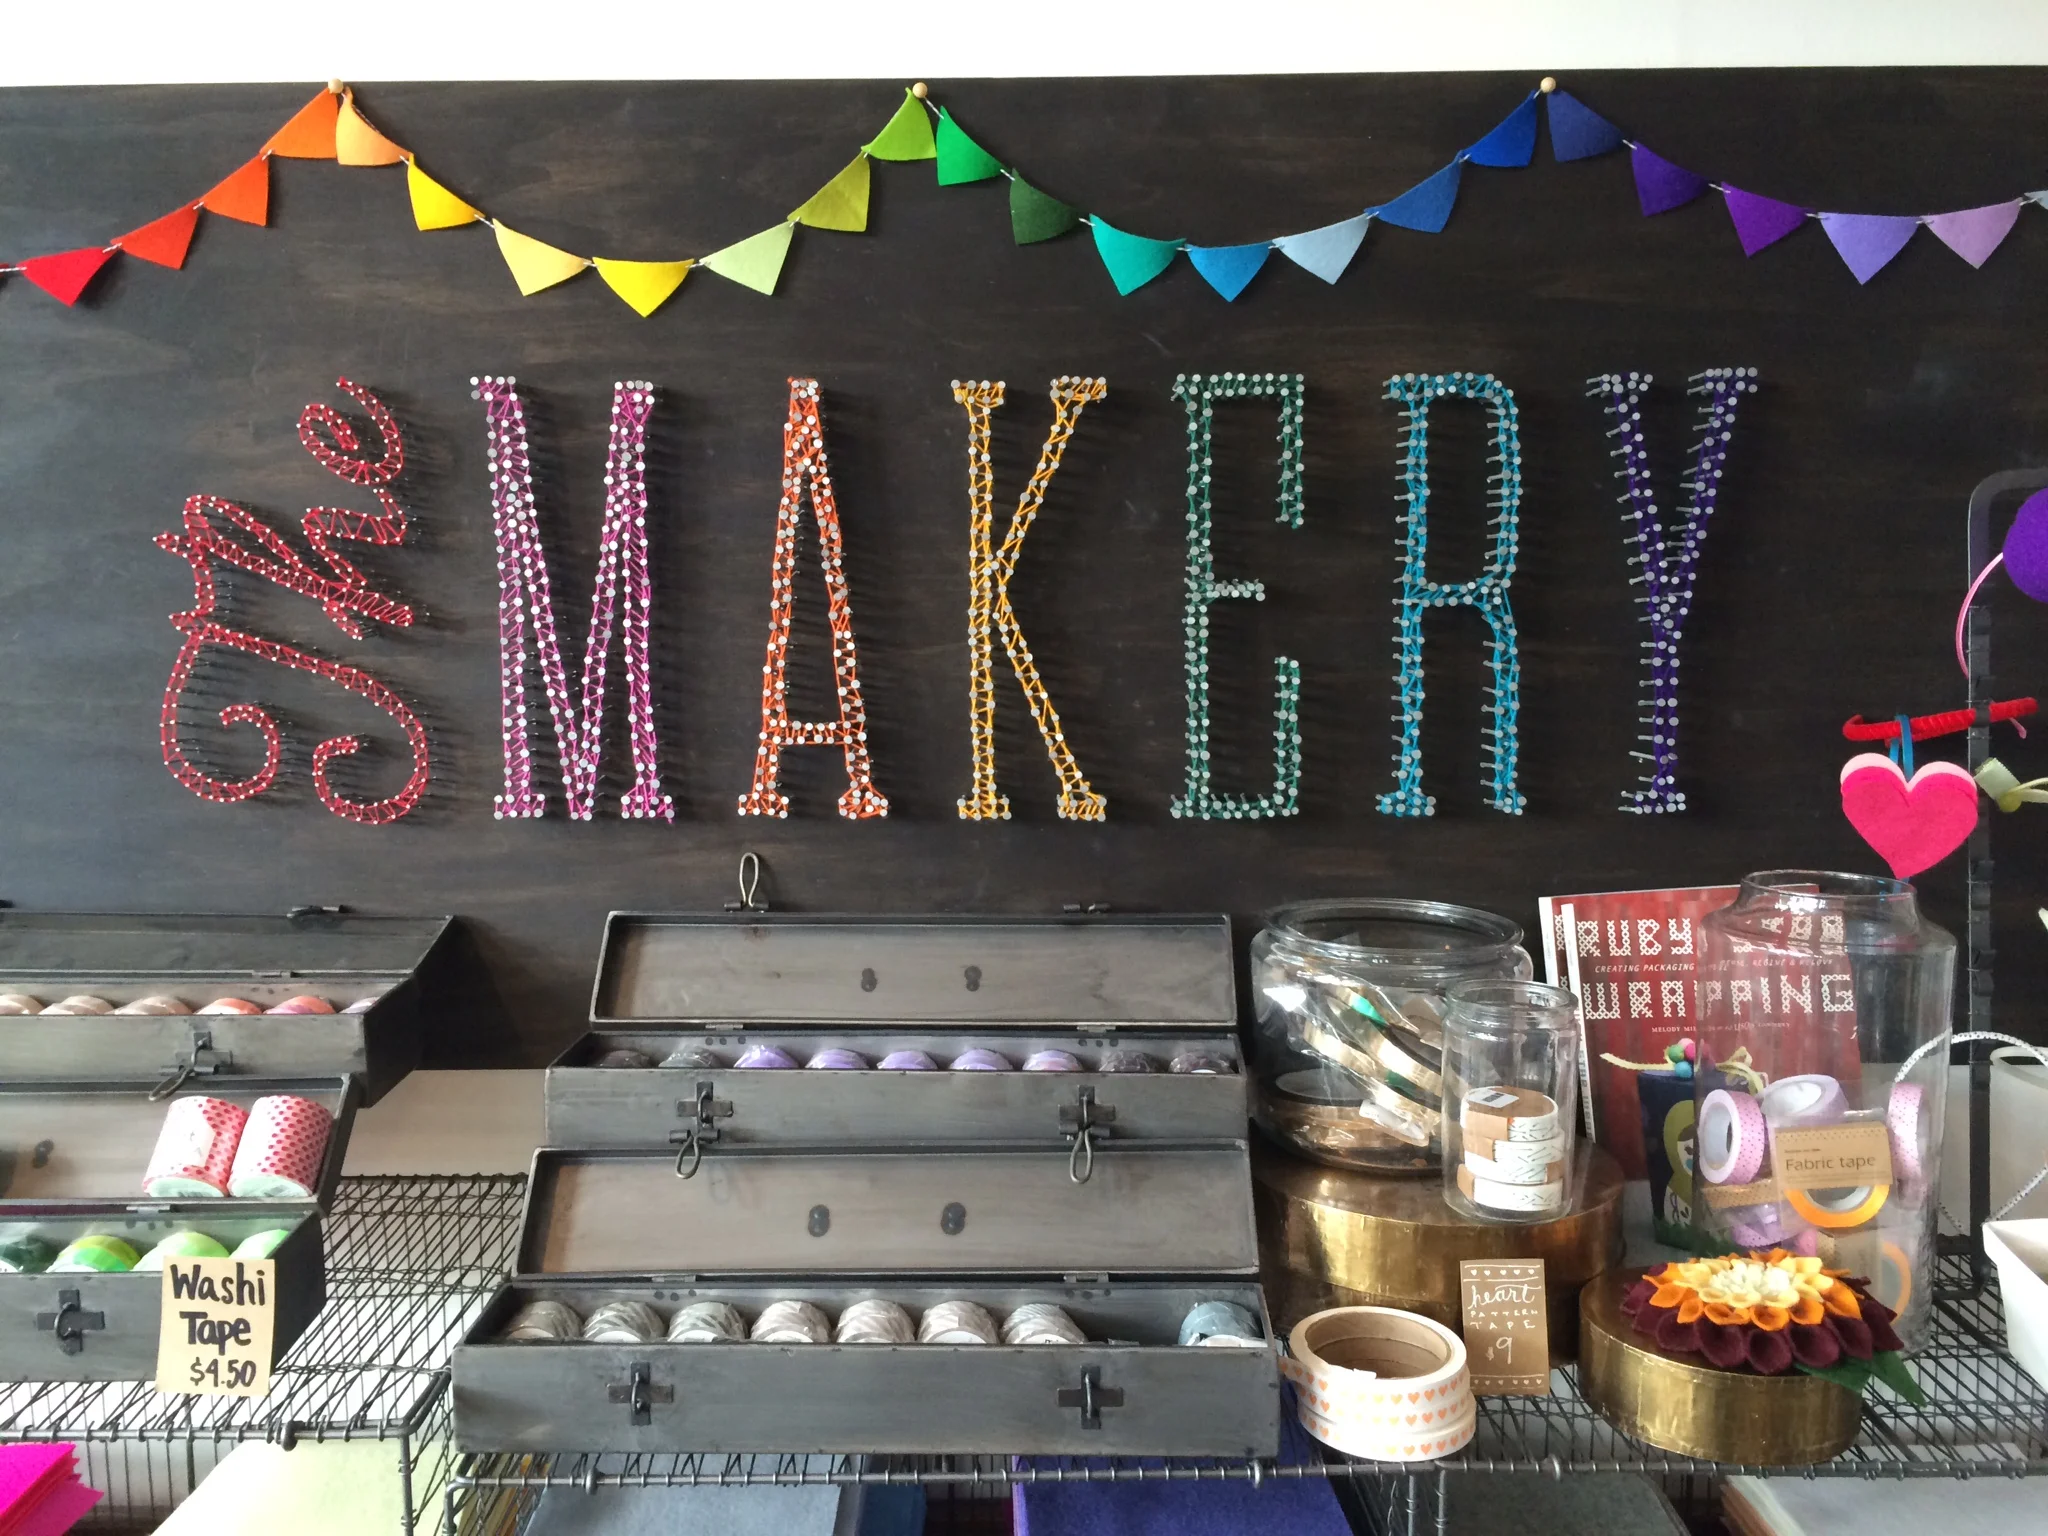
EST. SPOTLIGHT: THE MAKERY
There are few things I love more than decorating my home for fall. The colors, the fall leaves, the warm rustiness of it all.. I could go on and on. So this month I'm sharing a few of my favorite items from one of my favorite stores in the Bay Area, The Makery.
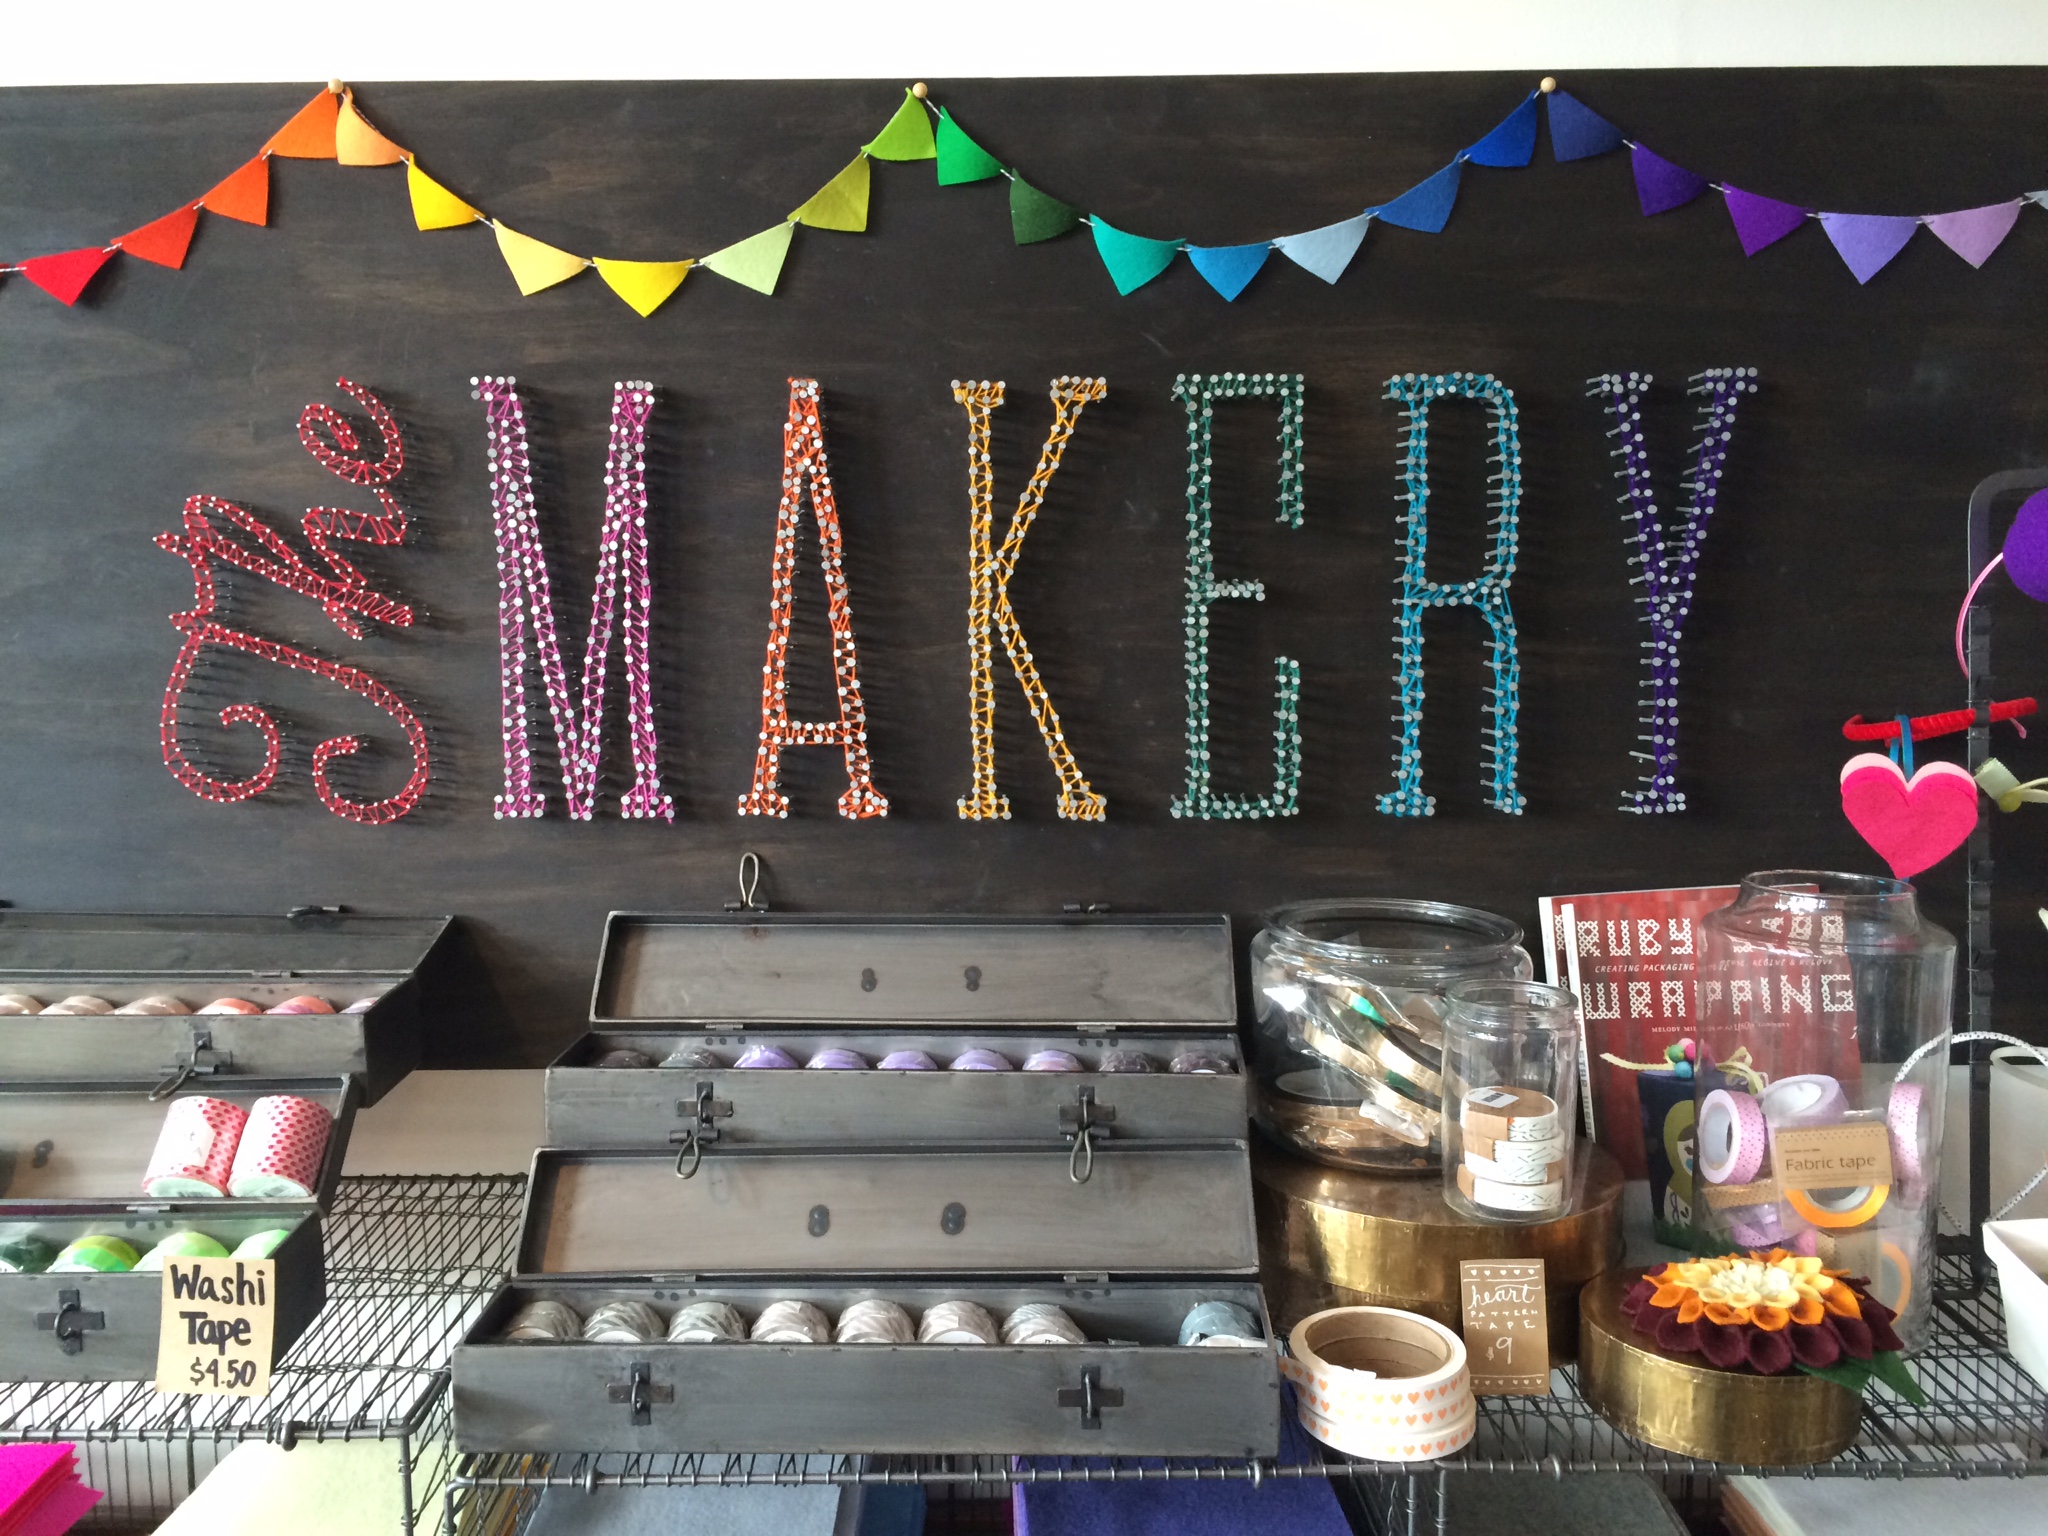
There are few things I love more than decorating my home for fall. The colors, the fall leaves, the warm rustiness of it all, I could go on and on. So this month I'm sharing a few of my favorite items from one of my favorite stores in the Bay Area, The Makery.

The Makery opened in downtown Los Altos in the Spring of 2013 and has been blossoming ever since. The idea for the store was to bring DIY projects, unique retail, custom items, events and more to people. The Makery has done just that! They offer open studio time where guests can come in and make a project of choice with a master crafter. They also offer special events like a monthly Craft Club, which puts a crafty spin on the classic book club. My personal favorite is that you can host your own special event complete with custom crafts!
They recently moved their sister store, The Botanist, in with them to add a little more to their already amazing collection of treats. Their well curated collection includes paper goods, fresh cut arrangements, a felt bar and more. The Makery is my go-to when I'm in need of a thoughtful and unique gift.

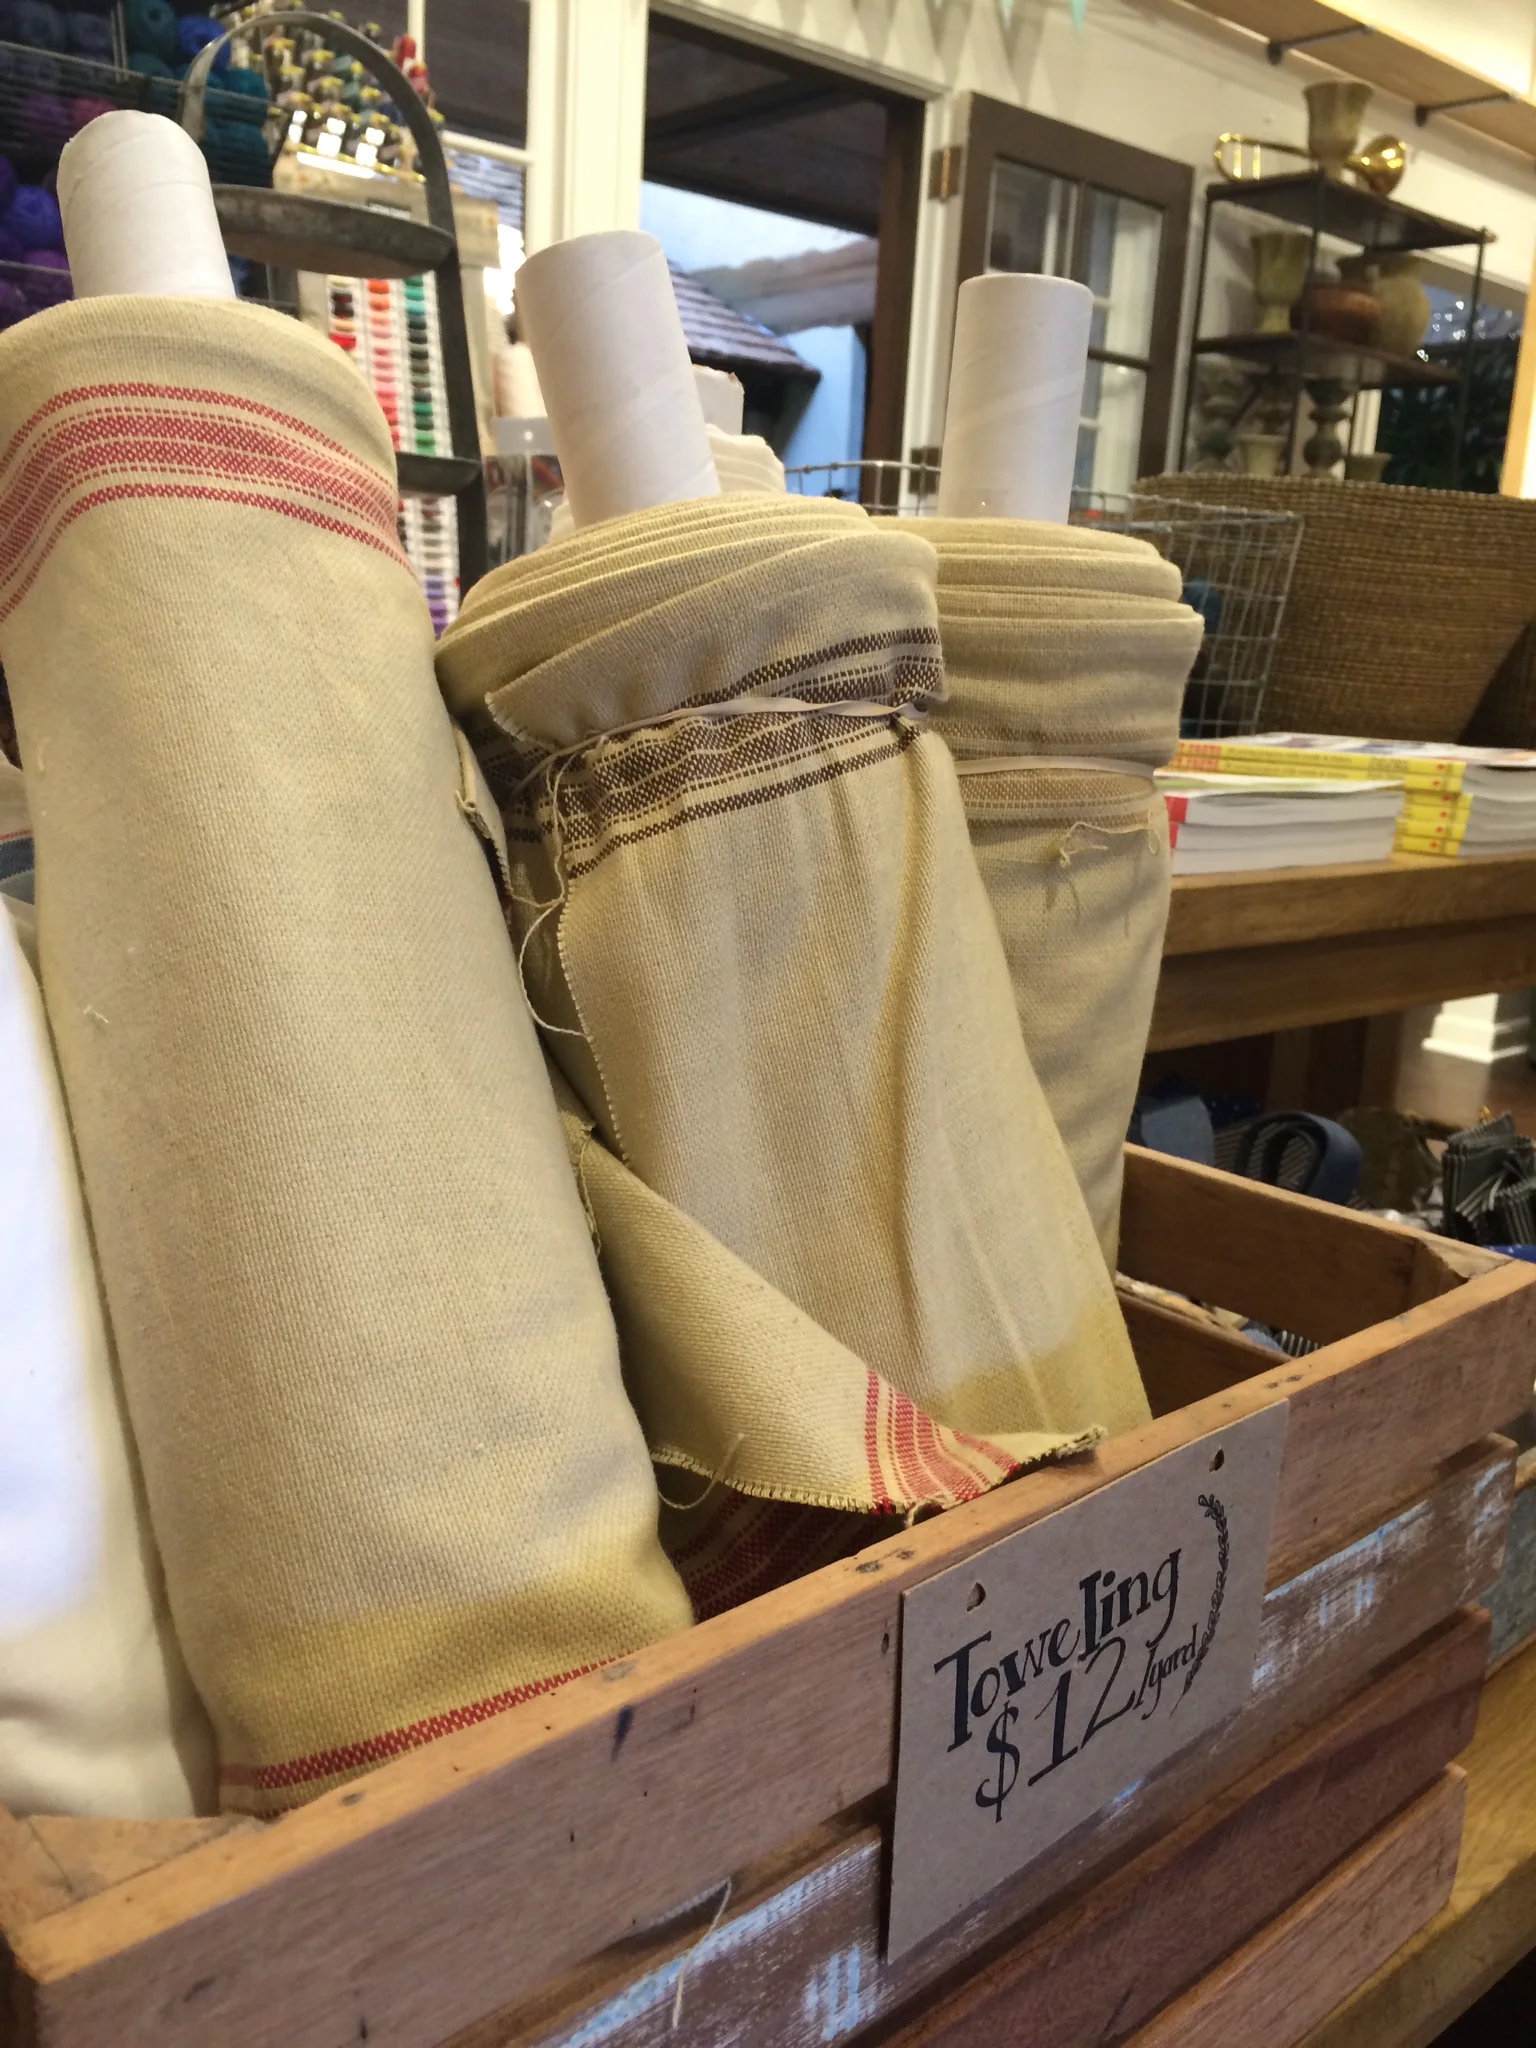
1. Rustic Runners
I really like runners for tables; they are the perfect simple canvas to start with when you are putting together a tablescape. These towel fabrics can be cut to any length so they are a custom fit for your table. Don't have dinning table? Dress up your coffee table with one and add some flowers and pumpkins for even more pop.

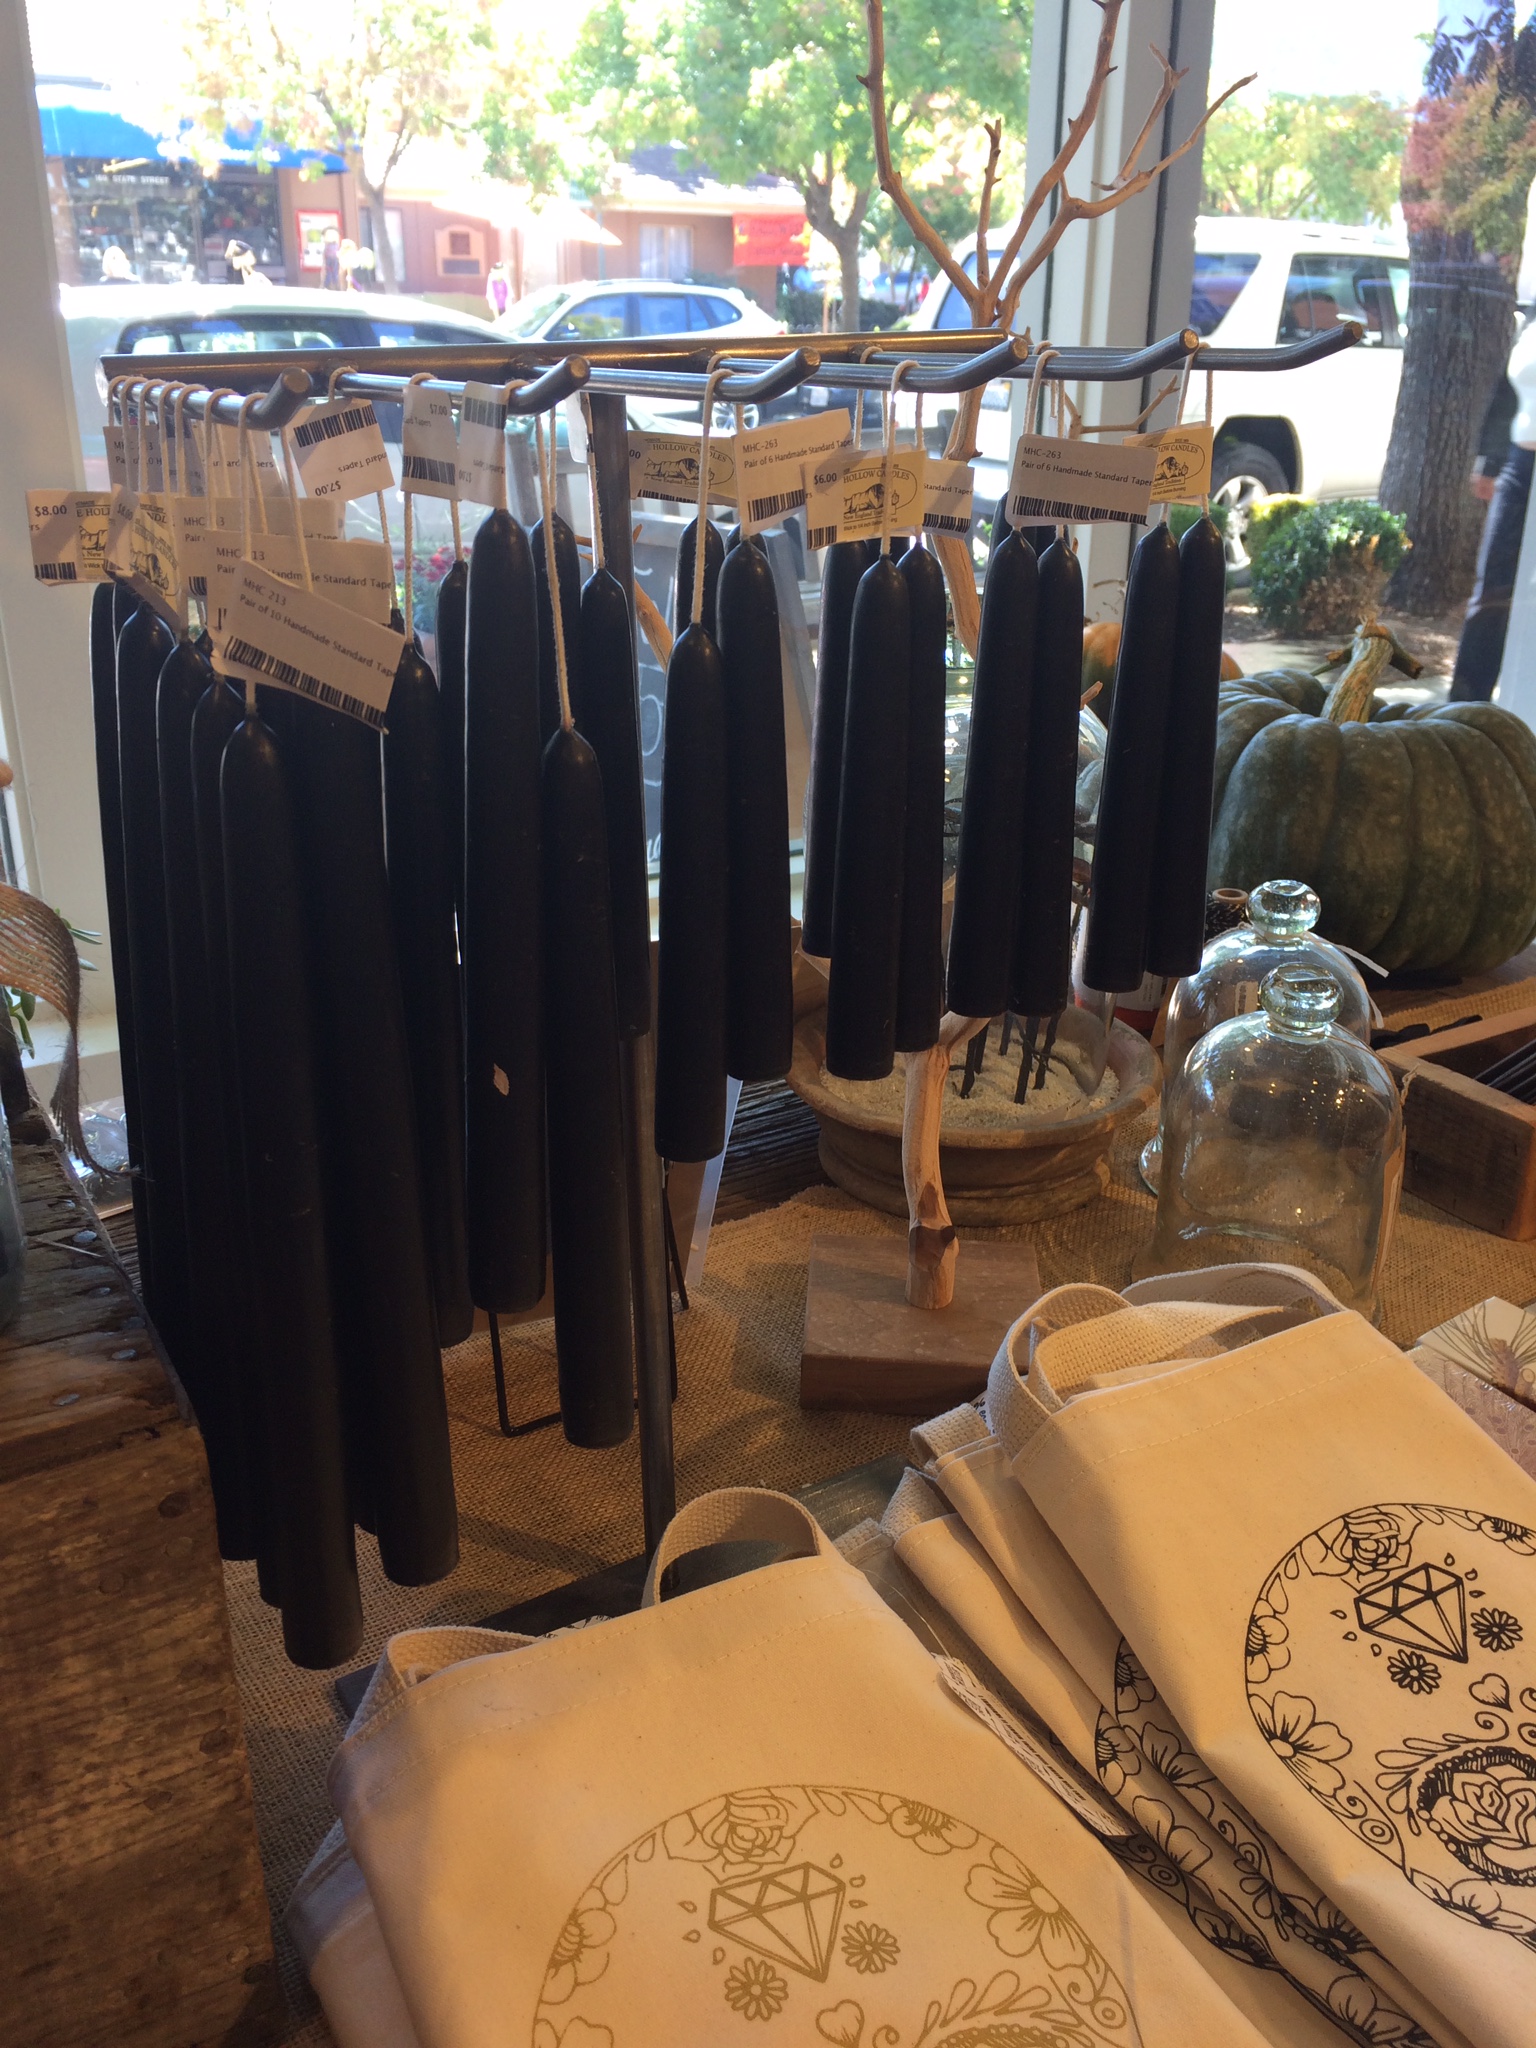
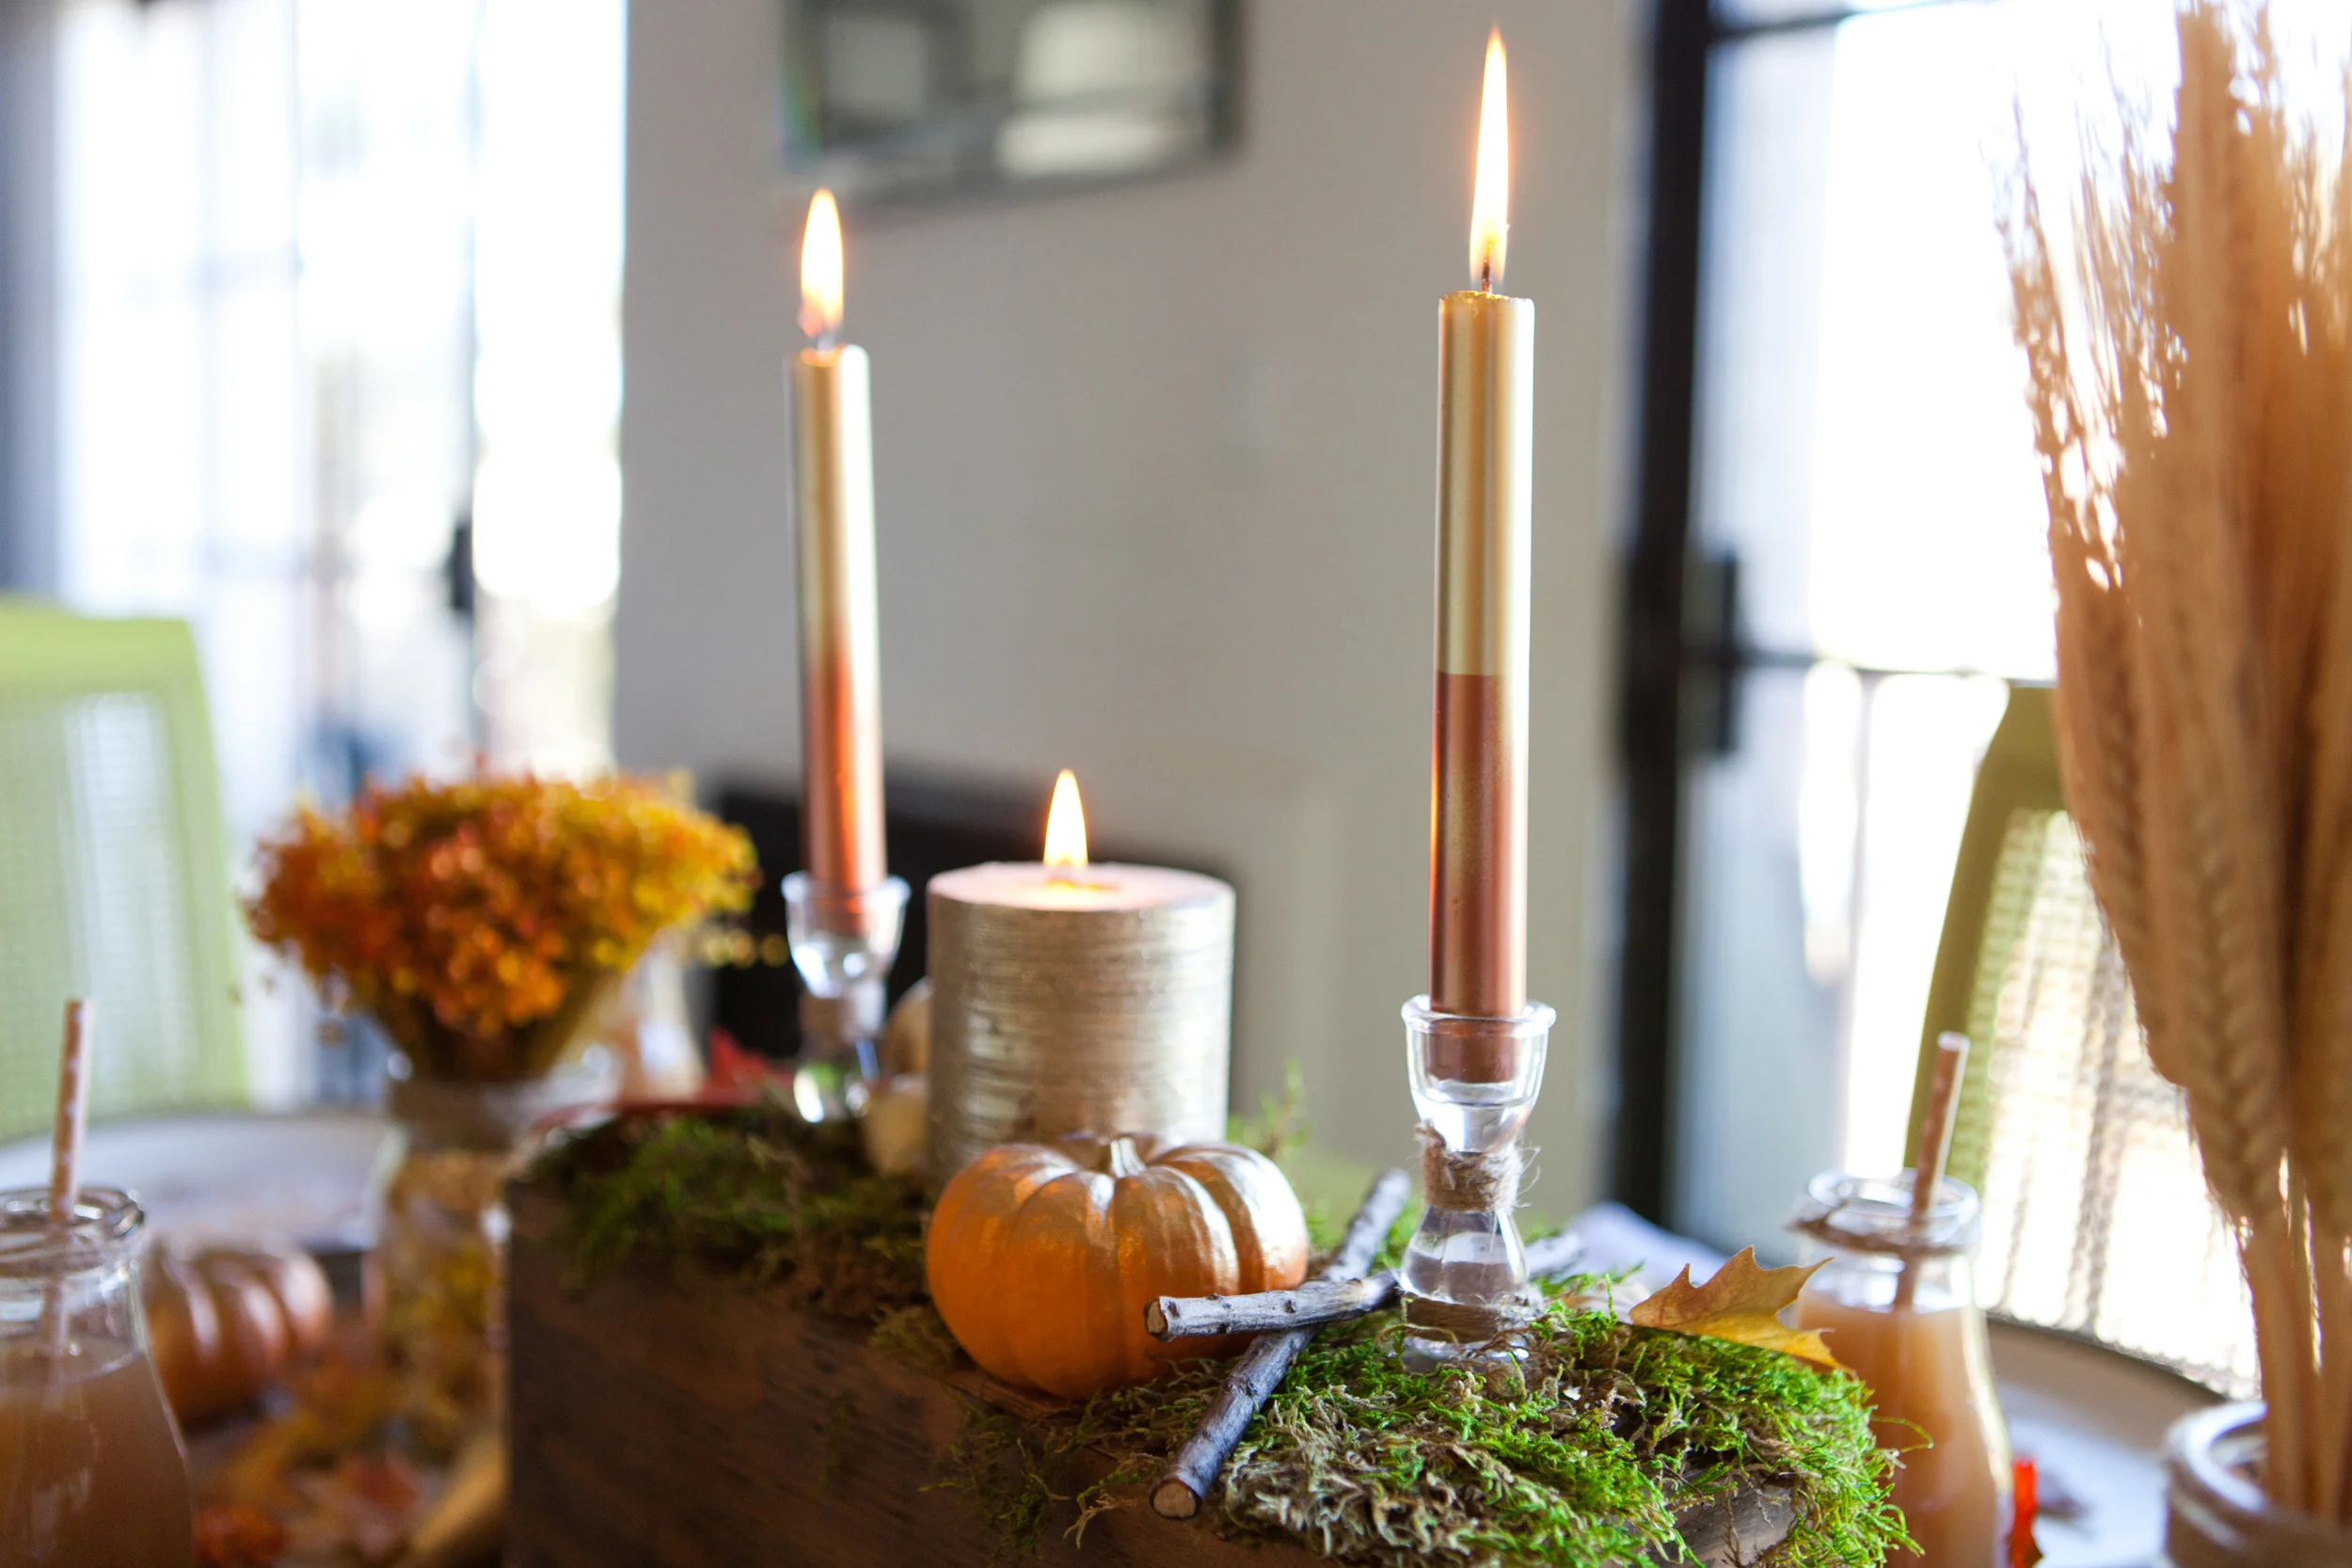
2. Candles
I love the amber glass that Sydney and Hale Co use for their bluegrass and juniper candles. The scent is the perfect combination of crisp and warm and will carry you through the season. I also LOVE tapered candle sticks for fall and these black all natural beeswax ones pair perfectly with the colors of fall. *Fun fact when you are all done with the candle the glass would make a beautiful vase.

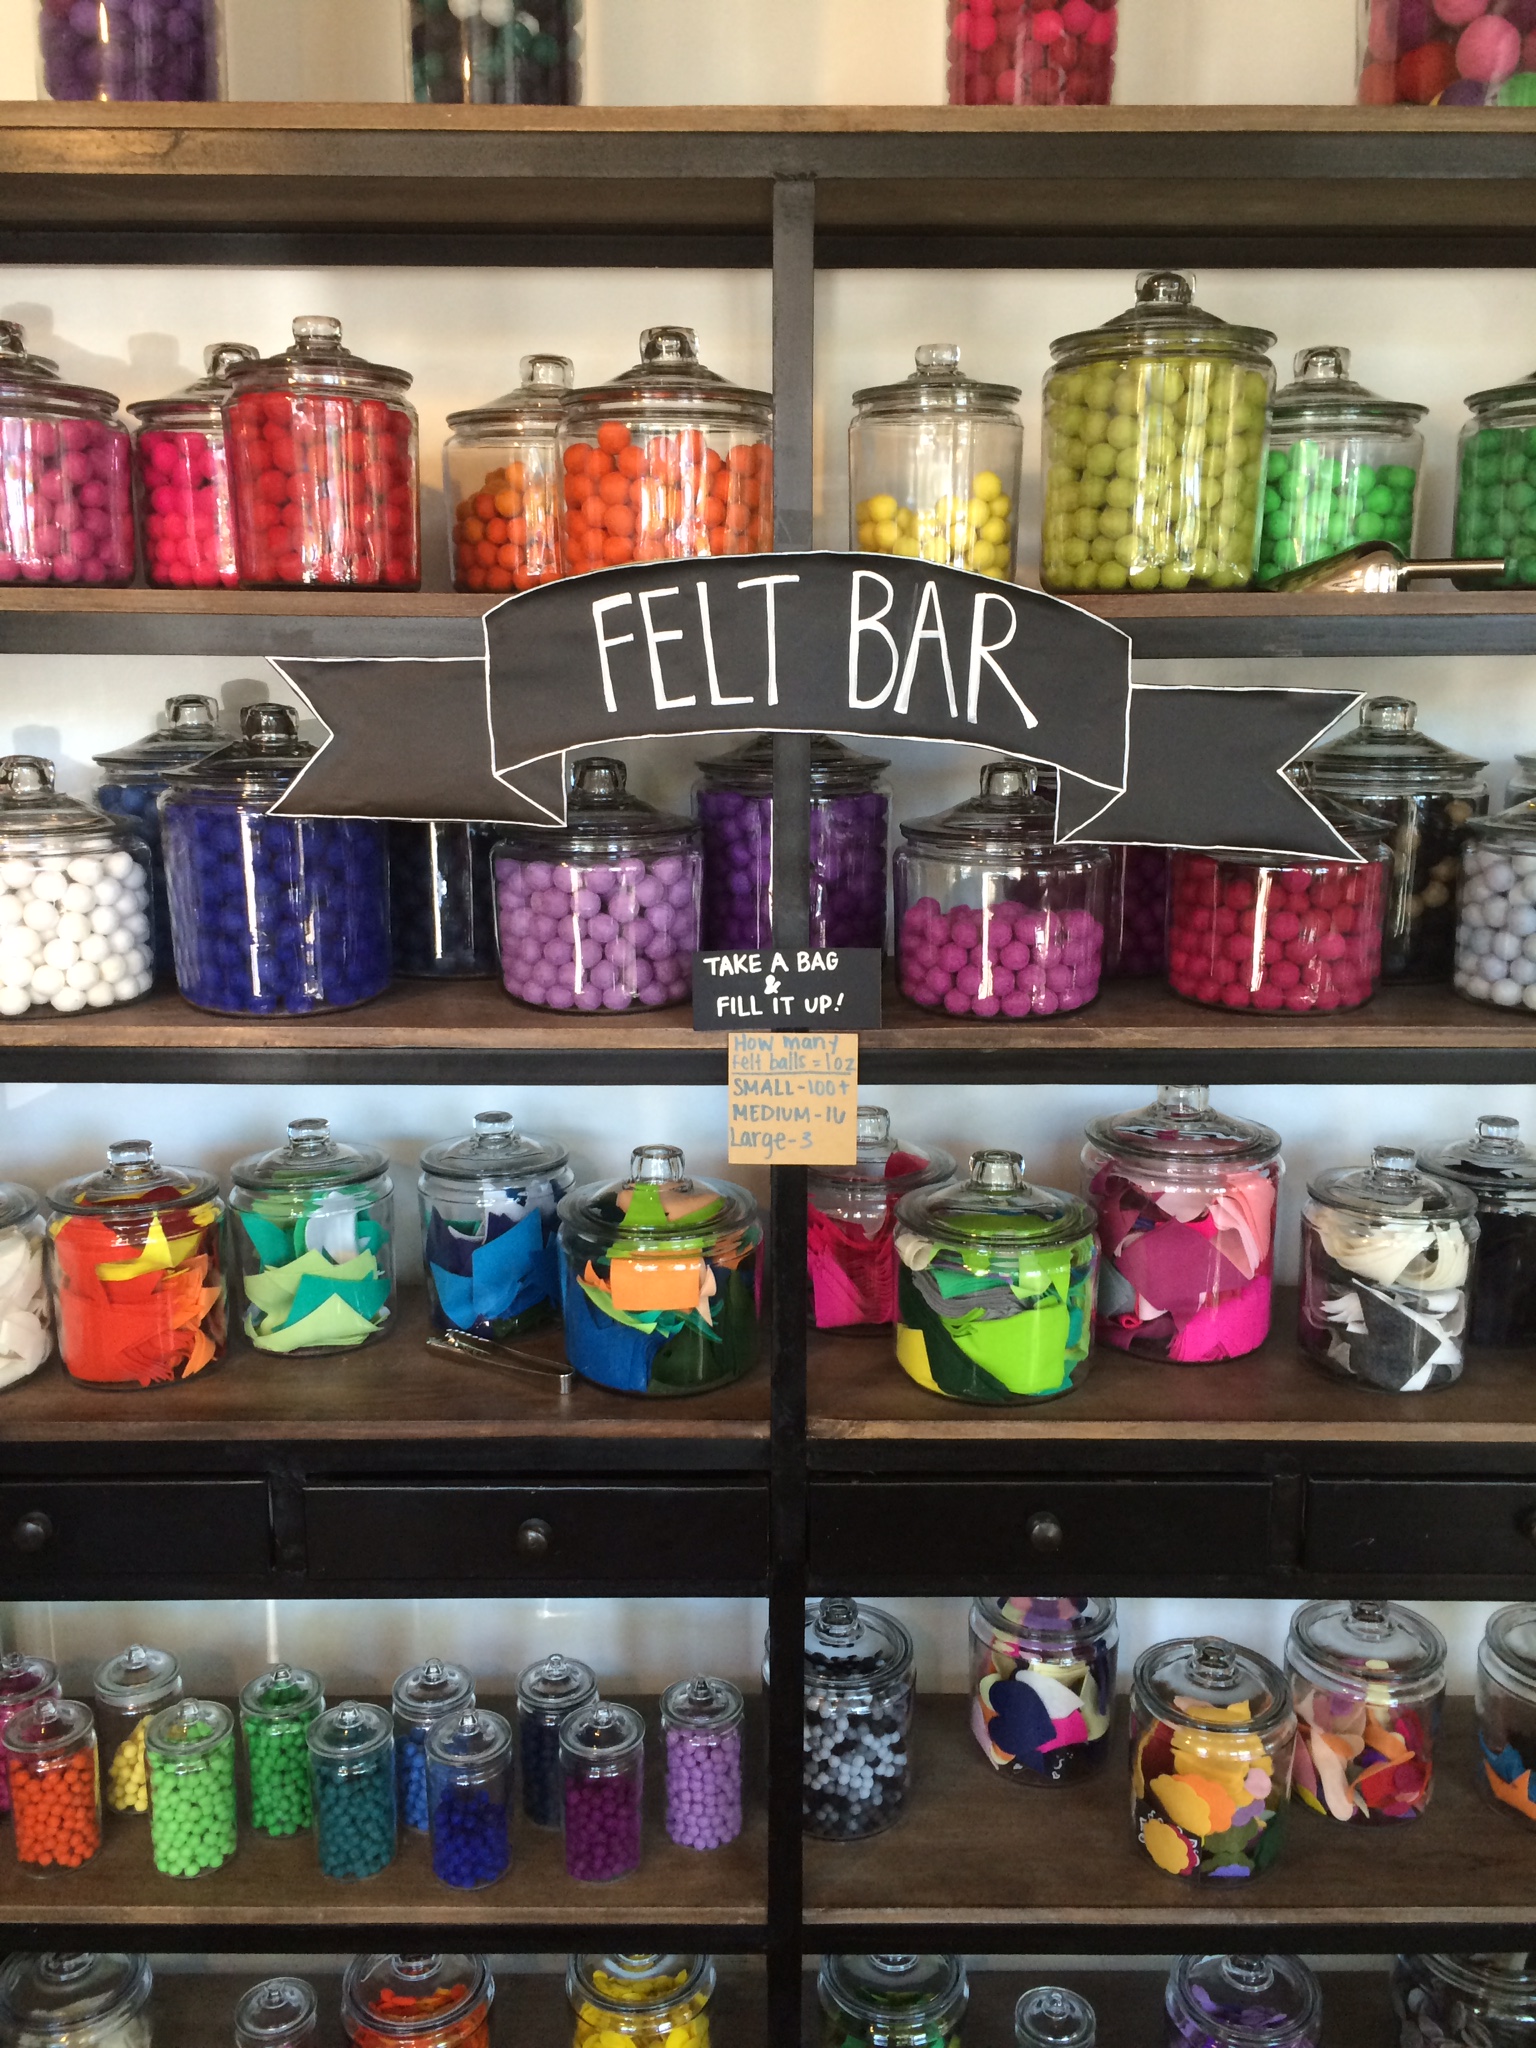
3. Felt Balls
Felt and Fall go hand in hand for me and I love these felt garland kits for a little DIY fun to spruce up your mantle. I like to mix in a few jewel tones with the warmer tones of fall to add a little pop.

4. Gold Metallic Letters
I love a good metallic and gold is the perfect color to mix in with the browns, oranges, and reds of fall. This vintage gold F would be perfect to hang on your front door and an alternative to the classic wreath.

5. Pumpkins!
And last but not least Pumpkins! My favorite pumpkins to use throughout the season are Cinderella pumpkins. Their colors and whimsy factor make them the perfect addition to your front porch or even a selection of them would be a stunning centerpiece.
So the next time you find yourself in downtown Los Altos, stop into The Makery and let your creative juices flow! You’ll thank me later!
The Makery
170 State Street
Los Altos, CA 94022
Xoxo-
Nora

ABOUT THE AUTHOR

A native Northern Californian, Nora Allen takes advantage of everything this great state has to offer. From the mountains to the city and everything in between, she lives for adventure. In her spare time you can find her eating her way through San Francisco, enjoying the wines of California, and enjoying life.
When she isn’t crafting colorful arrangements or tending to her succulents, she is busy working as a Creative Director and Events Planner in the heart of Silicon Valley.

DIY: FALLING FOR FLORALS
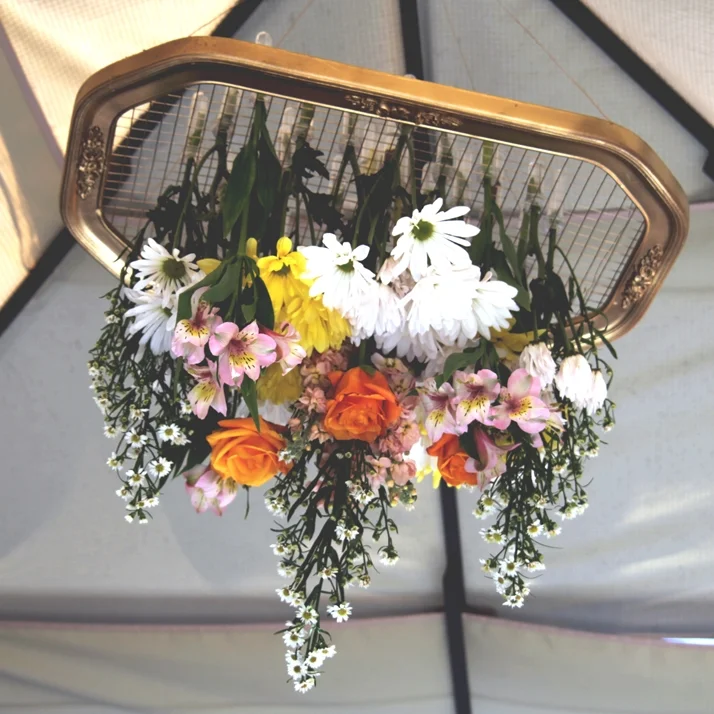
For someone with the opposite of a green thumb, I sure do love flowers! I’m not great at planting flowers and keeping them alive, but I do love creating a good floral display. I’ve been seeing lots of floral projects lately and thought it was time to try an alternate way of displaying… behold, a floral chandelier.
For someone with the opposite of a green thumb, I sure do love flowers! I’m not great at planting flowers and keeping them alive, but I do love creating a good floral display. I’ve been seeing lots of floral projects lately and thought it was time to try an alternate way of displaying… behold, a floral chandelier. I was lucky enough to have my very talented mom create one for my engagement party and recreated one for my Nana’s 90th birthday a few weeks back. What I learned… it is surprisingly easy, and yes, I know that sounds crazy!
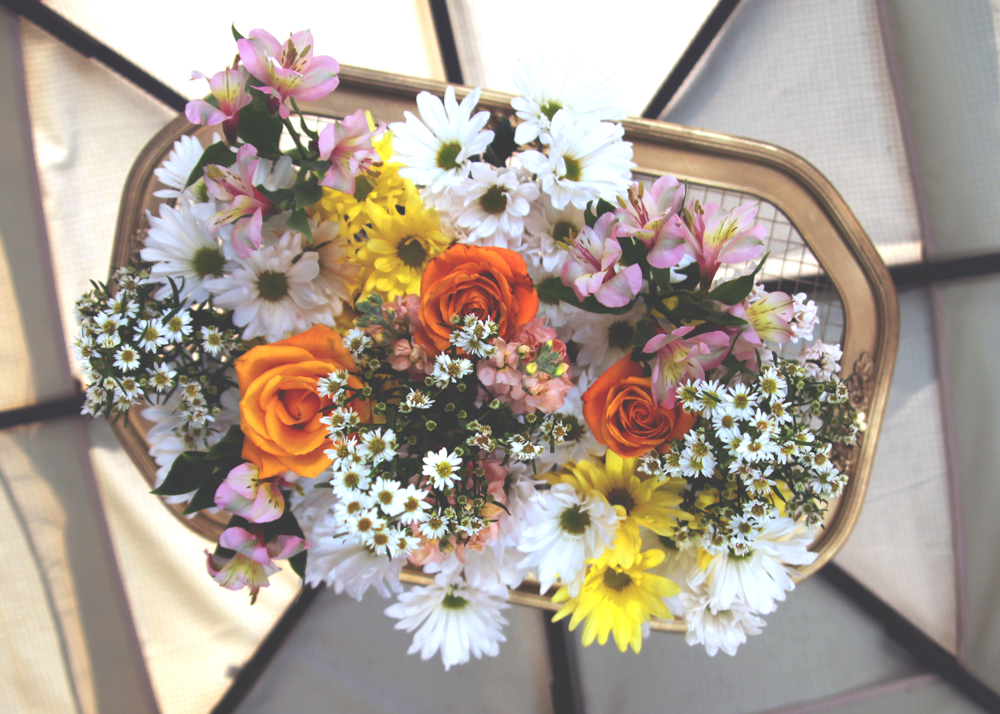
get started
Get started by picking your favorite flowers in an array of colors. The only wrong choice here is not picking enough! Usually I would agree, less is more but in this case, more is more! Once you have your selection, be sure to keep them in a temperature appropriate environment {35 to 45 degrees is ideal} during the preparation process so they don’t wilt on you. Keep in mind every flower is different but providing a cool area will slow the growth process of fresh cut flowers; thus making your flowers last long enough to make it into that chandelier and on display.
the skeleton
Next, find what will be the skeleton of your chandelier. For my chandelier, we used an old frame, popped out the picture and spray painted it in a color we loved… GOLD (what else?!) Then, take chicken wire and staple gun it to the back of the frame. Make sure you pull this tight and your staples are sturdy. This is what will hold your chandelier in place. Next, screw eyehooks into the four corners and with wire, firmly hook them at the top to a key ring.


lift + stick
Now, the fun part begins! Rig your chandelier up so you can see how it looks from underneath. There is no correct way to place your flowers, simply trial and error, based on your taste! You’ll stick your flowers up through the bottom and lock them in by sticking them into the clear acrylic floral tubes. {TIP: be sure you fill these with water leaving no bubbles and a tight lid!}

tip
Be sure to hang your flowers at all different heights. Continue to check from underneath as you go so you can see the arrangement from the view of your guests. You can create whatever pattern with your flowers you want, have fun with it. When you are done you will have a great centerpiece that will leave your guests talking!


Contributed by estCA staff, Megan Araujo

Bridesmaids: You're Cordially Invited..
When my fiancé proposed, my head was spinning. I couldn’t believe it was happening, to me and to say I didn’t see it coming, well that would be an understatement. After planning countless television weddings, it’s finally my turn and I couldn’t be more thrilled!

When my fiancé proposed, my head was spinning. I couldn’t believe it was happening, to me and to say I didn’t see it coming, well that would be an understatement. After planning countless television weddings, it’s finally my turn and I couldn’t be more thrilled! It still doesn’t feel real that I get to marry my best friend. But now that I have had some time to let it sink in, I’m getting used to it. Like when Beyonce’s Single Ladies comes on, I don’t gotta put my hands up! It’s great!
One of my first thoughts when the whirlwind began to settle was how I would ask my besties to stand up there with me. Every thought went through my head… Singing telegrams with gorilla suites (why not?!) Mix CDs of our favorite songs, bottles of champagne… I mean the list went on. I hunted through Etsy and Pinterest, racked my brain of ideas from all the weddings I’ve helped plan… NOTHING! Then finally, wham! It came to me, classy and funny. This explained my friends perfectly.
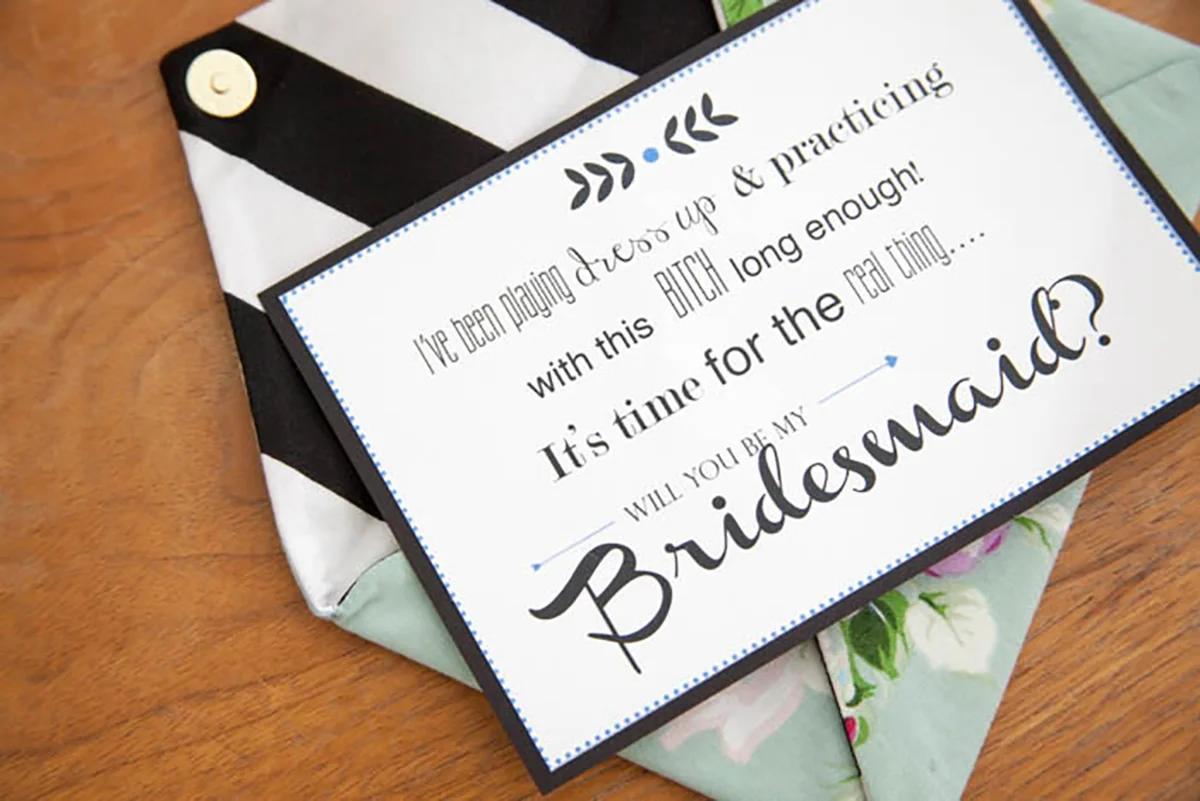
Some of these girls, I have known since we were nuggets. We played dolls together, the whole nine yards. So I thought, dolls! What better way than using a Bridesmaid Barbie to ask these girls, seeing how it’s my turn to play the Bridal Barbie! So I customized them each a Barbie and Barbie box, complete with a bridesmaid’s dress, accurate hair color, and wedding packaging. Next was creating a card to pop the question.
Since California is all about recycling items, upcylcing items I took that into consideration when creating the card’s envelope. I wanted to give the girls something they could reuse, since I didn’t know how much they really would use the Barbie! So I grabbed some extra fabric, an existing envelope, my crafty mom and got to work.
By opening up an existing envelope, where were able to use it as a template for the fabric envelope. This created something the girls could reuse for lip-gloss and items in the bottom of their purse while providing the perfect packaging for the note inside! Even better, with the extra envelope fabric, I was able to have my mom sew little bridesmaids’ dresses to really tie everything together!

I quickly created a card on the computer (Thank you Lindsay for your help!) and added some dimension by mounting it on cardstock. The card really served as the icing on the cake, carrying each element into the next. Once it was all wrapped up, the gift looked classy even though what was underneath was….well, a joke. It was definitely a fun way to reuse some old supplies, in true California style, and make something fun!
Now.... I just had to convince these girls it’s a good idea to deal with me for the next year while I plan this wedding!!


Contributed by estCA staff, Megan Araujo

IN THE DETAILS: Old Vase, New Life
We’ve all been there: the receiving end of a gorgeous floral arrangement from that someone special (or on that special day). You parade that arrangement through the office like it’s your first-born and you can’t wait to show it off.
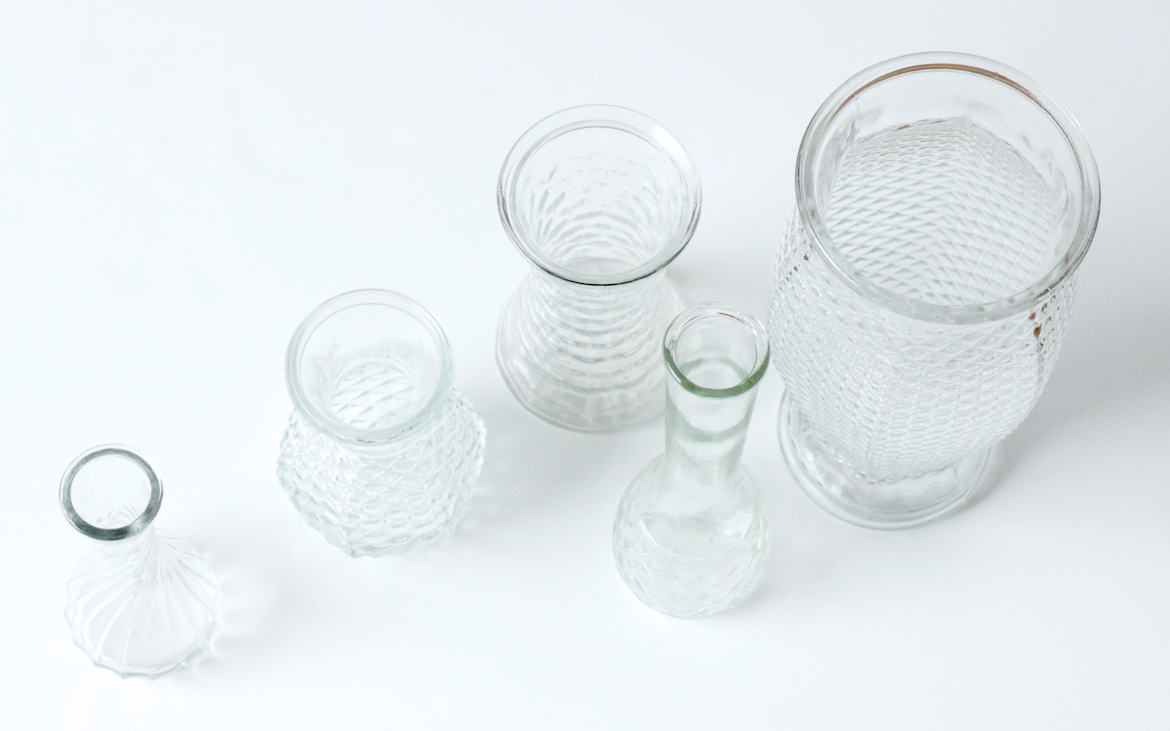
Image by Crab + Fish
We’ve all been there: the receiving end of a gorgeous floral arrangement from that someone special (or on that special day). You parade that arrangement through the office like it’s your first-born and you can’t wait to show it off. But sometimes that boring stock vase your new flowers arrived in just really doesn’t do that arrangement justice. And even worse, it leaves you with a vase that gets tossed into the cabinet to be lost in the clutter.
If there’s one thing every Californian loves, it’s recycling… or in this case, upcycling. With a little spray paint, you can change that vase into something every household needs. Even a texture change or unconventional vase can really make the difference in your floral display.
So give that killer floral arrangement you just spent an hour arranging or were just gifted something more than a plain vase. Here are my suggestions to let those flowers take center stage:

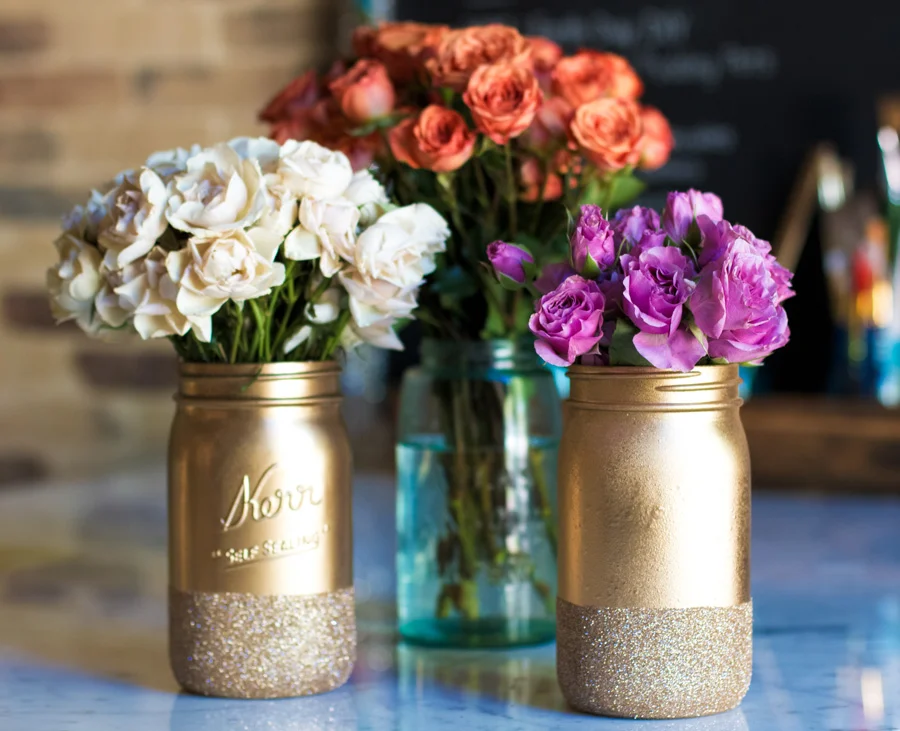
Image via Lily Shop
Spice it up!
Why not use a mason jar? But not just any old mason jar…spray it up, splash it with glitter. Hunny, make it yours! That vase should be just as unique as you and that floral arrangement!

Image via It All Started With Paint
Reinvent!
Slap some paint on those old vases. There are several ways to do it, for the fastest, easiest and most even coat of paint, use spray paint. You can even through some patterns and shapes in there to really make them pop!

Image via Jessica Schilling
Repurpose!
If you enjoy in the idea of using something alternative as a vase, how about giving old alcohol bottles a new purpose? Instead of throwing out your glass bottles after that fun weekend you had, why don’t you spread your flower arrangement across a few of them to give you a full and unique display??

Image via Love the Lincolns
Wrap it Up!
You've be amazed what you can do when you just wrap the vase and give it a new texture! So grab whatever you have, rope, twine, string, burlap, lace, tape.. the possibilities are endless!
So now that you are inspired to take that old vase and give it a new life, show us what you made! Message us at submissions@estcalifornia.com with your DIY vase for the chance for it to be featured on our site! Or show us using #estcalifornia on Twitter or Instagram!
Contributed by estCA staff, Megan Araujo

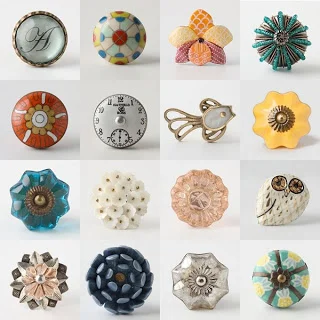
DIY: VINTAGE KNOB HANGER
I love vintage. I’m just gonna put it out there. It seems to put things into perspective for me. And lets be honest, perspective is always a good thing. So any time I have the chance to infuse my life with vintage elements, I’m all for it. In fact, most Californians seem to insert some vintage in their homes for that personal touch.

Image via The Moncurs
I love vintage. I’m just gonna put it out there. It seems to put things into perspective for me. And lets be honest, perspective is always a good thing. So any time I have the chance to infuse my life with vintage elements, I’m all for it. In fact, most Californians seem to insert some vintage in their homes for that personal touch.
After moving and redecorating, I knew I needed something extra in my entryway and decided on a coat rack. Since the entry way sets the tone for your home, it should always make a statement. I think It’s a great place to start introducing those vintage elements!
But if you don’t have the space {like me} and need everything to sit flush, it can pose an issue. I began the search for a rack that sat as flush as possible to the wall. I found a great one on Etsy but something was missing. Eurkea! (see what I did there) vintage knobs. This is a great way to infuse some vintage if you don’t have much space to work with.
Here's your start!: Hit the flea markets, your local garage sales, your grandmothers house, wherever and start treasuring hunting! If a newer vintage inspired knob is your preference, check out places like Anthropologie who carry vintage inspired knobs. Give yourself some options, you can never have too many options, right? Mix them together, new and old.

Image via Anthropologie

My mom always taught me, if you can’t find what you want: make it yourself. So, that is exactly what I did. With my fabulous knob finds, I knew what I wanted so I called in the "Big Guns": My Papa (he still goes to the wood shop each week!) to help. My Papa was thrilled to help me and even gave me some different size options on my wood slat and styling choices. He helped sand down the wood, bevel the edges, stain the wood, drill the holes, the works! He even offered his secret weapon: the soda can hook (Thanks, Papa!)

The final touch come from styling it up. Put the pieces that make your house, a Home and you'll be so thrilled with your new Home addition (I know I was!).
We'd love to see your version of the coat rack or how you were inspired on an entryway makeover. Post using #estcalifornia or send us your pics! You might find yourself featured here on the site!

Contributed by estCA staff, Megan Araujo

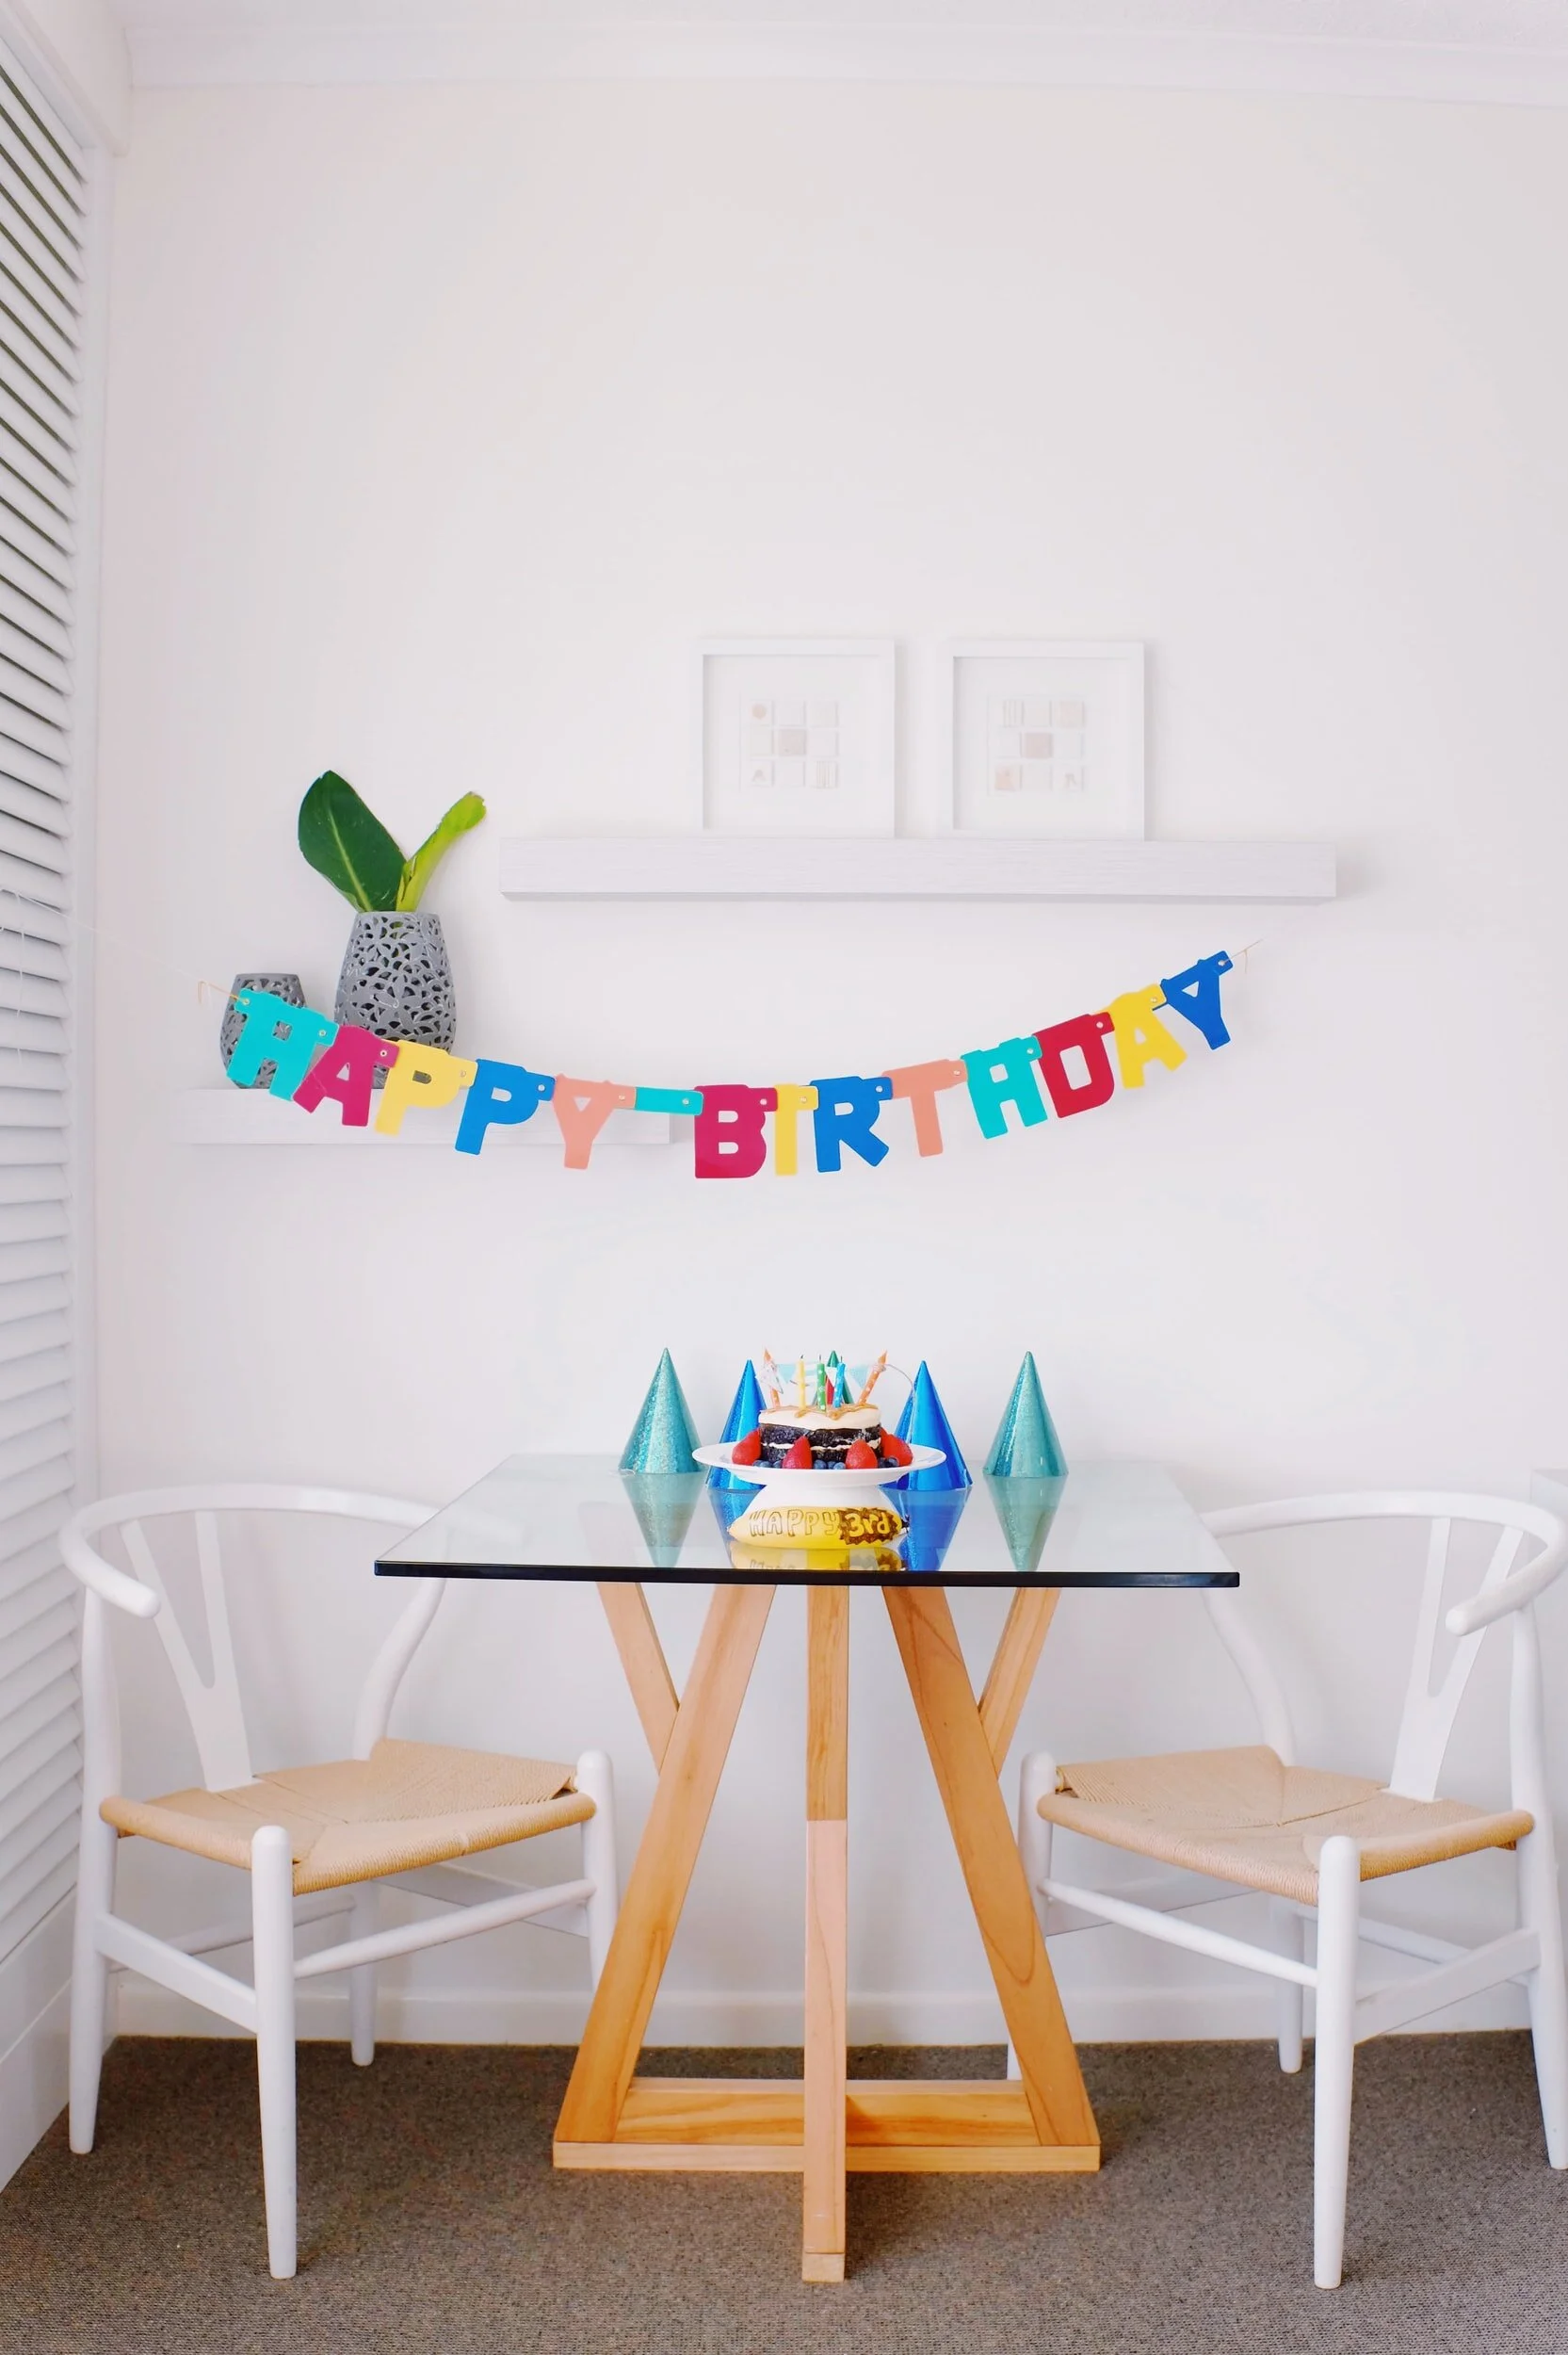
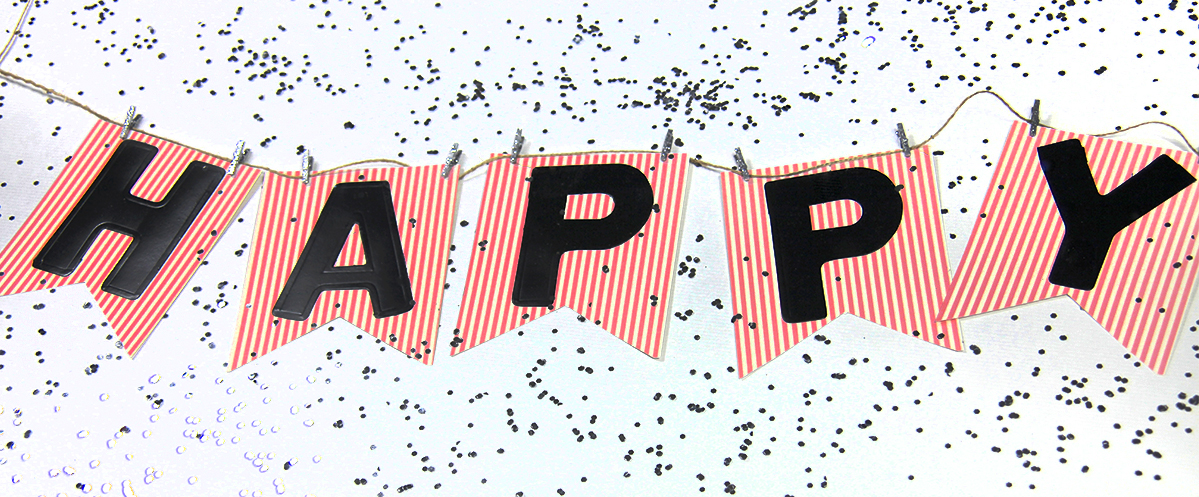
DIY: BANNER-MAKING 101
Everyone loves a good party. And no one loves one more than me. Decorations at a party are one of my favorite things to see upon arrival because each party is so unique.

Everyone loves a good party. And no one loves one more than me. Decorations at a party are one of my favorite things to see upon arrival because each party is so unique. There are so many ways to decorate, themes to choose from and places you can take your vision. But somehow, when planning my overall vision for a party or get together, I always find my way back to my party planning roots. I like to think there are certain décor elements that are the foundation of putting together a party. One of those items for me is a banner….. yes, a good old fashion banner. It’s a great way to send the message of the party. I know what your thinking, of course in a literal sense, it says happy birthday! But a banner is so much more than that.
There are so many great ways to build a banner for your party. It can be clear, simple and classic or it can be far more detailed. You can go as far as using the banner as a place to tie together your printed materials used through out the party. I think of a banner like the summary of a story. It’s a great way to tie together all the different elements you have been working on and give a clear visual of the common theme. It’s like that moment when the skies open and the heavens sing, and you see a clear vision. Ok, Ok, that might seem a bit far-fetched for a banner, but you get the idea.
Below are a few different ways you can use banners to take your party to the next level. You can go the traditional route or the detailed route. You can even recycle old banners to make it easier…. The choice is yours!


Contributed by estCA staff, Megan Araujo